Sunday, February 26, 2017

Half Drop Bargello?

Saturday's post about my attempt at bargello got a couple of comments that sent me on a learning adventure.  Debbie mentioned Eleanor Burns' "half drop" method for making a Trip Around the World (TAW) quilt.  Then Left-Handed Quilter seconded the suggestion.
With this method you do not have to match seams, so I like it already.  Knowing that many things are on the internet, I did a search.  After watching the video , I wondered if it would work for bargello also.   There was a small piece of the strip tube that I made for the bargello bit that I did.  Cutting it up in various sized strips, half inch increments, I sewed it using the half drop method.
Yes it does work.  This will be something I could do far more easily.  So I may reconsider it at some point.  I will be needing to make a graduation quilt for a great-nephew in a month or so.  I am thinking a TAW using this method will be just the ticket.

Here is the video of Eleanor Burns showing the TAW half drop method.

Comments are welcomed. I will reply when possible unless otherwise stated. Of course if you are a "No Reply Blogger"- I can not reply. Links in posts may be affiliate links for which I am compensated if you click through and purchase.

Saturday, February 25, 2017

Bargello

One type of quilt I have never made  is a bargello quilt.  I have seen some that are truly amazing.   " " Why not try it?" the muse whispered ever so seductively.  Five fabrics were gathered in a range of values. I used my camera set on "monochrome" to insure that I wasn't being fooled by color/chroma/hue.  Two fabrics were changed as the value was the same as the fabric next to it.

I cut three sets of five colors and sewed them into a strip set with values going light to dark, with two repeats. Then after pressing the seams,  I sewed it into a tube.  (I was following directions on a website that explained how to do this.)
The "yellow" is actually a green colored fabric.
Strips were cut - varying the size of each cut by 1/4th inch.  Then they are picked apart on one seam and sewed to the next larger one.  This is similar to a "Trip Around the World" quilt - except for varying the sizes of your cuts.
I got bored with the fourth inch and jumped to half inch variations.  (Remember I am not good at following patterns to the letter.)
Here is what I have at this point
I like it, but I don't love it.  I have more of the tube left, but I think I am done with this for now. Doing this was a reminder of why I have on made one "Trip Around the World" quilt.  You have to match every little seam intersection for it to look good. (I call that "pin and cuss" sewing.)
The size on this is roughly 23 inches square. What do you suggest that I do with it?
a. Table topper
b. Antimacassar
c. Add borders and make a baby quilt
d. Fill in the blank - your alternate answer

Barbara asked "What is an antimacassar?"  So I am editing to add this
An antimacassar is a fabric piece put on the back of an upholstered chair to avoid getting hair oils/hair dressings on the chair fabric. ("macassar" was a hair oil in Victorian days - the term dates to that era.) 
Comments are welcomed. I will reply when possible unless otherwise stated. Of course if you are a "No Reply Blogger"- I can not reply. Links in posts may be affiliate links for which I am compensated if you click through and purchase.

Friday, February 24, 2017

Facing It

I have gotten behind on posting on the blog.  Mostly "life has gotten in the way" and I don't have a lot new to show.  Nothing bad has happened. I have been doing some cleaning and decluttering around my home/studio.   I have dyed a bit of fabric, but no photos to show for it.

My last finish on an art quilt was to add a facing rather than a binding.  I used the tutorial by Robbi Joy Eklow found here.   My quilt was already trimmed so I lost a little bit of the edges in the process but it isn't noticeable.  I even hand stitched the facing on the back.
I also did "random acts of fusing" using pre-fused scraps to cover the back which was  a bit messy due to all the threadwork I did on the front.
I put the circles on to echo the design on the front.  Here is the final finish on Garden Path.


Comments are welcomed. I will reply when possible unless otherwise stated. Of course if you are a "No Reply Blogger"- I can not reply. Links in posts may be affiliate links for which I am compensated if you click through and purchase.

Sunday, February 19, 2017

Star Play

The Flying Stars quilt is coming along slowly but surely.  Saturday night I had an idea to do some "Crafted Appliqué" on it using the method in Lara Buccella's book.  Here are those blocks:


The first two had the half orange peel pieces added to existing blocks.  Then the muse said "What if?" and the third block was created.  You may notice that there are no flying geese on this one. But the orange peel halves create a different four pointed star.

Here are all of the blocks so far:
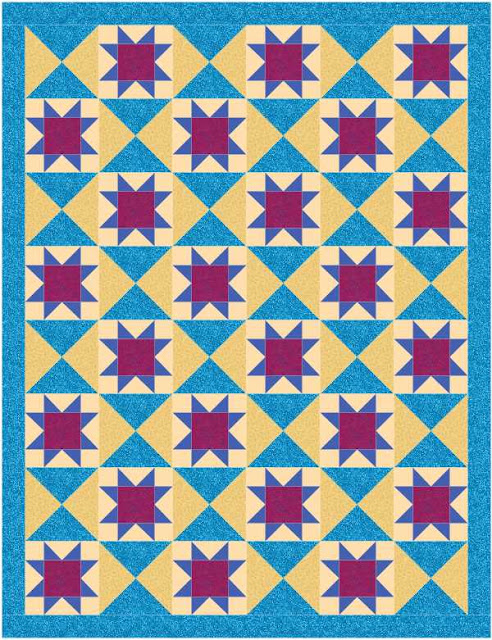
There are nineteen of them so I need to make at least one more. and possibly more depending on the layout I decide on.
Here is one possibility that I am considering. I am just not sure I want to make that many quarter-square triangles.

Comments are welcomed. I will reply when possible unless otherwise stated. Of course if you are a "No Reply Blogger"- I can not reply. Links in posts may be affiliate links for which I am compensated if you click through and purchase.

Wednesday, February 15, 2017

Crazy Piecing

Wednesday afternoon and night I did a bit of random crazy piecing using some hand dyed fabric pieces and a couple of bits of commercial fabric.  I am thinking that I will put these blocks in the quilt with the Flying Stars just because I can.
Since there will probably be a solid sashing color, it won't be as strange as it seems right now.  Of course I will lay it out first and then possibly decide that these need to live elsewhere.  Whatever happens I didn't want to waste these bits of hand dyed fabric.


Basically I did this for stress relief.   You see, Tuesday had an incident that disrupted my calm life. I had put some fabric in the dryer and was putting some clothing in the washing machine.  I smelled an odd smell and my eyes started burning.  Then I saw smoke coming from the dryer.  I pulled the door open - which switched it off - and saw flames and ashes!  I closed it, ran to the sink and got water, reopened the door and doused the flames.  I started opening doors and windows and tried to get the smoke to go outside.  The smoke alarms screamed and the one that talks said "Warning-Fire" repeatedly.    Whew!
There is still some smoke smell in the house but it is mostly gone.  The dryer is outside and will have to be replaced.  The best guess is that the thermostat and/or the temperature limiter malfunctioned causing a high temperature in the dryer. That caused the cloth to burst into flames inside the dryer drum.

I am so grateful that I was right there and saw. smelled and reacted quickly. This could have been a major disaster - but instead I am safe - my house is standing and is still inhabitable.  For that I am truly thankful.

FYI - I learned that 4% of all  house fires are dryer related. Remember to check your dryer vents and clean them out yearly.  I will be adding a new smoke alarm directly above the dryer when it gets replaced.

Comments are welcomed. I will reply when possible unless otherwise stated. Of course if you are a "No Reply Blogger"- I can not reply. Links in posts may be affiliate links for which I am compensated if you click through and purchase.

Saturday, February 11, 2017

More Stars AND Dye Results

My dyed fabrics are ready to be shown AND there are more of the Flying Stars with Chubby Stars in the centers.   Here is a "peek photo."


Now let's look at all the dyed fabrics first.
One of my favorites! 

Stitch resist - another of my favorites!

This is the over-dyed fabric that had just a little green on it. You can see
where the green was but it is now a much more interesting fabric.

Pole - resist dyed. Parts will be cut away and overdyed, I think. 

This was pleated and twisted and tied.
Another possible overdye?

These two were "filler" pieces- added to  soak up excess dye.
But, they are great fabrics now

Two different red fabrics with different tones and color saturation. 

Another over-dyed fabric.
This was a blue with lots of white space.  It is much more dramatic now.  
This was the 'stars' resist. There are only vague images of the stars.
Another possible over-dye fabric.

Now for two "Wows" and a hmmmmm:
 A mandala dyeing - this is my first attempt at it. 

This was under the mandala to catch extra dye runoff.
I think I see a cave wall painting here. 

Hmmmm
This was under the Mandala and the "Cave Wall piece. It was only at one end.
Thus there is no purple.  To the left I see watercolor flowers.
Parts may be over-dyed. 
Finally let's look at the Flying Stars with Chunky Star centers.
Here are three completed and appliqued to the blocks.  The small Chunky Star is on a 4 1/2" piece to become the center of another Flying Star block.
Don't forget that the "how to" for the Chunky Star came from the Craftsy Class:  Big Techniques from Small Scraps with Sarah Fielke when Abby (the muse) flicked on the lightbulb above my head.
And------

Craftsy is having a sale! All of their new classes are under $20!  So click HERE to go to the SALE.  But I happen to know that  Big Techniques from Small Scraps with Sarah Fielke is $19.99 right now also.

The New Class sale runs until Sunday 11:59p.m. Mountain Time.   You can go back and watch the classes months or even years later.  

Comments are welcomed. I will reply when possible unless otherwise stated. Of course if you are a "No Reply Blogger"- I can not reply. Links in posts may be affiliate links for which I am compensated if you click through and purchase.

Friday, February 10, 2017

Hmm - Appliqué Idea

The Flying Stars seem to have been almost forgotten until yesterday when I said "Hey I could use some of the hand dyed fabric for centers.  But I was re-watching one of my Craftsy classes, Big Techniques from Small Scraps with Sarah Fielke when Abby (the muse) flicked on the lightbulb above my head.   She said "You could use this on the star blocks too."
I paused the video and got some fabric scraps to try it. I know better than to argue with a muse!
A little easy sewing and I had this:
The cutest little star (or flower) applique. 

Then I placed it on one of the star blocks and had this:
When you piece the star/flower appliqué the edges are already turned under for you.  You just have to sew it down.  A simple straight stitch around the edges will work. How cool is that ???

Now the best part of this happening now is that Craftsy is having a sale! All of their new classes are under $20!  So click HERE to go to the SALE.  But I happen to know that  Big Techniques from Small Scraps with Sarah Fielke is $19.99 right now also.

The New Class sale runs until Sunday 11:59p.m. Mountain Time.   You can go back and watch the classes months or even years later.  Seriously!  I got this class in December 2013 - that was over three years ago.  I call that continuing education.

Oh,  this was a surprise post.  I hope to have the dyed fabric in the next post.

Have a great weekend.

Comments are welcomed. I will reply when possible unless otherwise stated. Of course if you are a "No Reply Blogger"- I can not reply. Links in posts may be affiliate links for which I am compensated if you click through and purchase.

Thursday, February 09, 2017

Possibilities

One of my friends asked what will you do with all the fabric you are dyeing.  Of course it will be used for quilts and maybe  for sewing a few other things.  When using the cotton/poly sheet to dye, there was a hem on three sides since I only tore off part of the sheet to dye.  Once it was out of the wash, the hem was unceremoniously ripped off  of the piece.   The thought was to maybe shred it to use in weaving.  But while watching Netflix, I used a seam ripper and removed all the white poly stitching from it.  Then it was ironed out and trimmed.  I sewed it in strips and chunks and got this:
Suddenly I thought - what about the stars?  Grabbing a few flying geese from an early session I did these layouts.


I did not fill in the corners, but you get the idea.  Don't you think they will work well?  The cut off bits can be re-pieced for an even more interesting center.  This may be one of my weekend projects!

I will be dyeing the rest of that sheet too - waste not, want not!
Here is a picture from my last dye session - I will report on the full session later when I have pictures of the complete cloth.
These are wooden stars from the craft store.  Since the wood was yellow, they absorbed some of the blue dye and became green.  (Hint - this was not a great success as far as leaving nice star shapes. Tune in for the next post to see.)

Comments are welcomed. I will reply when possible unless otherwise stated. Of course if you are a "No Reply Blogger"- I can not reply. Links in posts may be affiliate links for which I am compensated if you click through and purchase.

Wednesday, February 08, 2017

Photo Shoot

Photos from my "photo shoot" of the fabric I dyed.  I am including photos of the fabric before it was dyed also.  I used some interesting resist techniques and items.

Dyed fabric with resists
But before it went in the dye bath - it looked like this:

I used two caps (larger and smaller) from pharmacy bottles on either side of the
fabric bundle - held in place with a rubber band.
The rest of the fabric was twisted and held with rubber bands also.
Lots of white left on these two- the may be overdyed later.
The green fabric had one layer of fabric for the circles.  I used five pharmacy bottles
and put the fabric over the top and replaced the caps.
The rest of the fabric was twisted and tied.  
The blue fabric was rolled up with bubble wrap.  Some of it took the texture well, but there was a bit too much of a resist in the center.

This amazing piece was a stitch resist pattern.  I love the way it came out.
Not a great photo but you can see how it looked prior to the dye.

The next two are a scrunch technique. 
This one did not take a lot of the dye. I may have had it scrunched too tightly.
It is possible to overdye this with another color. 

This beauty had three colors poured in to the container with it.
Interestingly none of them was a pink.
I LOVE this one too. 
I have even more fabric in the dye bath today.   Here is the start of another stitch resist. It is not all stitched and bundled and in the dye.
I can hardly wait to see the results on this one.
And here is another that was too tightly resisted. It is now being overdyed.


So until next time - may your life,  your quilts and your weaving be filled with color and happiness.


Comments are welcomed. I will reply when possible unless otherwise stated. Of course if you are a "No Reply Blogger"- I can not reply. Links in posts may be affiliate links for which I am compensated if you click through and purchase.