Wednesday, May 29, 2013

A Different Endeavor - Making Soap

This may surprise some of you but a rare few may know that I make my own soap. The fancy word for one who makes soap is a saponifier. I practice the art of saponification.  I honestly don't think it saves me any money, and it is hard work.   However, I know what is in it and I know that it is good for my skin.   I can control (to some degree) the fragrance in it.  This batch is getting a blend of cranberry, english ivy and sandalwood.   I hope it comes out with a nice clean scent.
At this point I am letting the batch rest before I go stir it more.
I use a stick blender - also known as an immersion blender - to mix the ingredients. The basic process is elementary science - chemistry to be more exact.  You use an alkaline solution that is mixed into an oil solution. The oil is an acid.  Did you know that oil is acidic? Well, now you do.  This results in a chemical reaction called neutralization.  The alkali, which can burn your skin, gets neutralized by the oil and makes soap. It also makes glycerin, but that is left in the soap to make it very moisturizing.
Another little science fact - soap is a type of salt.  This is true soap and not what you typically buy in the supermarket. Those brand name soaps are more closely related to detergent.
How about a fun fact using a brand name?  Palmolive - can you guess where the name comes from?  The name is made of a combination of the two oils used in the early bar soap made under that name - Palm oil, and Olive oil - thus, Palmolive.
Here are a couple of pictures  of my mixture in the soap pot. The oils I used in this were lard and palm oil.
 See those air bubbles....you are supposed to avoid that -oops.
You do need to stir it for quite a while, but you can take rest breaks like I am doing now.

Just so you know,  it is ready to add color if any (I dont' add color) and fragrance when it reaches a state called trace.  Trace is the point where the blender or a spoon leaves a mark, a TRACE, in the soap.  It is starting to thicken and must be poured before it gets to far or it won't pour at all.  There is  a risk with adding fragrance that your soap may seize.  That means it gets hard quickly and doesn't pour smoothly but lumps up.  It can still be used but it isn't very nice.   That is a chance I will be taking with the fragrance I am adding.

Oh!  I was so lucky!  I went back to check and the soap was at light trace.  I was so excited I forgot to get a trace picture for you. Just a little more stirring with the blender and then I added the fragrance.  Yaay!  It did not seize at all.  It poured smoothly.
I used three of my bar mold trays. As you can see (kind of anyway) they each make 8 bars of soap.
I have three of them filled and sitting to cure.

I have the extra mold sitting in this picture but decided to do a separate picture for it.  You may notice that the tray in the upper right looks less smooth than the other two.  That was the last tray I poured. The soap was starting to set up a little.   You may be wondering about the towel under the molds.   I like to put a thick towel under it to hold some of the heat in so that it cures better.  They are sitting in the laundry closet where there is less draft to cure.
I am very happy with my soap making adventure today.  I will try to remember to show it to you when I unmold it in a couple of days.  I may let it sit over the weekend if I get busy.

Wistful Wednesday

I haven't sewn anything since the weekend.  I have been busy with family and household chores.
Today I would like to share with you a couple of my paintings.  First I will do a realistic one.  This is watercolor.
And then this piece which is a "Non-representational" painting called "Am I Dreaming"
I really like the depth that the multiple layers of transparent paint give this one. There are symbols stamped in metallic paints on top of the painting to add even more depth.

In other news:
Craftsy has new classes starting today
Sandra Betzina - Sewing on the Bias (Sewing) 
Janet Pray - Sew Better, Sew Faster: Garment Industry Secrets (Sewing) 
Frieda Anderson - Machine Quilting the Home Sweet Home Quilt (Quilting) 
Maggie Austin - Sugar Berries, Leaves, and Blossoms (Cake Decorating) 

I wish they would do a class on sewing for men. I would love to learn to make my own clothes. 

Monday, May 27, 2013

More Scrap Play

In my last post, I showed how I used some "unusable" scraps to make fabric by fusing it to medium-weight fusible interfacing, then sewing all over it.
I managed to sneak in some  more sewing time this holiday weekend.  Again I had no plan to "make something" but rather I played in the scraps again.
In all fairness I have to confess that some of these pieces in the pile were already sewn.  But I pull them all out when I start because you never know which pieces will fit together.
When I do this, I simply take a pile of scraps (that are ironed flat) and sit and start sewing.  I try to find pieces that fit together. If they don't fit, but are close, I sometimes sew those together too.  Then I can trim them later.
As you can see, this piece didn't quite fit.  No problem!  I can trim it so there is a straight edge when I go to press the seams flat.
This is a really fun way to start an improv quilt top or a pieced backing.I really like using various sized pieces and building something from them.  It makes for a far more interesting design.
When I look at these pieces, I have a memory book of some of the quilts I have made. Right away I see two baby quilts and one Trip Around the World quilt.
I will take these and add to them to make larger "blocks" that can be joined into a top or backing.  As I am writing this, I just realized that I could set a few of the pieces in a solid background and make a very interesting Modern Quilt.
What do you think of this method?   Do you ever just sit with a pile of scraps and start sewing?  Have I convinced you that it might be fun and worthwhile?   Remember, those scraps cost the same "per yard" as your quilt top cost.

I will remind you that today is the last day of  Crafty's Memorial Day sale. There are several classes on sale at serious bargain prices. There is one class on sale that is about using scraps-Big Techniques from Small Scraps by Sarah Fielke. The regular price is $39.99 but the sale price is $19.99/  If you have been wavering on taking a class now is the time to try one.
Craftsy
For those in the USA - Happy Memorial Day.

Saturday, May 25, 2013

Fun with scraps

All quilt-makers have scraps. Sometimes they are nice big happy chunks of fabric that can easily be used in another quilt.  But how small does have piece have to be before you toss it in the bin?
Suppose those bit were able to be used in a fun and useful way? Would you save them?

Remember the snack mat piece I made with some scraps? 

Some of those pieces were pretty small. Using the same type of technique, but with a different base I have taken some really small pieces and some bigger pieces too and made fabric.  This is not much thicker than the regular quilting fabric.
Some of those strips are not much more than a 1/4" wide.  But isn't this a fun piece of fabric.  I did do free motion sewing all over it to hold down most of the edges . This also insures that the pieces don't fall off if I didn't fuse them enough. I am thinking this piece might become a covered journal. It is plenty big enough at 20 3/4" by 9 1/4"  OR I could use it as part of a pillow cover. Or maybe you have another idea. What do you think I should make with it?

Don't forget that Craftsy is having a Memorial Day sale that goes through Midnight on May 27th.  A percentage of all purchases will go towards supporting American veterans!
Craftsy

Thursday, May 23, 2013

My Little House - A finished Quilt

Happy happy!   That is how I feel.  I have completed my art quilt from Laura Wasilowski's class on Craftsy.  It is bound and even has a rod pocket on it.
This little wall quilt measures 12 1/2"  by 13 3/4 inches. All of the fabrics are hand dyed. The sky is the only one that I dyed myself.  It is actually a printed fabric that I over-dyed.  I like a pink sky, don't you?

So this is my finish for this week.  I will be linking it up with Richard and Tanya's blog for Link A Finish Friday once that is posted on their blog.


Have a wonderful weekend and remember the real reason for Memorial Day.    Memorial Day is a day of remembering the men and women who died while serving in the United States Military
Craftsy

Peace be with you,

Wednesday, May 22, 2013

New Classes

Just a quick post to let you know that there are some interesting new classes on Craftsy.


Marcy and Katherine Tilton are teaching The Ultimate T-Shirt: Fitting and Construction. So if you want to learn to make your own t-shirts that fit perfectly, this class is ideal for you.

Joe Cunningham is teaching Pattern-Free Quiltmaking.  This class is about making your own spontaneous designs.  If you want to make a one of a kind quilt and increase your quilting repertoire this class is for you.

If you are a knitter then Stephen West's class - Shawlscapes will teach you techniques to create your own shawl designs. Alternately,  you will learn Stephen's pattern and can make his Boneyard shawl.

There are a variety of other classes on Craftsy also.  There is sure to be one that appeals to your crafty nature.

Sunday, May 19, 2013

Blogger's Quilt Festival 2013

I have decided to enter my quilt "Happy Days Ahead" in the Bloggers Quilt Festival in the Bed Quilt Category.  I have to say that I have seen some amazing quilts in this category. I don't expect to win, but if I do it would be great.
This is a quilt that I designed and made for a commission. The colors were chosen using the favorite colors of the girl who was set to receive it.  I have to say that the color combination is now among my favorites. The quilt measures 92" by 70"
I also pieced the back and it fits quite well in the Modern Quilt Movement in my opinion.
So here it is both front and back for you to see and enjoy.

I free motion quilted this one on my domestic machine.  My free motion skills have improved since then thanks to Leah Day's Class on Craftsy.  But this was made prior to taking the class.
I hope you enjoy seeing my quilt and if you wish to nominate it for viewer's choice, I would be totally honored.

Art Quilting Fun

Saturday I started on  fun little art quilt.  It is not my design, but it is a part of the learning process.  I am taking Hand Stitched Collage Quilts on Craftsy.  I started it soon after the class was announced.  But I just started MAKING one of the projects. This one is called "The House in the Valley."    I got the top fused together onto the batting.  At that point I took a picture:
I have started on the hand stitching to add embellishment but I only have a little bit done.  Let me show you what I did to the house.
I used an Aurifil 12 wool thread to outline the windows and an Aurifil 12 Mako for the cross pieces. The other threads are hand dyed that I have bought various places.

I am starting to add the seed stitches in the tree to give it some texture now.
That thread going off the top of the picture is attached to my needle. This thread is one that I won from Laura Wasilowski on her blog. She "mis-dyed" some thread and I was lucky enough to get some.  I think it goes great with my tree fabric.

There is a television commercial that I have seen somewhere (not at home since I only have Netflix) but nevertheless I have seen it.  The tagline is "Never Stop Learning."  That is my goal.  I love learning new things.

Okay one confession about this piece. I changed some of the colors to make it a little more mine AND because I didn't have the exact colors Laura suggested.  But hey, it is my quilt and so I get to do that.

Friday, May 17, 2013

Project Update & Want to take a FREE Craftsy Class?

A couple of people said they wanted to see my snack mat when it is finished.  It isn't finished since I don't have a binding on it yet.  But it is ready for the binding!   So here are a couple of pictures of it.


The angle shot below shows the quilting a little better.
I did both free motion and straight line quilting on this.  It is the most densely quilted thing I have ever made!

I also just had to make a bowl cozy since I kept seeing them everywhere on blogs.  I used the instructions here.  I will show it to you with the bowl.
And with the bowl removed:
And since they are reversible - the other way:
Can you believe I coordinated the fabrics?

Now About That FREE Class:

Craftsy is offering a free class to new users.  So if you have never taken a class from Craftsy,  This is your big opportunity. There will be several choices of free classes.   There are free classes on Sewing, Quilting, Crochet, Embroidery, Knitting, Jewelry Making, Cake Decorating and more.
Just click the picture to get there. If  you use my link to join, I do get a little bit of credit. (Thank you!)
I am hoping that this will be open by the time this post goes live.  If not, come back later this evening or tomorrow to get your free class - I believe it goes live tomorrow.


Thursday, May 16, 2013

A Table for----

I am sure most of you have thought "Is he still sewing?" or "What is going on with Gene?"  The truth is that I have been busy with a lot of things and my energy has been sapped.  Things are getting under control I think and I have actually made one small project and am working starting on another.

First the finished project!  Yippee, don't you love a finished project?
For all of my sewing days, I have had to run into another room to iron my pieces.  That takes a lot of time and energy. I have seen various ways people have set up a small ironing surface near the sewing machine and I decided to make my own.
I took a TV table and measured the top.  I got already had some ironing board cover fabric - the nice shiny kind that reflects heat back.  And I had some batting and some backing fabric.   I fiddled around and made a simple ironing pad with ties to put on the tabletop.  Oh yes I put two layers of batting. I hope that was a good thing to do.

Here it is sitting up:
 You can see one of the ties hanging down.  And here is the underside so you can see how simply it is tied on. There are two bow knots there.  So I can easily remove it to wash it OR to use the table for something else if needed.


Right now on my cutting board I have a piece of fusible fleece and some scraps.
I am going to take the scraps and cut them up even smaller and layer them on the fleece and iron it down.  Then I will back it and quilt it heavily (or as my grandpa would have said quilt the "beegeebers" out of it!)   Then with some type of binding it will be a nice little snack mat.  I saw this on Stitchin' Therapy by Debbie and she reminded me that she got the idea from Wanda at Exuberant Color - which I also read.
Will mine look as good as theirs?  I guess we will wait and see.

Are you working on a project right now?


Tuesday, May 14, 2013

Creating with Tombow

I am celebrating the 100 days of Tombow.  You see the Tombow product line is 100 years old, but still fresh and creative.
I was sent a starter pack of Tombow products.  It contained some lovely colored pencils and some dual point pens.

The pens have a sweet combination of brush tip and a firmer pointed tip.

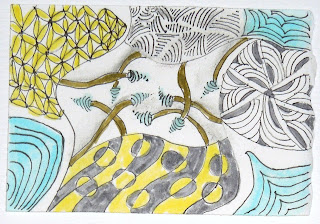
I love this combination. For finer areas, I can use the point and for larger areas I can use the brush.  I used both to color in this doodles.

Then I tried a rather simple landscape to show the use of both pencils and pens together.
The colors work together so well that it is hard to tell where one stops and the other begins.

I was also sent a StampRunner adhesive.
While I didn't use it in these projects, I can see that I will be using it in the future.  I think it will be perfect to attaching pieces of a pattern together.  I hate it when a pattern prints across two pieces of paper, but sometimes (ok, often) that is necessary to make it large enough.  This jewel will attach them easily.  The glue is repositionable for a short time then becomes permanent. So you have time to get it right, but then it stays!

Check out all of the Tombow products at Tombow USA.

(I was supplied with pens, pencils and the stamp runner in exchange for my blog post.  However, the opinions are my own.)