Friday, January 31, 2014

Different

For something different yet following in my series,  I did some digitizing editing.  Here is how it sewed out.

Dororthy:   What kind of a horse is that? I've never seen a horse like that before!

Guardian of the Emerald City Gates: And never will again, I fancy. There's only one of him and he's it. He's the Horse of a Different Color, you've heard tell about.
                                              from the film "The Wizard of Oz"


Comments are welcomed. I will reply when possible unless otherwise stated.

Wednesday, January 29, 2014

Snow Day Recap -A finish

While I didn't spend my day in complete productivity, I did manage to start and complete a project.  I spent a lot of time on the computer monitoring weather just like I would have done had we gone to work.  I talked to my boss for about 30 minutes also.

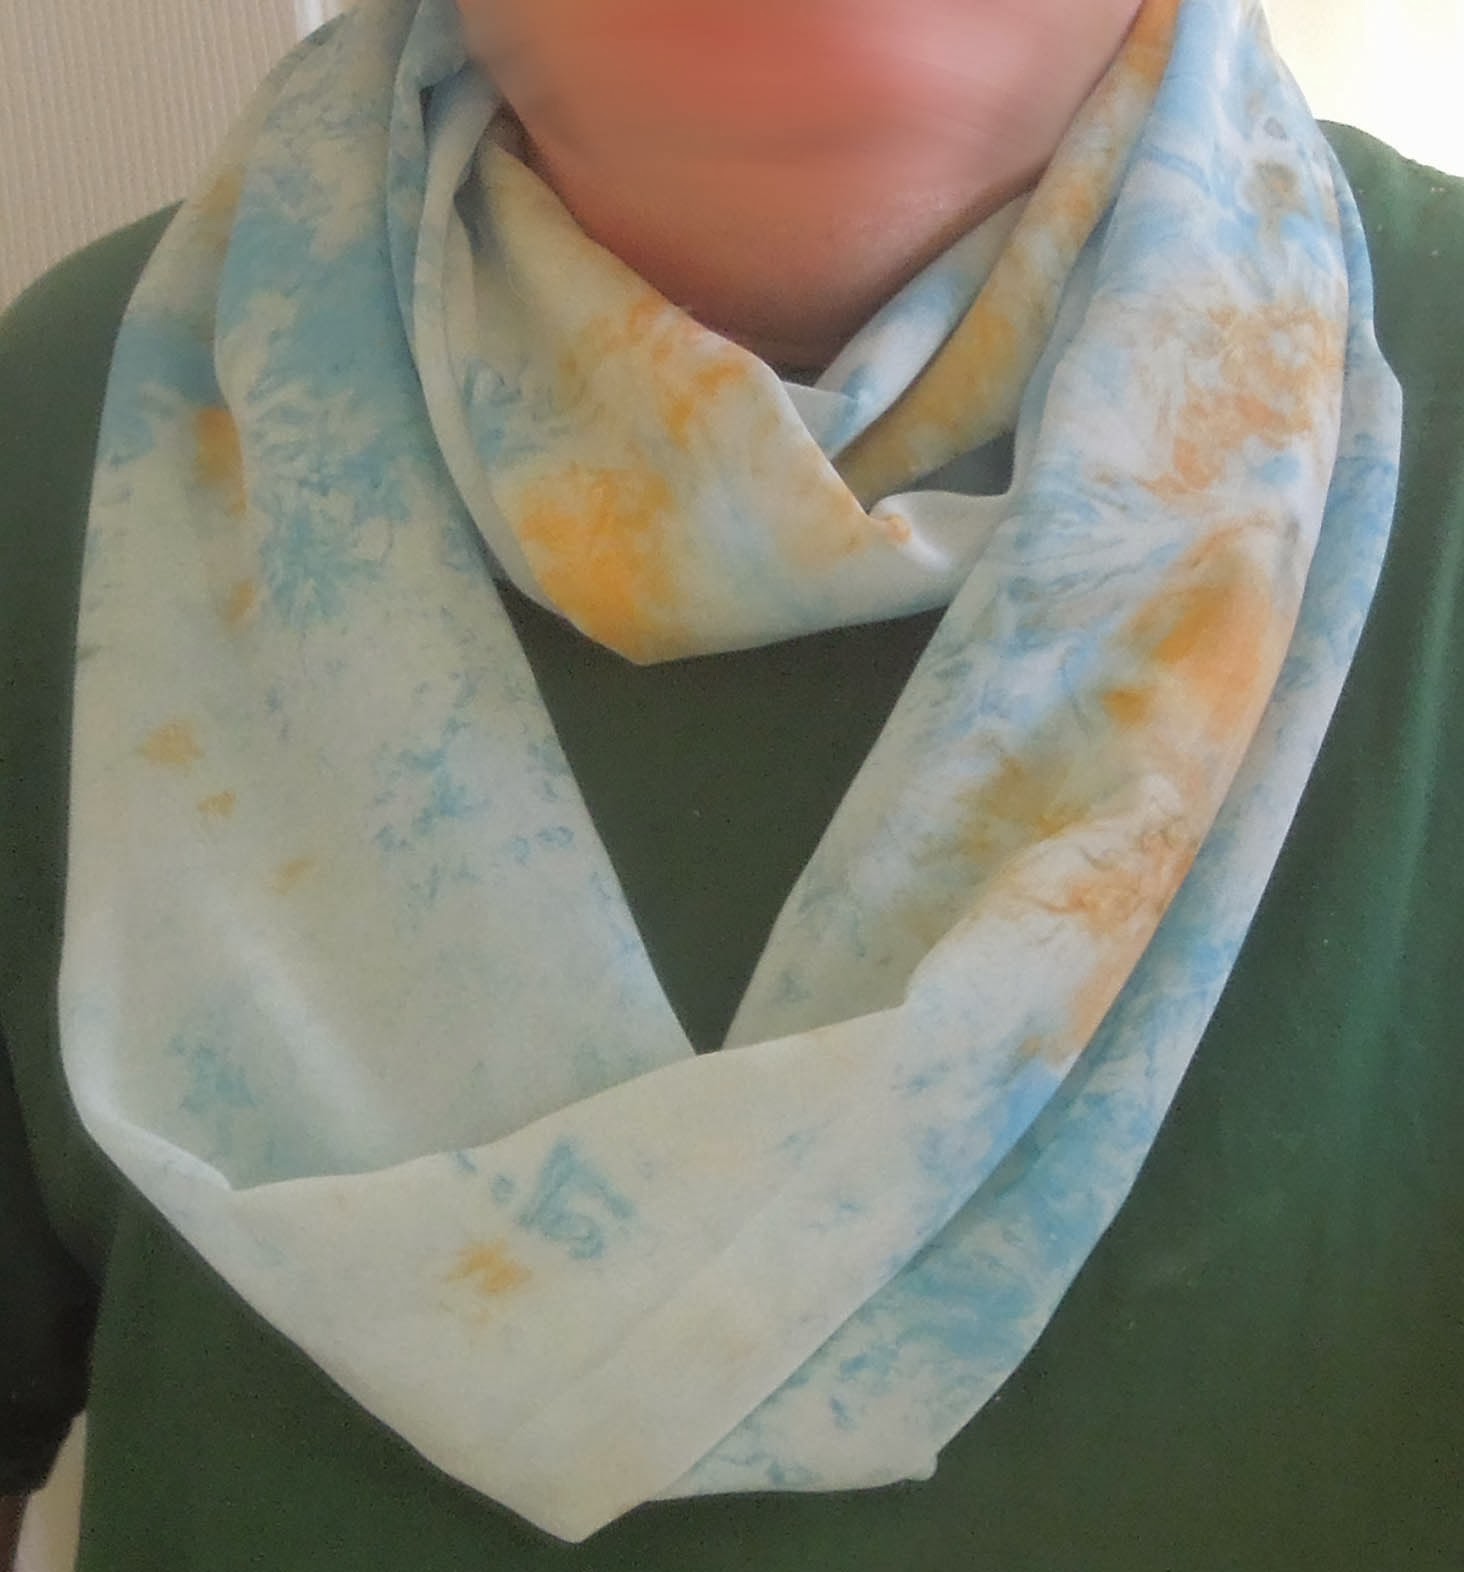
But the main thing I did was create this:
 Yes another scarf.  I hope that it suits the one who asked me to make it.  It certainly suits me.
In fact I look downright dashing in it and my newsboy cap.  Ha ha....who am I kidding. The cap is there to hide my hair which I didn't even comb today.   But the scarf is amazingly rich in color.  But I know I won't get to keep it regardless.  I had another friend see a peek of it so she is second on the list for it.  The reason I am uncertain about the one who commissioned it, is that she doesn't want stripes - but she does want multiple colors.  Since weaving is inherently straight lines, that makes stripes of some manner difficult to avoid.  However, I don't think this really comes off as stripes when it is worn.
I never got around to turning on the sewing machine.  Truthfully, I have at least three more scarf orders and want to fill them as soon as I can.
Weaving these scarves has really helped me to see that most colors will work together.  The big question is "What goes on the loom next?"


Comments are welcomed. I will reply when possible unless otherwise stated.

Snow Day

Yesterday we were sent home from work.  By the time we left it had gotten nasty out.  Everyone from so many places were being sent home that the roads were backed up.  And since it is Alabama, most folks have no clue how to drive on snowy/icy roads. Apparently 2 miles an hour was the chosen speed limit.  What is roughly seven miles took 45 minutes to travel. When I got to my turn there was a bus either stalled or stuck and they had the road blocked. So I went to the road that I knew would be safest anyway in the snow. As I got to it, I saw it was becoming a parking lot. I turned after one block onto the unused back roads. From there it was smooth sailing for the mile to my house.
When I got home, I saw this icy build-up in my wheel wells
I haven't seen that type of thing since I was in Ohio at college.   The snow continued to fall and later in the day I took this picture.
At the end of that fence is my driveway, not that you can tell from this picture.
All the city roads are closed today and the road at the front of those buildings is closed.  I am officially snowed in.
So last night I finished the "Blues" scarf.  I even took the dreaded "selfie" picture with it on to share with you.
Today, if I quit being lazy and just luxuriating in my freedom, I need to weave more and maybe work on a quilt.  I really want to just get a cup of coffee or tea and sit with a book under a quilt.


Comments are welcomed. I will reply when possible unless otherwise stated.

Tuesday, January 28, 2014

Free Form

As an update to yesterday's post, let me  show you my reconstructed block.

Remember these two blocks? Rather than making opposing angles for the wonky 9s, I did these on parallel angles. So they didn't fit in.
One of them was slashed  and added to and became this wild free form block - it may become a mini quilt.
What would you suggest that I add to the top blue section?  Fusing something there could make it more interesting. Right now that expanse of almost solid may be a bit too strong. It seems to overpower the piece.
If it doesn't work out as an art piece I can always put it on the back of a quilt.

Comments are welcomed. I will reply when possible unless otherwise stated.

Monday, January 27, 2014

Last 6 Wonky 9s and Loom Blues

This was a good day to take one of my vacation days. Let's call it a pajama day.  That is a day where you don't have to get dressed and you can wear pajamas all day. I did shower and shave, but I put on pajama bottoms with my t-shirt.

Just because it is a pajama day is no reason to waste the day.  I have completed the last six Wonky 9-patches.  One of my readers emailed a suggestion that I not put the pairs together so the quilt has a more scrappy look.  I like that idea.  I tried to layout the six that way.  the problem was that two sets used the same background fabric. Oops! I can't make it work with just six, but you can see  if you ignore the middle two. Ha ha.

They do look better separated. The purple is matched with a large print from the French General collection. I love the surprises in  the blocks that it makes. Do you see the bird?

I also started another scarf on the loom.  It is another commission piece.  However, I am not happy with it for the intended recipient.  She has a wilder style than this.  The stripes are too obvious and too orderly.
I also think a more aqua/ teal range of blue tones in it would appeal to her sense of color style.  This will still be a beautiful scarf for someone with a different style or maybe even for me.  I love it.  So I will finish this one and be seeking the "right" yarn for her scarf. I delivered one scarf yesterday and immediately got orders for two more from folks admiring her scarf. I will be weaving a lot in the near future.  But I will also be creating quilts.
On Wanda's blog, Exuberant Color, she mentioned a book by Rayna Gillman who also has a blog.  I was so intrigued that I bought the kindle version on Amazon. (I had a gift card so it was  a no-brainer!)
In the book she tells how to use orphan blocks and ugly fabrics to make something amazing.  So I used some scrap strips as leaders and enders on the last six wonky blocks.
 Honestly I found sewing these far more interesting than making the last blocks. After I finished those blocks I did a bit more sewing on these.  These strips will be chopped and re-sewn a few times to create something. At least I used a bit more of the yellow spiderweb fabric that I got in a bundle and have been going "ugh" every time I see it. There will be more fun with this as it goes on.

Comments are welcomed. I will reply when possible unless otherwise stated.

Sunday, January 26, 2014

On the loom & Wonky 9s

After conquering the partial seams, weaving was a requirement for this weekend as I have orders for more woven scarves.  One of those wanted the same weft yarn as in the scarf I made for myself. However, she wanted a periwinkle warp thread. Finally a source for the periwinkle that was "not too blue, not too lavender" was found.  Yes, I was picky about it.
So I put it on the loom and started.  When I first put it on the loom, I had my doubts.  It suddenly seemed a bit too lavender.  Oh well, let me weave a few inches and decide.
Oooh... I like it!  I like it a LOT.

That settled, I made some more wonky nine patch blocks.  Actually I only made two of them. 
They are a bit busy but the contrast in both color and value passed the camera  monochrome test. 
So I laid out all the blocks I have made for this so far. 
There are 24 of them.  Which means that I have six more to make. I already have the fabrics cut out all I have to do is stack, cut, sew, press and repeat until those six are complete and I can start to assemble the quilt. Wow, a little at a time really does get it done before you know it. 

And speaking of done, I sat at the loom for a while and kept on weaving.  I find it wonderfully meditative work.  I can just get lost in it. And I did.  Before I knew it, I was finished weaving.  I cut it off the loom and did the finish work.  Would it be bad to keep it for myself? Well, yes it would.  I know the one who commissioned it is eager to get it. This cold snap we are having will be a perfect time to put it to use. 

The completed scarf
The periwinkle yarn blended with the colored yarn beautifully.  I think I want to do one now with alternating light blue and cream warp threads. 
How about some detail shots of this woven goodness?

Since the yarn changes color as you progress through the skein, you get areas of different colors.  This is what is called a "self-striping yarn."  I love using them for weaving, but they are not easy to come by locally.

I think I had a productive day on Saturday.  I am very happy with my accomplishments for the day. I hope your day was equally good.

Comments are welcomed. I will reply when possible unless otherwise stated.

Saturday, January 25, 2014

Partial Seams

One thing that I have avoided is partial seams.  But my friend Linda at life, quilts and a cat too  has been playing with Electric Quilt on a design that intrigues me.  It is made of two blocks: the snowball block and a block that I didn't know called "Bright Hopes." It seems that Bright Hopes has partial seam. So I decided to see if I could manage this technique.
Bright Hopes
Fabric that I won from Amanda Murphy
Arrrgh.  I need to read the directions as I go and maybe I will get it. This block is usable but not that great.
The quilt would look like this.
Woven Octagons

The blocks in this are set on point. I love the way it looks as if the octagons are woven together.  Do you have a nice go-to tutorial for this Bright Hopes block? The on on About.com is confusing to me.  I need pictures or video.  Since all the seams in the block are partial seams, I found it difficult. I suspect I am making it harder than it really is.  Help!
EDIT--
Bright Hopes, I extend my apologies.  You are not so difficult.
I found a tutorial at A Girl in Paradise blog.  It is not nearly as difficult as I thought.
I made another block in much less time.
One seam is still a touch wonky, but I am sure I could correct that with practice.
Yaay for a fast solution.

Comments are welcomed. I will reply when possible unless otherwise stated.

Wednesday, January 22, 2014

Are You Tired of My Wonky 9s yet?

I am still plugging away a bit at a time on my wonky nine patches.  As you recall, I had one leftover square or fabric from the cutting I did for the brief tutorial.

I have now added another square of fabric to it.  I also cut two more sets and have sewn them all into Wonky Nine Patch squares.

As soon as I took the picture I realized that the turquoise and orange squares have a problem. The VALUE is bland.  The other two sets have good value contrast.  The orange/turquoise set is too close in contrast to really pop.
Here, let me show you.  I put the photo in my editor and desaturated the colors for a value test.
The left set is too close for my liking.  The center set has GREAT value contrast. Thanks to the patterning on the tan fabric, the last set has adequate value contrast.
So what will I do?  Honestly since the color contrast is good, I will just go ahead and the orange/turquoise set and know that I didn't make the best choice there.  In the grand scheme of thing, it will be just fine.

Another thing you may have noticed (yes I am talking to you, Ms Quilt Police!) -the points don't all match up.  For a wonky block, that doesn't bother me at all!  I like the fact that it looks like pieces floating.  I need at least 30 of these blocks to make a quilt the size I want - that is adding sashings. So I will most likely be showing a few more of these.   I need to pull out some more fabric and make some good contrasting pairs.
I am seriously wondering just how I will quilt this. Ha ha. I suppose I should put the cart back behind the horse and get it made first.

Speaking of horses,  I have been playing with coloring changes in my embroidery software.  I discovered that I can add stops and change the color in the one color designs.  So, I took the horse design and colored it like a true "Horse of a Different Color."

This is a photo from the design file. I will likely play with colors when I sew it out.  I think I need to do a series of horses.  What will I do with them though?
Comments are welcomed. I will reply when possible unless otherwise stated.

Monday, January 20, 2014

Wonky Nines

I made a couple more wonky nine patches and was preparing to make more.  So I decided to show at least part of the process.

Here are the two I made
With this process you always get two mirror image blocks.
So how do I do this?
First I iron and starch my fabric.  The starch helps stabilize the fabric. This is important because you will be sewing bias edges.  (Bias: not cut along the grain lines and thus it is stretchy)
Then I layer the fabrics on the cutting mat. I sometimes layer up to six layers. I don't feel comfortable cutting more than that.
Here I have five layers - two folded pieces and a single layer.


Since I have a 16 1/2" square ruler I use that size as the basis for this.   I lay the ruler on the stack with just enough edge on the left and lower side to have a bit to cut off.
Then I cut the right and top off and remove the excess fabric. I rotate the entire mat and cut the other two sides.
As you can see I have a stack of squares the size of my ruler.  Next I pair them up  in the combinations I want.  I try to get good contrast in both color and scale of print - but at least in color.
In these two I have both. I did have a spare red square left over that I will pair with another piece later.
Then I stack a pair (and I should have done them both to speed the process.) I align that pair or pairs with the leftmost line on my cutting mat.  I make sure that I can see the inch markings on both top and bottom of the mat.  Then I take my longer straight ruler and line up the first angle cut.
Although it is small I have circled where the ruler crosses the 7 inch line at the edge of the fabric. (please ignore that the ruler is upside down - it is a straight edge and doesn't matter for this.)
The top edge is lined up with the 4 inch mark (or in this case close to it. oops)
Holding the ruler firmly I cut the angle. Then I shuffle the left section.
These will be sewn back into a rectangle -almost square. - then pressed and restacked with the seam line matching.
I don't have more pictures at this point but I think you can take it from there.  When you cut the second angle it will form a loose V or A shape with the previous seam.   In other words, the edge you lined up at 4 inches will be lined up at 4 inches again. And the side you lined up at 7 inches will be at 7 again. then press and stack again.
The other angles are done the same way from the sides that are left  with no seams. When they are completed, I trim them to 15 inches square.

If you are doing these in a different size you will have to pick markings for your angles that make a pretty block. I suggest that you experiment with it and have fun.

If you cut a line parallel to the first angle line you will NOT get mirror image blocks. Why?  I finally figured it out.  When I fold a block where I have sewn the first two angles as I showed above, the seams pretty well are mirror images of each other....and it translates the same between the two blocks. Clear as mud, right?

Have fun, I would love to see what you make with these.
Here is a mock-up of a quilt made with these that I did in EQ7
Without sashing:
and with sashing
I know it looks better without sashing, but I will most likely be sashing my quilt.


Comments are welcomed. I will reply when possible unless otherwise stated.

Sunday, January 19, 2014

A little sewing project

While on a work trip, we stopped to shop - there was another crafty person along so we went in JoAnn's while the others went in the store next to it.
I have been thinking I could easily sew an infinity scarf - I have seen tutorials all over blog-land.  So my fabric purchases were not cotton (shock!) but rather filmy type fabrics (don't ask - I don't know what they really are, probably polyester- ha ha)

So on Saturday, I decided to try it.  Each piece I bought was two yards.  I took one piece and tried to tear it down the middle like I do my quilting fabric - this stuff doesn't rip!   Next stop the rotary cutter. Folks this stuff slips.  It is like trying to hold onto a greased hog on a hot Alabama day. I couldn't find the grain line so I just had at it. It worked out fine for this.

I sewed the long edge then turned it right side out.  I put the ends together and sewed it sort of like sewing in a shoulder seam. I went as far as I could go then I used a ladder stitch to sew the last few inches.

I didn't have a female model handy so this excuse my chin and neck wattle.  I tried to blur that part out when I edited the photo.
I love this fabric design, I just wish it were quilting cotton!
I think the scarf came out just great.  Have you tried making an infinity scarf?   I am thinking I may join the ends of a woven scarf to make one. --But that will be when I catch up on my orders and can play with weaving again.
I also wove another scarf  Saturday for an order. It is exactly like the one I made for myself so I didn't take a picture.  But maybe I can get one of the purchaser wearing it.


Comments are welcomed. I will reply when possible unless otherwise stated.

Saturday, January 18, 2014

FLASH!

I have been "unproductive" for the past few days as I was on a work trip.  But I got this news and just have to share it with you.


Craftsy Flash Sale 1/18 - 1/19
This year, turn your resolutions into reality with Craftsy! For the next 48 hours, choose from over 50 classes in 14 categories that are up to 50% off and start learning from the comfort of your own home. Categories include cooking, photography, sewing, quilting, fine art, knitting, and more! Check out the flash sale here: Craftsy Flash Sale 1/18-1/19
Craftsy


So go and find a class to improve your skills or learn new ones. I promote Craftsy because I love their classes and because I am a very satisfied customer.
Disclaimer: I do get a small affiliate fee if you join or sign up for a class through my link.  
Comments are welcomed. I will reply when possible unless otherwise stated.

Wednesday, January 15, 2014

Horsing Around

I decided to horse around with the horse I digitized.  This is the same horse design that I previously used in my "Horse of a Different Color" art quilt.
Since I free cut some of the pieces for the art quilt by hand, the tail is very different. So is the mane.

I wanted to play with the horse machine embroidery just a bit. I used a twisted thread which is a combination of aqua/teal and white for this variation of the "Horse of a Different Color."
I had tried a variegated thread but it was creating stripes and I stopped it quickly and changed plans. The twisted thread gives a textural feel that is different from a solid thread.  I suppose "tweedy" would be a good description.
I think that this would be a great thread to use as an eye color on one of my doll faces too.


Comments are welcomed. I will reply when possible unless otherwise stated.

Tuesday, January 14, 2014

Another Face - and Thoughts on Freedom

After posting the doll faces on that I had digitized, I got a couple of comments that they needed eyelashes.
I am having problems running my Windows based programs under Parallels on my Mac. Sometimes it works and other times it just hangs there with that ugly hourglass in my face. I wish all my programs were Mac based. Sigh!

Still,  I got it to work, although haltingly.  So I have a nice face with eyelashes now.
When I chose the fabric to sew this on I thought it was a good idea.  Well actually it was, but the thread choices needed adjusting. I sewed the eyebrows in a brown that got lost.  I did the nose with the same thread.  I did not want to re-sew the entire design and waste my fabric, so I did the creative thing.
I sewed the nose section again with a lighter thread.  Then I moved the design, using that feature on my machine, to make a second layer of eyebrows.  I did the second layer in black just below the brown eyebrows.   I also stopped the machine before it sewed the dividing line across the lips.  (I did that to make the mouth a little different than on the other one. It was a personal choice.)
You do know that it is okay to stop your machine while sewing out an embroidery design, don't you? That little secret allows you more control over your machine embroidery.  If, for example, you are sewing out a one color design,  you can stop the machine and change colors to make the design more colorful.  There is no "thread police" function that will refuse to sew the design if you aren't using the prescribed color.
Here is the same face, but I did a different photo rendering of it.

I did use green for the eyes which is what I had in the design - but that was my choice.  The eyes could be blue or gold or even variegated if that is what I decided to do.   I remember being told, as a child that the sky is blue and I was supposed to color it that way on my coloring sheet.  But a few days later I was outside at sunset and the sky was ORANGE.  I knew better than to tell that teacher she was wrong, but I stopped thinking of her as the authority on color.  Ha ha, I guess I was a rebellious artist even then.  But think about it, without rebellion, we would be slaves.


Comments are welcomed. I will reply when possible unless otherwise stated.