Friday, November 28, 2014

Is it just me?

Is it just me? Or are other of my crafty creative friends not going out to shop on this Black Friday?  I far prefer to avoid the crowds.
One thing I do on those stay in days is watch (or re-watch) some of the classes I have bought on Craftsy.  
Last night I re-watched part of Laura Wasilowski's class on Handstitched Collage Quilts.
I made this art quilt from that class.

It is amazing how much we forget if we don't use it frequently.  Fortunately, once you get a Craftsy class it is yours forever to come back and watch again.  I love that feature.

I also took classes to learn free motion quilting.  So the secret quilt I am making has some pretty good quilting on it.  Here is the back of it.


Craftsy has a Black Friday Sale going on now.   A really nice thing is that you don't have to fight anyone in line to get a great deal. All classes are $19.99  or less.  Yes, really!  I saw one that was $59.99 originally - and it was only $19.99.

I am thinking these classes would make great gifts for a creative friend also.  There is a "Buy as a Gift" option and you can choose the delivery date - like Christmas eve, or maybe Christmas Day or perhaps Hanukkah or even a birthday.

My blog is http://blog.geneblack.com
Comments are welcomed. I will reply when possible unless otherwise stated. Of course if you are a "No Reply Blogger" - I can not reply.

Monday, November 24, 2014

Shhhh!!!!

Making a quilt...but I can't show it.  Maybe you will settle for some "sneak peek" pictures.  When it is finally shown (elsewhere) I will post a link to the entire project.

I love the rich vibrant colors of the fabrics!
Blocks

Fabrics

Mockup Pieces.....cut from paper
In case you are wondering, it is coming along beautifully.  I wish I could show you my progress. I am having FUN with it.

My blog is http://blog.geneblack.com
Comments are welcomed. I will reply when possible unless otherwise stated. Of course if you are a "No Reply Blogger" - I can not reply.

Saturday, November 22, 2014

Saturday Spinning

Several months ago, I started learning to spin fibers into yarn.   It is an ancient art that I have seen demonstrated with a rock and a stick used as a drop spindle.  Of course, we have moved beyond that and now drop spindles are much nicer.  I believe I showed one earlier that I purchased.
I had dyed some bamboo fiber in colors of blue and lavender. So lately in odd moments I have been spinning it into a lovely bamboo yarn.  I will use this for weaving on my loom.
Here is a picture of the spindle with yarn on it.
Spinning bamboo fiber. I dyed this fiber.
I have finally finished spinning all of the fiber I had dyed.  It is now off the spindle and rolled into a center pull ball.
This yarn has a lovely shine and is soft as a dream.   I used a yarn ball winder to make the center pull ball.  Here is a picture of the two side by side.
If you are interested in seeing how the ball winder works, there is a video that I made sometime back at this link. 

Some of my other videos (although not all of them) are easily accessible on the tab at the top labeled "Craft Videos"

I hope you are enjoying your day.


My blog is http://blog.geneblack.com
Comments are welcomed. I will reply when possible unless otherwise stated. Of course if you are a "No Reply Blogger" - I can not reply.

Thursday, November 20, 2014

A Finish!!!!

Yes!  It is completed.  With any luck, it will be shipped today.  What is it you ask?
The Anchor Baby quilt is all quilted, bound and ready to go.  I washed and dried it yesterday as is my practice.  I try to never let a quilt leave my hands without being washed.  Any surprises should happen to ME not the recipient.  By surprises, I mean: Burst seams (hey it happens)  - Color bleeding -or any other "oh no! what happened!" moment.

I was quite pleased with the final result.  The quilt is lovely and did the perfect quilt puffy wrinkle that makes it so snuggly.   Just look!
The sun shining across the surface really shows off the effect.  Of course, I know you want to see the entire quilt, so here it is.
I hope it is loved by the recipient as much as I love it.

While the quilt was in the wash, I took one of the work logo shirts that I had purchased but could no longer wear since retirement and "fixed" it.
I put some of my handwoven fabric and a backing layer of white cotton behind the logo.  It was all held nicely in place with some Lapel Stick.  I sewed with a triple stitch  and then carefully cut the original logo area away just inside that stitch.  Since the cotton shirt just might fray, I also zigzagged over the edges with a matching red thread.

Then I wanted to add a bit more interest to the shirt so I added a collar bit.
For this I just used the triple stitch around it twice. It isn't going anywhere.
I also added a bit on the center back yoke. But I didn't take a picture of that one.

Thanks to everyone who has responded for the Quilt Angels.  I will remind everyone that there are tabs at the top of my blog and there is a tab for more information about the Quilt Angel Project.


My blog is http://blog.geneblack.com
Comments are welcomed. I will reply when possible unless otherwise stated. Of course if you are a "No Reply Blogger" - I can not reply.

Tuesday, November 18, 2014

A Quick Update

But first if you missed yesterday's post  Can YOU be an Angel?
please go back and read it. Angels are needed.

Now,  let me show you the progress I have made on quilting the Anchor quilt.
As seen from the back
 Except for the corner triangles and the borders, it is quilted.  The color shown is not accurate as the flash lightened it considerably.

I have also spent some "resting time" with a spindle and this lovely bamboo roving that I am spinning into yarn for weaving.   When I got the bamboo it was white.  But of course I wanted colors, so I dyed some of it.   This part was dyed in a brown Rit Liquid dye.  But I "space dyed" it - submerging only parts of it. The color drifted into the unsubmerged parts creating lovely variations of shade and tones.  This now has browns, grays, whites and peachy pink bits.  I wish I had dyed the entire roving this way, but instead I also dyed part of it blue and another part purple.


My blog is http://blog.geneblack.com
Comments are welcomed. I will reply when possible unless otherwise stated. Of course if you are a "No Reply Blogger" - I can not reply.

Monday, November 17, 2014

Can YOU be an Angel?


Back in July, I put out the first call for quilts for the Quilt Angels project.   For those reading who are not aware of the project, let me give a brief history.


In 2011,  a friend heard of a need in a youth shelter for quilts to help keep the youth warm.  The youth in this shelter are there because for some reason home is not a safe place for them to be.  It could be due to physical abuse or just a bad home situation.  Regardless of "why" they are there, they need to feel some love and know that humanity is basically good.   I personally know some of the people who work in this shelter.  They provide a great environment for the youth that are there.  They teach them skills to live a productive life.   But all of them need to know that there are people out in the "real world" who are loving and giving.

This is where some of you can help. Many of my readers make quilts.  Some have donated a quilt each year since 2011 to this ministry of love.  A couple of my readers have already sent quilts for this year. ***A big THANKS to you***   But suddenly it is mid-November.  Where did the time go?   We are still in need of some quilts to warm the hearts (and bodies) of these young people.
The quilts should be at a minimum 45 by 60 inches, but twin size of bigger is much better.  The pattern can be simple or complex.  The important thing is that the quilt be sturdy. If possible put a simple label on the quilt with something like "Made with love for you by someone in (your state)"  You can include your name if you wish.

Due Date:  We would like to have the quilts here by December 15th this year.  If you are running late/cutting it close please keep me updated.  Thanks!

I do wish I could post pictures of the youth as they receive the quilts, but for privacy reasons I can't do that.   Let me assure you that I have seen joy, awe and huge smiles when the boys and girls receive their quilts.   The quilts with labels often get comments such as "Wow!  this quilt came from  Virginia! That is a long way off."  (it could be any state, I just used Virginia since I do remember hearing that once. )

If you have already promised a quilt for this year and haven't sent it, do send me an email or make a comment here.

Thank you for considering this. For those who have participated and those who have helped by  spreading the word, I thank you wholeheartedly.


Here is a picture from delivery day 2011 - the first year we did this.
Please help me to make this happen again this year.  
I would really like to wrap each youth in the shelter in the love that is a quilt. 
If you want more information or links to some of the past Quilt Angels project posts, there is a tab at the top titled Quilt Angels.

My blog is http://blog.geneblack.com
Comments are welcomed. I will reply when possible unless otherwise stated. Of course if you are a "No Reply Blogger" - I can not reply.

Saturday, November 15, 2014

Some Quilting To Anchor the Layers (+Winner)

I have started quilting on the Anchor Baby Quilt.   I decided to do some pebble quilting around the anchor to really pop out the design and add some fun texture. Over the rest of the quilt I am quilting simple wavy lines.  But it takes a bit more time because I am changing the thread color to match the background of each block or area.  Here are just a couple of pictures that I took after finishing the center section.

I have since quilted all of the light blue blocks, all of the red sections and some of the white.  I have the majority of the white to finish up on and the  navy blue blocks and the borders.

At this point, I am happy to announce the winner of the prize in the Patsy Thompson Designs Blog Hop.   The random drawing was won by Kathy E.  who said,
"Lots of lovely designs to choose from! I really like your star that you used, but my favorite is B2 Pearls and Figure 8's Wreath. I've been making tote bags for friends for gifts and I can see this design on the front next to their monogram. I will wait to finish my next one in case I win!"
Kathy has been contacted and has already received her prize.
Thanks to everyone who commented.  I truly enjoyed this blog hop.


My blog is http://blog.geneblack.com
Comments are welcomed. I will reply when possible unless otherwise stated. Of course if you are a "No Reply Blogger" - I can not reply.

Wednesday, November 12, 2014

Clean is Good!

If you are looking for my post on the Patsy Thompson blog hop, it is here.


I love taking a nice hot shower.  I love being all clean and fresh.  I don't like it when the soap I use dries out my skin though.


I love chemistry too.  When I was younger I begged relentlessly for a chemistry set. I think someone finally told my parents that I could not blow up the house with it.  So for Christmas that year I got a ChemCraft chemistry set.
This is not the exact one I got, but I could not find a picture of it. As I remember mine was in a metal case with three sections. I loved doing the experiments included in the instruction booklet. I was rather sad when I used up the chemicals and couldn't replace them.

So combining the two loves leads to todays blog post:

Several (maybe 15-20)  years ago, I got a bar of handmade soap from a gift basket that was won at a Christmas party.  I fell in love with that soap.  Besides making me feel clean, it made my skin feel better.  I checked with the store that had donated the basket.  I was shocked at the price for one bar of soap.  Since I have always enjoyed shopping for a deal, and I had just realized that internet shopping yielded some amazing bargains, I decided to try to find it cheaper online.

I had no luck with that.  But I found mention of making your own soap.  It was probably a good thing that my grandmother didn't make lye soap in a kettle out back using ashes and lard. That would have scared me off.  I understand that it was a rather harsh product.  After reading a while, I thought "I can make my own soap!"   That is a part of who I am.  If it can be made at home, I will try to make it myself.  (The exception is building things with wood. For some reason I have never been able to saw wood properly.)

That began my soapmaking adventures.

Sadly due to the manufacture of illegal drugs, one of the common products is now much harder to find.  That product is essential to making real soap.  You must have real, pure lye (also known as Sodium Hydroxide.) The lye is combined with an acid that is quite common in most kitchens although you may not realize it is indeed an acid.  That acid is cooking oil.  I have used everything from lard to coconut oil (along with many others) in making soap.

The current batch is made with canola oil and coconut oil.  Each oil has properties that make a difference in the soap.  Some oils make rich lather, some make it gentler to the skin. The canola gives a stable lather, conditioning factor and makes a softer soap. Coconut oil helps to make the bar harder and makes the lather fluffier.  Too much coconut oil in the soap can make it drying to the skin though.
(((these instructions are NOT a tutorial.  You should know that this is a dangerous process. Lye can burn right through your skin!)))

I always get my molds ready before I start and put them on an old towel.   There is one mold in this picture that I did not use. It was a "just in case I need it" mold.  I actually used the clear mold and the red silicone loaf pan.

Prior to starting everything is weighed carefully on a postal scale. This ensures that the resulting soap is mild and skin friendly.  
So, to make soap,  the lye is put in the water  (always the lye goes into the water  - the other way can cause it to erupt like a volcano!) The lye and water create an exothermic reaction (It gets HOT!)   The oil is heated.  Then both the oil and lye-water are allowed to cool to roughly 110-120 degrees.  The lye water goes into the oil.  Then it is stirred for a while.  I use both a silicone spatula and an immersion blender for this.
The color changes to a creamy warm off white. If it is stirred only by hand it can take hours! The immersion blender speeds the process greatly.  When the mixture reaches what is called "trace" it is time to add any fragrance oils.  Trace is when the spool or immersion blender leaves a line in the mixture.  Or if you scoop up a bit and drop it it doesn't immediately blend back in but is visibly laying on the surface.
While the above picture is after being poured into a mold you can see that it did not level out..the part circled in blue shows what "trace" looks like.
After adding the fragrance oils (if any) the mixture is stirred just enough to incorporate the fragrance oils into the batch.  Then it is poured quickly into the waiting molds.
 If you notice at the lower right there is a spot of soap mixture that got on the towel.  It is much easier to wash the towel than to clean the surface.

For cleanup, I add a little water to my soap pot and try to stir all the leftover into the water. I do not put my hands into it as raw soap is still harsh and will dry out skin.  Then I take it outside and pour it in the weediest part of the yard. (it doesn't seem to hurt it, but I figure if it kills anything hopefully it will be some weeds!) Then I wash up all of my soap making equipment. I never use that equipment for anything else.

The soap has to cure for at least 24 hours in a warm place before it is unmolded.  I usually put a thick towel on top of the washing machine, set the filled molds on it, cover it with a box to keep anything off the surface of the soap and then cover the whole thing with a thick towel to insulate it.  The soap goes through a gel phase and gets hot again. Preserving that heat helps it to process.

After unmolding, I will slice the soap into bars and put it on a rack to dry and finish curing.  That will take four to six weeks.  This is not a quick process. But for me, the resulting soap is worth the effort.

Now if you are still curious and want to read much MUCH more about making soap, here is the page where I learned to make soap: Miller's Homemade Soap Pages.


My blog is http://blog.geneblack.com
Comments are welcomed. I will reply when possible unless otherwise stated. Of course if you are a "No Reply Blogger" - I can not reply.

Tuesday, November 11, 2014

Patsy Thompson Designs Blog Hop - My Day (and Giveaway)

Comments for Giveaway are Closed. 
There is a blogger issue that will not allow me to stop comments, but the last comment prior to Midnight November 14th is the last one that will be counted.

The winner is Kathy E.  

I hope you saw Kelly's post yesterday at I Have a Notion.  Today is my day.  For the design I chose to use the Feathered Star Design. It is a great design that would look great on a quilt.  But I chose to do something else with it.

 I did several sew-outs before I started a project just so see how the design works.  So those will probably show up in a quilt later. I love this design; it is so versatile.  One thing that I enjoy doing is playing with the colors of thread.  But I also love to see what else I can do with the design.

Since this design comes in three sizes,  3.75", 5" and 7"  I decided to use the two smaller sizes and do more than one of the design on a project.

My first project was a red pillow.
I first set the 5" star in the center of my design field.  Then I added two of the 3.75" designs and moved them around on the design screen until I liked the arrangement.  I added a bit of batting behind the fabric to add dimension.  It is not very obvious in the photo, though.
Here are the closeups:

As you can see, I did quilt the pillow cover before I fully assembled the pillow.

My next project was another pillow, using a white fabric that I had bought previously in the upholstery section of the fabric store.  It has a lovely texture and shine in person.  I think that I may need to rip out my hand stitches and add a bit more fiberfill into the pillow so it puffs out more. I clearly need lessons in stuffing a pillow properly.


You may notice that this design looks very different. I told you that I like to see what else I can do with a design.

If you watch a machine embroidery design as it sews, you can get ideas of ways to use parts of it.  This design starts with the outer star outline and progresses inward.  Most embroidery machines will allow you to skip a section.  Or you can skip the beginning and use the inner part.  For the white pillow I set one 5" star and seven of the 3.75" stars.
First I sewed out the first two colors in the large center star. Then I skipped the two center sections.  Then I proceeded to skip the two outer sections of the smaller star which was also in the center. (It was right on top of the large star on my design screen!)  I sewed out only the inner sections right in the middle of the large star.
This put the smaller center inside the larger star outline and feather design, leaving some white space  and actually making a new design.
In the same manner for the other six smaller designs, I skipped the outer two  sections and on four of them only sewed one section.
As you can see, the middle design on each end of the pillow has two sets of "loops" while the two on each side of it have only one.  I love being able to use parts of a design like this.  I want to do a trapunto design sewing only the two outer parts of the design so that the center, unembroidered, star shape will really puff out.   I am certainly not done experimenting with this design.

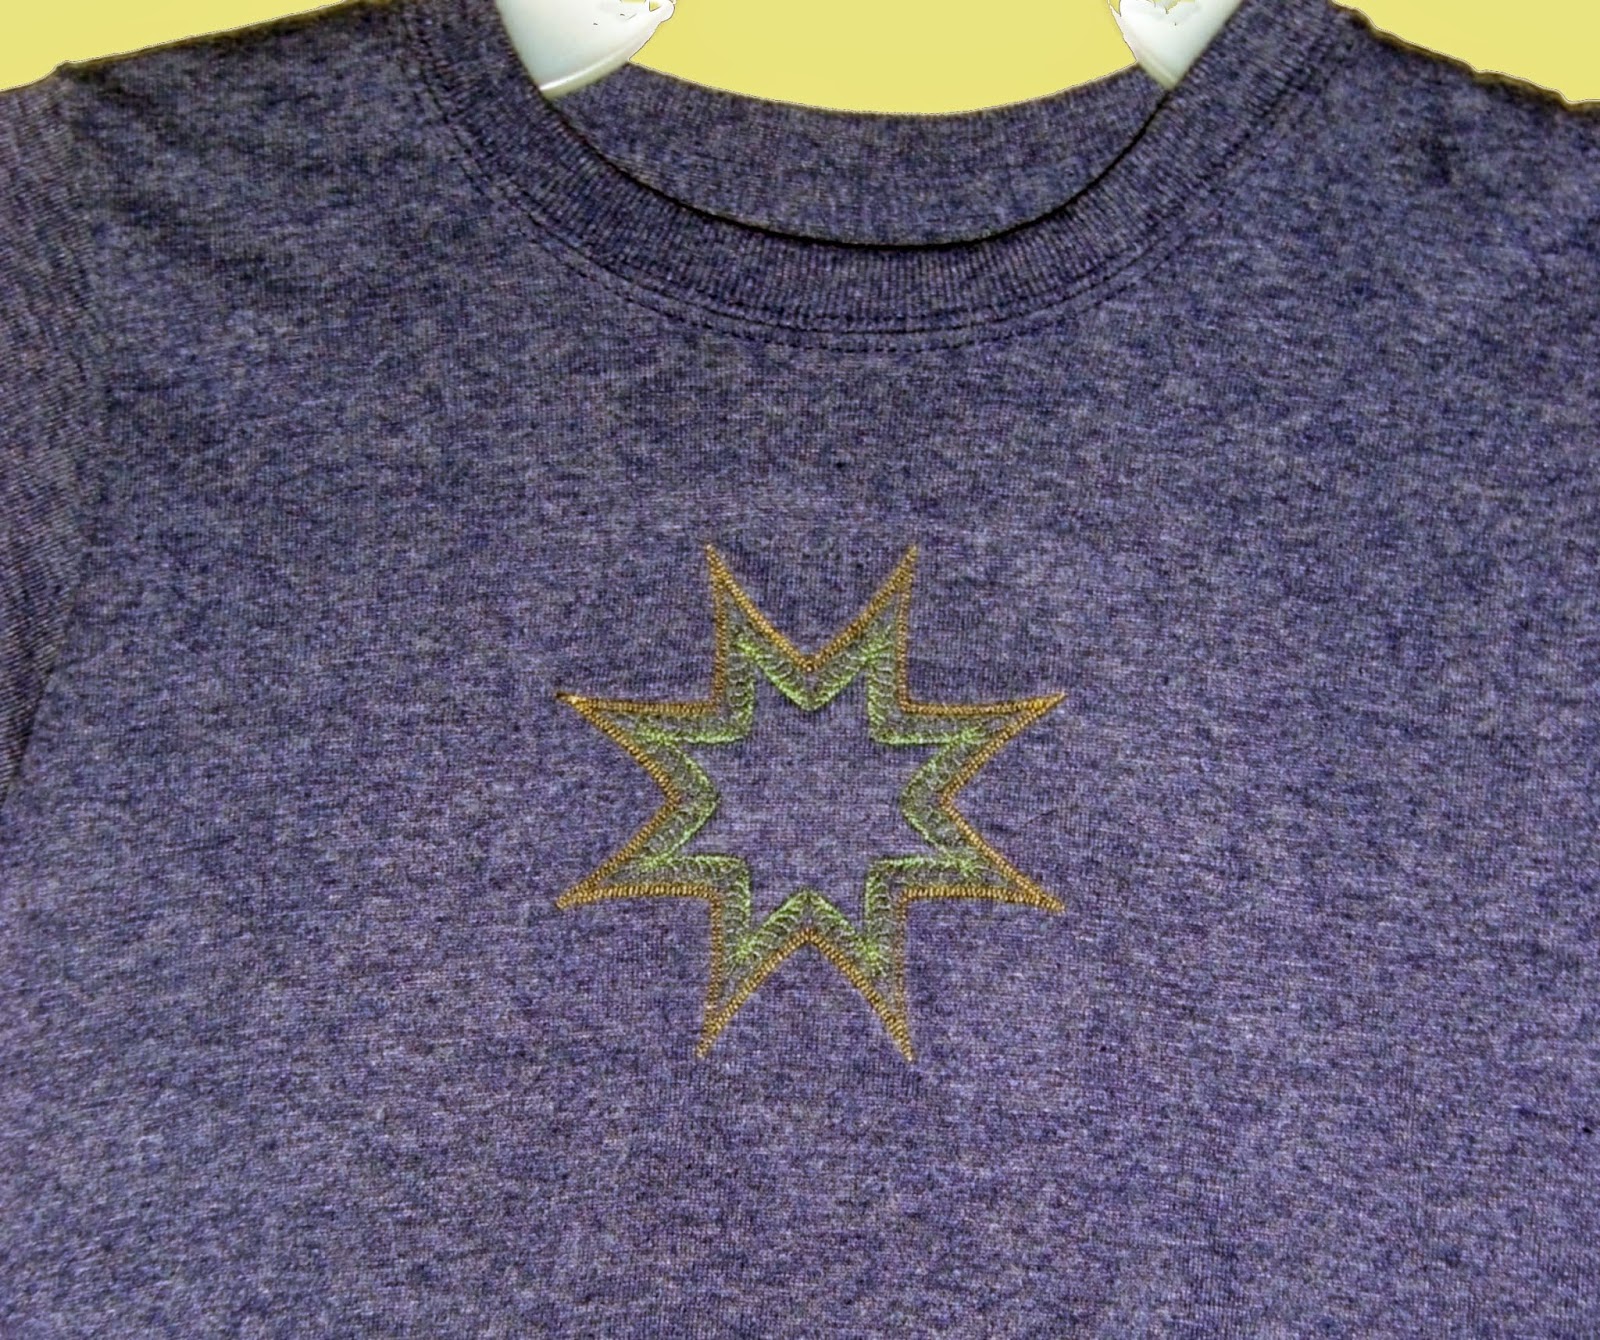
Another little project that I did unfortunately did not photograph well.  It is a T-shirt for a child that I did the outer star on the front.  Because the T-shirt is a "tweedy" weave, it confuses the camera imaging receptors.  But I am going to show it anyway.
Notice that I stopped the design with just the two outer sections this time. 
So that makes four different designs that I have managed to get from this one design.

As you can see the heathered shirt somewhat hides the design in a photo..but in person it is quite attractive.  I also used a layer of cotton batting behind this so the center has a slight trapunto effect. I also used cutaway stabilizer so that the batting is contained and won't fray.

Let me encourage you to stretch your imagination.  You may be able to do more with your embroidery machine than you ever imagined.  Of course, well digitized designs, like these from Patsy Thompson, make experimenting so much more fun.

I think this design would be great done on a red sweatshirt in green and/or white threads for holiday wear during the Christmas Season.  The white and blue make me think of the holidays also.  But I suspect my great nieces who love the movie "Frozen" will see snowflakes and grab it for themselves.

Some of you may have read the post on my blog yesterday where I showed a "sneak peek" at some test blocks that I used to practice free-motion quilting.  Here are the pictures of those blocks which will show you how these designs can look in a quilted setting.


Now for that giveaway I mentioned in the title:  Patsy Thompson will give one of my readers your choice of any downloadable digitized pattern or design on her web site.  This is an excellent prize. To be truthful, this would be a very difficult choice for me. But to register yourself in this giveaway, leave a comment with your choice of design. Be sure that if you are a no-reply blogger that you leave your email address in the comment. I must be able to contact you for you to win.  Otherwise I will choose another winner.  This will remain open until November 14th at midnight Central Time. I will announce the winner on the following day.
And just for fun, I would like to know what type of project you would plan to do with the design you choose.  I will choose the winner randomly from all eligible commenters.

Here is a list so you can see the entire blog hop.  If you missed Kelly's post yesterday, be sure that you go back and read it.  Then also be sure to check the other entries as the week progresses.


I Have A Notion Blog November 10th
Gene Black  November 11th (you are here) 
Jean Creates November 13
SewCalGal  November 14


My blog is http://blog.geneblack.com
Comments are welcomed. I will reply when possible unless otherwise stated. Of course if you are a "No Reply Blogger" - I can not reply.

Monday, November 10, 2014

It has Started!

Today is the big day.  Kelly at I Have a Notion has taken the lead with her post for the Patsy Thompson Designs blog hop.   Kelly shows a wonderful design and has used it in a delightful project.  Tomorrow is my day.  Last night I was inspired to quilt some small pieces that I had sewn out while experimenting with the design I am using.  I will not show the design - but I will show you some of my quilting on it.  I did the green piece first and did not match the quilting thread to the fabric.


On this piece you can see where I overshot my target line a couple of times.  Seriously, in the grand scheme of a bed quilt, this is not important. (Show quilts live to a higher standard.)

Next, I quilted the two pieces I did on yellow fabric.
 I used pebbles on this one to fill the shapes.  Did I "color inside the lines" all the time?  No, a couple of my pebbles run over the edges.  Does it bother me?  Absolutely not. It gives a nice organic texture to the piece.
The second yellow piece I simply outlined the embroidery design with tiny pebbles. (No,  I am NOT showing that today - come back tomorrow to see it)
Then I covered the rest of the area with larger pebbles.  This is a bit time consuming but it really gives  a great texture.
I have two completed pieces for the blog hop and **if** I get froggy (jump to it) I may have another.  So go to Kelly's post today and come back here tomorrow for my day of the


My blog is http://blog.geneblack.com
Comments are welcomed. I will reply when possible unless otherwise stated. Of course if you are a "No Reply Blogger" - I can not reply.

Sunday, November 09, 2014

Anchoring the Quilt Top

I have been working on my baby quilt commission.  The top is finally completed without having to do any partial or Y-seams.  A little brainstorming session with pen and paper got it all sorted into easily put together pieces.  I really wish I had documented the construction with photos.   But the truth is, I was flying along and in the creative groove.

Now the top is anchored to the batting and backing.  The basting method I chose for this quilt is one I had not tried before.  I used some Lapel Stick  the top and anchored it to the batting.  Then I put some on the backing and anchored the batting to the backing.  I did one row at a time starting from the center to insure a nice smooth finish.  For the backing I just estimated the width of the rows. I put one dashed line of the Lapel Stick glue across the area.  I lightly pressed it on each side as I finished the side. I find that helps to enforce the hold when an item will be handled a lot.  And I know I will be handling this a lot as I quilt it.
I am very happy with how the Lapel Stick works.  I love the fact that it washes away when I launder the quilt.
In the coming week this quilt will get quilted.  I have to get my quilting mojo working so this one turns out excellent. I think that I will probably change thread colors so that the quilting thread doesn't stand out but rather blends into the quilt.

Don't forget the Craftsy sale that goes through Sunday night. Even if you aren't ready to take a class, you can purchase it and have it waiting for you. Right now several of the classes are on sale at half price.  I like to keep a wish list and buy when one I want is on sale.  (thrifty hint!)

And remember that Monday is the start of the Patsy Thompson Designs blog hop.  I will be showing my projects on Tuesday. Be sure to follow along - and if you have an embroidery machine, there are NICE prizes you can win.


My blog is http://blog.geneblack.com
Comments are welcomed. I will reply when possible unless otherwise stated. Of course if you are a "No Reply Blogger" - I can not reply.

Saturday, November 08, 2014

Improve your skills

You may know that I am a Craftsy Affiliate.  So I get the opportunity to share all the sales with you.
Craftsy is having a Shop to Unlock Sale today (November 8) through tomorrow night (November 9th.)   When you buy a class - already on sale - you will get access to another set of classes that are on sale.
What makes Craftsy classes so great?  Once you purchase them, you can watch when you want to. They are yours for life. No DVDs to worry about losing or breaking. (A friend of mine had her 3 year old put a DVD in the toaster and it destroyed the DVD and the toaster.)
You can ask questions of the teacher AND your classmates making it easier to learn on your schedule.  There are SO many classes, but the sale is only today and tomorrow.

Craftsy


My blog is http://blog.geneblack.com
Comments are welcomed. I will reply when possible unless otherwise stated. Of course if you are a "No Reply Blogger" - I can not reply.