Tuesday, August 31, 2010

Round Two

I am doing a Stay at Home Robin over at Kate's Quilting.  I have waited until the very last minute to add my pieces for round two....so without further ado here they are (I am doing two versions)


Monday, August 30, 2010

Summer Garden Goodness

I am so fortunate to have good neighbors and friends.  One of my next door neighbors has a garden this year.  I was over visiting and was offered the opportunity to help myself to the overrun of okra. (Okay, fine! I know some of you just gagged! But it is healthy and to some of us it is yummy.)
So after work, I just went out the back gate and into the garden.  Gary was already in the okra cutting and trimming the plants.  I had a plastic bag and (more importantly) a pair of vinyl gloves.  Those keep the prickly hairs on it from causing you to sting and itch. Once I had picked all I thought I could eat -and talking to Gary for a while- I headed to my kitchen. First off it needs to be washed well. This removes the pricklies and any bugs that may have ridden in on the okra.

I got a number of little pods that are just perfect for (don't gag now) boiling.  I will tell you the secret to good boiled okra. Once the water starts boiling with the okra in it, you add about a quarter cup of apple cider vinegar. Like magic it reduces the "slime" that most people find offensive.  Once it is boiled to a nice tender stage, drain it in a colander and toss it back into the hot pan along with some REAL BUTTER.  (shhhh..don't tell my doctor, but I use real butter for cooking-  in moderation of course.)  I set it back on the stove (which is hot but turned off) and let the butter melt and coat it. Then I add a light sprinkle of salt.
That is some tasty eating in my book.  Uh....I had already eaten about half of it right out of the pan! 

 I also had some larger, but still tender, pods. So I cut those up and dredged them in cornmeal. Then I fried them in a combination of olive oil and canola oil. The olive oil can burn at high temps so the canola tempers it. 

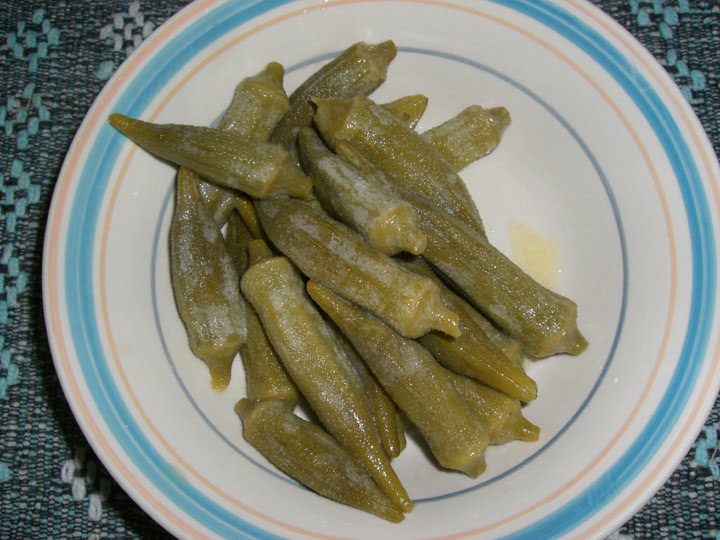
This is the first batch, in the pan.  I had another batch also. I put the fried okra away for lunch tomorrow and probably a bit more tomorrow night. (I ate all of the boiled okra with a chunk of cornbread!)

That is some real Southern Cooking!  I took a "how Southern are you" test today.  My results said I am 100% Southern and probably kin to General Lee.  LOL

Sunday, August 29, 2010

Names, Naming, Who are you?

Names are important.  We each have one, whether we like it or not. We usually grow attached to our names as we get older.  Don't you find it annoying to be called "hey you" ? I do. 


Psalm 147 says "He telleth the number of the stars; he calleth them all by their names."  Even the stars in the sky have names.  


It happens that at work we wear name badges.  It helps those who don't see us often remember our names.  When I see a worker somewhere wearing a name badge, I will call them by name. It lets them know that I realize they are more than just "that girl at the checkout counter."  
We all have a story and our name is part of that story.  Some people change their names for various reasons.  I use my middle name, not my first name. It happens that I also use the shortened version of that middle name. 


Oh, I got lost....so what does this have to do with sewing or art?  If I say "Mona Lisa" you immediately know what painting I am talking about, right?  If I say "Ricky Tims" or "Eleanor Burns" or "Pat Sloan" you know which quilter I am talking about also.  


However,   this post started just so I could show you what I made yesterday.  Then I got lost in wonder about names.  (not my first time pondering names by any means) 
So, yesterday I made lanyards for the name badges we wear at work.  My friend, Stephanie, (HER BLOG)  showed some she made and I oohed and ahhed over them.  She kindly sent me a couple.  SEVERAL people at work ooohed over them when I started wearing them. Hmmm......
Yes I can make them too. 
Here are my first few for you to see.


Lanyards
Wouldn't that ABC one in purple be great for a first grade or kindergarten teacher?
These also have a breakaway safety feature, thanks to my friend who works as a Safety Officer and said "Everyone needs a breakaway on a lanyard."  Because I said, "you don't really need one in an office setting"
Okay, I was wrong and so I added them.
Hey folks, wear your name proudly AND safely, okay? Why? Because I like you and "You are NAMED, you ARE.*"  Your name is important.

P.S.  I added an "About Gene" tab at the top of the page. It tells more about me than you want to know.

*A Wind in the Door by Madeleine L'Engle

Thursday, August 26, 2010

JRQA Top finished

First an apology, this is a lousy picture --but at least I got it done and a photo made of it.  But still here it is.


Jelly Roll Quilt Along Quilt top
I promise that it looks better in person. I NEED a good quilt photographer that can work  on MY schedule.  Ha ha. 

A special Day

My friend Pat had a great idea.  One of our friends is having a birthday so we are going to send as many people as we can to her blog.  Let's make this an amazing day for TONYA at Tonya's Sewing Room.
Just go on over and wish her a BIG Happy Birthday.

If you don't know Tonya, well let me tell you, she is a sweet and fun lady. She is both generous and kind. Those are two qualities I love in a person.

I KNOW you will read this Tonya so -Happy Birthday my Friend, I love you. (not in a creepy way either! ha ha)

Saturday, August 21, 2010

The pattern is complete!

After more hard work than I realized it could possibly be, my pattern, Dance of the Japanese Lanterns, is now for sale on Etsy. 

I have added a link on the sidebar at the right of this page so you can get there easily. And here I am repeating it:


While it only shows five in stock, I will have more available.  Right now I am "testing the waters."   


If you are international (not USA) and would like to purchase a copy you may email me, or leave a message here asking me to email you.   But be sure if you ask me to email you, that I have your email address.  We can determine shipping costs and I can list one just for you. 


Thanks to everyone who has been so supportive while I have worked on this pattern.  You are the wind beneath my wings...oh watch out or I will start singing! ha ha.  I do appreciate you all.

Friday, August 20, 2010

For your entertainment

For your entertainment-  or maybe you will find it hideous.  However,  some of my friends and blog buddies wanted to hear me sing.  Most of you have already heard me on penny whistle.  This is the tune I played with our choir anthem a couple of weeks ago.
Hopefully my singing won't scare anyone away.


Thursday, August 19, 2010

Celebrate - A birthday party

Yes that is right a BIRTHDAY PARTY, but you can get the gifts. (but I am hoping that ***I*** get them!) ReannaLily Designs is hosting this party.
Can you say PRIZES? Can you say WIN? Can you say "What are you waiting for, post the link already?"
Okay
http://reannalilydesigns.blogspot.com

Wednesday, August 18, 2010

A different kind

A different kind of quilt along.


I think this will be well worth watching and reading. Maybe I will increase my skills!

Finished Product

I have a finished product.  This is the little table topper that I made using the Star variation from my AccuQuilt GO! video.   (The pattern for the "Dance of the Japanese Lantern's" pattern should be done this weekend with any luck!!!)

So just pictures of the topper over the back of a chair, the back of  the topper and some detail shots.
I quilted it with straight lines through the design area.  In the border I did some very dense pebbly quilting to give texture to the border.


OOOPS somehow I lost the picture of the back.  Sorry!

Friday, August 13, 2010

Variation on The Friendship Star Topper

SI finally got some time to sew again. I had the Variation on the Friendship Star started from my video. So I made the rest of the blocks to make a 2 foot square table topper.  This is my own design.
Friendship Star Topper
Don't you love this fabric?  It is hand dyed. I got it from Ricky Tims.

I used the AccuQuilt GO! cutter with the Chisel Die and the 3 1/2"  Triangle Die to cut the pieces. I love how the center, where the four blocks are joined form a star rotating in the opposite direction.  This would be lovely done in solids also. If you do that, go for strong contrasts.

Simply by adding more blocks, you could make this into a bed quilt. If you are really diligent, you could make the stars that are created by joining the blocks a different color and have each color spin in different directions.  This would require using three colors of fabric.

If you make this design, please post a picture and send me a link to it. I would love to see what you do with it.

Thursday, August 12, 2010

Fallen?

Have I fallen off the face of the earth?  No, my dear readers.  I have not fallen.  Life has conspired to keep me very busy.  Work has taken more of my time than usual.  I really feel like I need to post something clever on my blog. Sadly, I don't have anything interesting  to post today.

I had a flash drive failure with a document that took my sewing time last night.  The document was the pattern I am writing and it was G -O - N- E  gone, gone gone.  YIKES!  I had decided that I could start from scratch and write it all again.   The prospect wasn't a happy one.  I had spent a LOT of time writing and (hopefully) perfecting what I had already written.   Today I checked another computer that I was SURE it wasn't on.   I found a copy, I am sure it isn't everything I had perfected. BUT I don't have to start from the beginning.

My Goal is to have the pattern FINISHED by August 23rd.  There are a few things that could hinder that.  I will be patient sitting a friend who is having surgery on his arm next week on Thursday and Friday. That could be a blessing (time to type and proof) OR a curse - too busy doing "nursing/waiting on" to work on it. Only time will tell.

I hope you are having more sewing time than I am.

Hey, I noticed that my followers list is growing!  I see a few of you on that list that have never left a comment.
Here is your chance.  Just say "Hi" or something.  Comments are welcomed and it encourages me to post.  Tell me what YOU would like to see on my blog.  (I am not promising anything, but I do like to keep you happy.)

Gene

Sunday, August 08, 2010

My First Quilt-making Video

I know a number of my readers are Fans of AccuQuilt on FaceBook and have already seen my demo/instructional video for cutting chisel shapes on the GO! cutter.  However, some of you haven't seen it, and I want to share it with ALL of you. This video also shows a quilt block I designed using the chisel shape AND a triangle shape.
Plus you will also get to hear me talk. (some folks actually think I have an accent! can you believe that???) AND you will get to see the backdrop which is my Japanese lantern quilt. This is my first ever instructional video. I did it without a script and in one take. So, I am sure there are some errors.  But you should know that Ricky Tims said nice things about it.  (yeah, I mentioned him in the video!)

I must say, it was a learning experience. I hope you learn something too. Enjoy!


Thursday, August 05, 2010

Pictures of the Cooling tie

I am posting the pictures for the post yesterday about the cooling tie.   I will repeat the instructions after the picture so you don't have to hunt for them if you want to make these.

The entire Cooling tie.  I left these hanging to dry so it is partially dehydrated, but it still feels cool.


Double sewn seam.


This is the end.  There are no crystals in this part so it is flat for tying. You could angle the end if you want to fancy it up a bit.


And a silly picture of how I wear these.  The blue of the fabric almost disappears against by blue FOCUS tee shirt.
One reason these are so effective is that the cooling part is right against the carotid artery in the neck. But they also make great sweat/head bands to cool at the temples.  (think an ice pack on your hot forehead ---ahhh!)  Either way they help to keep you cool.


Repeat of the directions:

Cut a strip of fabric 4 1/2 inches wide (I used width of fabric.) . Fold lengthwise right sides together. REDUCE your stitch length.  I set mine at 1.6    Sew a 1/4 " seam along the long edge. This makes a tube that you will need turn so the right sides are out and the seam is inside.

Fold the tube in half  to find the mid point. Sew a seam across the midpoint and reinforce it well. I sewed back and forth over mine to make a strong seam.  Now pour a table spoon of the crystals in one end.  Shake them to the center seam.  Sew a seam about 9 or 10 inches from the center seam trapping in the crystals.
Repeat at the other end, adding crystals and sewing.  Then turn the ends of the tube in to make the ends neat and hem close to the edge.

The tube is soaked in cold water prior to wearing it. To wear it either tie it around your neck or your head  I find hanging it around my neck and tying loosely to be perfect.  It will really help keep you cool when you have to get out in this unbearable heat.
If you make one (or several) I would love to see pictures of you wearing them.

Wednesday, August 04, 2010

Is it Hot enough?

Folks the heat has me just drained of energy.  I am not getting much done.  Today on my indoor/outdoor thermometer the reading for the high outside was 105.4 F

Now the sensor is on the north side of my house IN THE SHADE, so  that is just too hot.  To help keep cool, I made some cooling ties last night.
The concept is simple. You need some fabric yardage and a container of water absorbing crystals.  The crystals I got at WalMart in the plant department. The ones I got are Schultz Moisture plus.  They are used in the potting soil to retain water and keep the plants moist.

Cut a strip of fabric 4 1/2 inches wide (I used width of fabric.) . Fold lengthwise right sides together. REDUCE your stitch length.  I set mine at 1.6    Sew a 1/4 " seam along the long edge. This makes a tube that you will need turn so the right sides are out and the seam is inside.

Fold the tube in half  to find the mid point. Sew a seam across the midpoint and reinforce it well. I sewed back and forth over mine to make a strong seam.  Now pour a table spoon of the crystals in one end.  Shake them to the center seam.  Sew a seam about 9 or 10 inches from the center seam trapping in the crystals.
Repeat at the other end, adding crystals and sewing.  Then turn the ends of the tube in to make the ends neat and hem close to the edge.

The tube is soaked in cold water prior to wearing it. To wear it either tie it around your neck or your head  I find hanging it around my neck and tying loosely to be perfect.  It will really help keep you cool when you have to get out in this unbearable heat.

Sorry I don't have pictures.. I was just too overcome by the heat to make them.

Monday, August 02, 2010

Final piece of the puzzle

Over in my sidebar is a button for the Jelly Roll Sampler Quilt Along 2010 at Moose on the Porch Quilts blog.  We started on March 1st and made a block every two weeks.  I was always ready to make the next block.  And now suddenly, WHAM!  today the last block was posted.  I was finished with the block before I realized that I was at the end of the quilt along. 
Next up, we will sash and border the quilt top.   Konda said we would make the quilt 58" by 72" but I am thinking I will just make my outside sashing wider and not add the final border.  Thus mine will probably be 48" by 62" which is  a nice lap quilt size, I think.  


Here is that final block for you to see how I did mine.  I plan to do the sashing in heavy muslin with leftover pieces of the jelly roll as cornerstones Although leaving out the cornerstones would eliminate the point matching (which you can see in the picture I don't always succeed in doing.)


Block 12 from Blue Nickel Studios

Wanna win a Silhouette cutter?

Vanessa at V. and Company is having a great giveaway


That's all for now! .

Sunday, August 01, 2010

Getting There

This quilt is s---l---o---w---l---y getting finished. I have two more "joins" to make as it is in three big pieces at this point. AND then I have to bind this puppy and it will be FINITO, FIN, Finished, fini, fertig!
Don't ask what all those languages are either, I am not sure.