Monday, December 30, 2019

Back to Bargello

I have not forgotten the bargello.  
Those pieces are right where I can see them every day.  
I want to have the bargello section of the top done this year. 
So now I am on a tight schedule.
The upper half is finished. 
Aren't those colors luscious?
 When I took photos, I had 10 strips of the bottom half sewn - there are 45 strips total.

The wind started blowing as I started to take photos- why does that ALWAYS happen?
 Right now, I have 14 of the 45 sewn.  
But I have all day tomorrow to sew. (Tomorrow is New Years Eve.)

Will I make it?  Will I even come close?  
The answer will depend on how I feel tomorrow
or
What comes up that I may need to do instead of sewing. 

Time will tell.  But at least I am getting there. 


Until Next Time,  
Stay Creative 


Comments are welcomed. I will reply when possible. Of course if you are a "No Reply Blogger"- I can not reply. Links in comments will result in the entire comment being deleted.

Thursday, December 26, 2019

A couple of days late

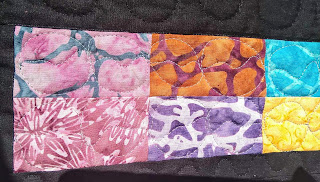
The mail brought this today - a couple of days late for sure but, 

Merry Christmas to me! 


So pretty I had to post two pictures.  I am not an Island Batik Ambassador in 2020, but I will still be using some Island Batik fabrics. 


Until Next Time,  
Stay Creative 


Comments are welcomed. I will reply when possible. Of course if you are a "No Reply Blogger"- I can not reply. Links in comments will result in the entire comment being deleted.

Wednesday, December 25, 2019

Have a Merry Christmas!

Wishing you all a day of Joy and Peace.  I painted this several years ago.


Until Next Time,  
Stay Creative 


Comments are welcomed. I will reply when possible. Of course if you are a "No Reply Blogger"- I can not reply. Links in comments will result in the entire comment being deleted.

Sunday, December 22, 2019

Zipper Pouches

This week I am backing off on the busy quilting stuff.  But I still want to make some things just to satisfy my inner "creative soul."

So I decided to make two more zipper pouches.  I had made some of these Sweet Pea Pods by Lazy Girl Designs  that I showed in my last post. I grabbed some pretty fabric from my stash - this stuff has been in there a very long time.  I don't remember where it came from.

I decided that the green zipper tape would be fun for this set. It is not obvious in the photo but the zipper tabs are slightly different greens. The one in the back is darker.

Now these are ready for quick gifts if I need them.

Monday and Tuesday I will be baking and cooking for our Christmas Day celebration. I am going to attempt a custard pie with a lemon curd topping. It sounds yummy.   I also have a recipe for a lemon pound cake that is low carb and keto friendly.  I am not doing keto, but as a diabetic, the low carb foods in the keto diet can allow some treats that I would otherwise have to avoid.  And most of us love to have a nice bit of cake on a holiday.  This one will allow Mom and I to have seconds if we want it.    I hope to have photos of my baking to share with you in a couple of days.  If the recipes work out well, I will post links to them.

Until Next Time,  
Stay Creative 


Comments are welcomed. I will reply when possible. Of course if you are a "No Reply Blogger"- I can not reply. Links in comments will result in the entire comment being deleted.

Wednesday, December 18, 2019

Some Handmade Gifts - Island Batik 3D take 2

Before the end of December, when my year as an Island Batik Ambassador ends, I decided to do one more 3D project with these lovely fabrics.

I had made some of these Sweet Pea Pods by Lazy Girl Designs.  These are not difficult to make and are great small gifts for acquaintances.   They only require two ten inch pieces of fabric to make two of them. You also need fusible fleece and a zipper and an extra zipper pull.  I bought a lot of zippers and extra zipper pulls on a trip to Mexico.  They were pretty inexpensive, so I always stock up if I am there.

Here are my Sweet Pea Pods.

You will notice that the zipper is one piece that goes all the way around the opening. It is a clever technique to put them in that way. It is also why you need the extra zipper pull - but you get two zippers for the price of one!

I didn't measure them but here is another photo of one with a standard size glue stick inside it.

One of my zippers snagged and may quit working, so I kept that one for myself.  At this time I have charging cables and a phone charger in it. It is going to be my 'cables to go' kit.  It is the perfect size.

Some of fabrics in this project were provided to me by Island Batik  as an Island Batik Ambassador.  However I did purchase one of the fabrics and the rest of the supplies and pattern for the project.

Once you have made one of these, it is easy to line them up assembly line style and make several as quick gifts.

Until Next Time,  
Stay Creative 


Comments are welcomed. I will reply when possible. Of course if you are a "No Reply Blogger"- I can not reply. Links in comments will result in the entire comment being deleted.

Tuesday, December 17, 2019

A Bit of Dyeing

I was inspired to dye some fabric for possible use with the Bargello as borders.  
I am not sure I will like these fabrics with it....but I love them as they are. 

I did one rather large piece (approx 24" by 108") that is blue and green.  
It has some white background remaining.
I like it a lot.
Another shot of it

There is also a mostly blue piece that has a green curve through it. 

The color isn't exactly true, in reality it is a little darker. 
I love this one.  It may work in that quilt.

Next up is a piece that only has the green on it. 
Actually there is a bit of blue but it mixed with the green to make a "bluer" green.
I really love the textures the dyes created in this one.
This could be over-dyed for a different effect, but I love it like this.
The white is actually a very very pale green.
That was a delightful accident. 

Since I had extra dye,  this kitchen towel that I wasn't fond of got tossed in also.
It went from pastel blah to colorfully happy.
I have been using it and will use it much more now. 

There are four pieces of an "orange/red/purple" soaking now.  
I think this is the final soak and all of the excess dye will be soaked out.  
When this is done, the colors don't bleed. I love knowing this trick.
I dye some of my own fabrics now, but I still buy Vicki's hand dyes.
Vicki soaks all her fabrics for two 12 hour soaks before the final wash.
It makes a huge difference. 

Have you tried fabric dyeing?


Until Next Time,  
Stay Creative 


Comments are welcomed. I will reply when possible. Of course if you are a "No Reply Blogger"- I can not reply. Links in comments will result in the entire comment being deleted.

Monday, December 16, 2019

More Bargello and Wondering.....

I have discovered that if I do the bargello in small chunks that I don't get bored with it.  So now I have this much of it completed.

But I have been looking at the pattern - honestly I have been playing with it!  
 I realized that even though the pattern looks like this

If I flip the pieces and join what they have as the "ends" together it will look like this
I think that I like the alternate version better - plus I don't have to remove a piece 
from each strip if I do it my way. Thus the quilt will end up two inches longer.   

Of course, I am planning to enlarge the quilt anyway.  I will add borders to increase the length to 80" and the width to 80" also.  That is, if I can figure out how to do it without it looking odd. 
I am in the process of dyeing some fabric a blue and green for the addition.  I will just 
have to see how it looks later. Right now the fabric is in the rinse bath until morning. 
Then a second soak after which I can wash, dry and iron it.  I love dyeing fabric, but right now my fingers are slightly blue -because apparently my gloves leaked. 

Until Next Time,  
Stay Creative 


Comments are welcomed. I will reply when possible. Of course if you are a "No Reply Blogger"- I can not reply. Links in comments will result in the entire comment being deleted.

Saturday, December 14, 2019

Side Stepping - Squirrel!!!

A package arrived on my doorstep yesterday - I couldn't resist, it was on sale.  So this morning I made  a fabric pull from my fat quarter box to try it out.
 I decided to use a bunch of warm colors with a pop of black and some blue.  Who knows where it will go in time, but that is where I started.

You see, in that package was a new die for my Accuquilt Go! cutter.  

It is a 60 degree equilateral triangle. 
The notches are on the bias sides according to the package. 

I considered a ruler, but to be honest, I don't like using triangle rulers and they get "nipped" when I do.  The die will allow me to explore using 60 degree triangles. Then,  if I "need" a ruler to keep exploring, I can get one.

I cut some triangles with the die. 
you know I love using batiks!
Then I sewed a couple of short rows of them - just to try it out.

I can see lots of possibilities with this shape and this die.  I have no idea what these pieces will become, but I love it already.


Until Next Time,  
Stay Creative 


Comments are welcomed. I will reply when possible. Of course if you are a "No Reply Blogger"- I can not reply. Links in comments will result in the entire comment being deleted.

Wednesday, December 11, 2019

I Shouldn't Have Done the Math!

The bargello quilt is underway. I am glad I love these colors.

If I didn't love the colors in this kit, at this point I would start screaming and maybe never stop. Ha ha
Here are eleven (11) strips sewn together. It is looking fantastic.  I was feeling proud and happy.....then I did the math.   I added up the number of strips and got 90.  I subtracted 11.   That leaves 79 more to go.  Oh my.... that is a lot of "sew a strip, press, get the next strip from the proper stack, find the right place to remove the seam, remove the seam, sew the strip.....and start again for that many more times.
I am thinking that I should have just made star blocks from yardage. LOL.  But I know what when this is complete I will love it.  Unless of course, I just go quietly (or screamingly) crazy.

See you next time!


Until Next Time,  
Stay Creative 


Comments are welcomed. I will reply when possible. Of course if you are a "No Reply Blogger"- I can not reply. Links in comments will result in the entire comment being deleted.

Tuesday, December 10, 2019

Cutting Up

Y'all I have been a real cut-up lately.  Yesterday I was cutting up like nobody's business.  I am fighting the beginnings of a cold so I am spending a lot of time drinking liquids (and thus taking short indoor walks - if you know what I mean.) 

My favorite thing to drink in times like this is tea with some ginger grated into it.  I usually buy a big chunk of ginger and keep it in a plastic bag in the freezer door. (frozen ginger lasts forever it seems) Then I just pull it out and grate it with a small handheld grater straight into the cup. I don't peel it as the peel tends to gather on the top of the grater and is negligible.  As I am writing this I have a hot cup of mint flavored green tea with ginger in it. 

Back to the "Cutting Up" part of this though. 

You remember (hopefully - if you read the last post) that I sewed a lot of strips into sets for making this bargello quilt I am working on.  Those strip sets were sewn into tubes.  Then, following the pattern as carefully as I can, I cut them into strips again.  This is a lot like a "Trip Around The World" quilt except the strips vary in width. 

I got them all cut.  I labeled each stack with the size and the tube it came from. The tubes are pressed two different directions for nesting the seams when they are joined.  Here is my big old stack of strips.
I know the labels aren't easy to read in this photo, so I took a close-up of some of them.
Ignore the "Medical Doctor" scrawl.  My handwriting has always been atrocious.
I even labeled the two leftover chunks in case I need them if something goes awry.
After writing the last post,  I found that it was too tempting.  I ordered another kit like this one.  Yes,  it seems I led myself astray.  I know that I really don't need more fabric.  But, I am thinking that I could use the same colors and make a "Trip Around The World" quilt also.  I just love the colors in this kit.

To quote a country song that I love "Lead me not into temptation, I can find it all by myself."

Until Next Time,  
Stay Creative 


Comments are welcomed. I will reply when possible. Of course if you are a "No Reply Blogger"- I can not reply. Links in comments will result in the entire comment being deleted.

Monday, December 09, 2019

Up Next - Bargello

Back on December 24 of last year,  I purchased a Bargello Beauty quilt kit from Craftsy/Bluprint.  Then I found out that I was chosen to be an Island Batik Ambassador, so the kit went in the "someday" pile. 

Due to some family issues, I wasn't sure I could fulfill the obligation to be an Ambassador in 2020, so I did not re-apply.   After finishing my final Ambassador project, I felt a bit lost.  My surefire cure for any kind of blues/sadness/"change in life" is to start a new quilt project. So the bargello kit came off the shelf and was happily opened.

The kit is all solid color fabrics and looked something like this:
Lots of lovely colors - four of each - and even a chunk of black for the binding.
The quilt is supposed to look like this when it is finished.
Pattern Designer Carl Hentsch
I say, don't hold your breath! Ha ha. FYI, the kit is on sale at BluPrint.  When I was writing this, the price was $28.40. (That is less than I paid for it.)  There are 72 strips in there so it is a great deal.

The first part of making it is a bit boring.  You sew 72 straight seams to make four tubes of strips that you will then cut into various widths.   Here is one section sewn and joined  except for the final seam to make it a tube.
It is a beautiful series of colors.  I considered just sewing the four sections into a simple quilt.  But I really really want a Bargello quilt in my collection.  So I sewed all the sections into the four tubes.
This will make a bargello quilt that is roughly 55" by 70.  I am considering adding borders to make it bigger. 

What quilts are in your "I need to make one of those" list?

Until Next Time,  
Stay Creative 


Comments are welcomed. I will reply when possible. Of course if you are a "No Reply Blogger"- I can not reply. Links in comments will result in the entire comment being deleted.

Saturday, December 07, 2019

Stepping Up Tutorial

Wow,  the response to my "Stepping Up" quilt was fantastic. I think it was seen over a thousand times counting this blog and Facebook.  The interesting thing is how well it hides the construction method.  I received so many questions.  If I were a pattern writer, I would certainly write up and publish a pattern. Lucky you,  I will just show you in this post how it is constructed. 

First let's look at the quilt again.
I promise you that it is so much easier than it looks.  Let's see how I made it.

First I pulled out fabrics and the die to make it. In fairness, I used the Qube 8" companion set angles in the original quilt.  For the demo, I am using a single die, Triangle in a square.  I think it is smaller.
This is an older single color foam die.  I marked the shapes with a marker.
Then I started cutting fabric in strips. For this size die, I cut the strips 4.25" wide.  Then I cut a colored fabric on the big triangles and a gray on the side triangles.

I repeated that step with another color and black instead of gray.
If you are using a print fabric you will need to be sure to cut the gray face up and the black face down (or vice versa) so that you have both angle directions to complete the block. Since I am using batiks, I didn't have to worry about that.

I then made a single unit.
It is important that you consistently place the black on one side and the gray on the other the same every time. This makes the layout work. 

Then on a design wall or on a table (or even the floor) - lay your design out and look at it. In this demo mine are not sewn, but you can, and probably should,  sew all the units before you lay them out.

The reason I didn't sew these first is so that you  can see the individual pieces.  You may notice that this is NOT the exact layout for my quilt.  I only cut a few pieces to take photos for this demo.  I realized that the layout was different after I was already writing the post. (Bad me, I did not redo the photo.)

So what will I do with these pieces?  I am going to make a companion pillow for my quilt.  A special thanks to Island Batik for providing me with these fabrics as an Island Batik Ambassador.  I am sure I will eventually use every scrap possible.


Until Next Time,  
Stay Creative 


Comments are welcomed. I will reply when possible. Of course if you are a "No Reply Blogger"- I can not reply. Links in comments will result in the entire comment being deleted.

Thursday, December 05, 2019

Stepping Up - December Island Batik Challenge: 3D

Welcome to my 3D quilt for Island Batik.   I had a beautifully sunny day to take a few photos out in the cold.  But seriously, look how blue that sky is today.  Of course I want you to feast your eyes on my quilt, also. There is a closer shot later. So don't strain.


The challenge says: "Explore the world of 3D using your creative talents for this month's challenge. Bring your inner artist out by using optical illusions, textures, trapunto or whatever else will make your quilt pop into life." 

I think I nailed it!  I have always loved the Baby Blocks/Tumbling Blocks quilt pattern but the number of y-seams was just too daunting. So, for this challenge I played around in Electric Quilt 8 software to design a version that is simple to make. 
My plan included using the Accuquilt Go! Cutter and the Triangle in a Square die to make the blocks.   Each colored triangle was paired with one black and one gray side. When they are joined together they make a short Tumbling block design.  (Short in that the blocks are not "cubes" but a shortened cube.)

It was surprisingly simple to sew.  The challenge was in ironing all the seams neatly so that it would lay flat.
The quilting was fun.  I chose to use a lovely Silk Blend batting by Hobbs Batting.  It quilted beautifully.  I did curved lines in the top of the 'cubes.'  In the black and gray portions of the 'cubes' I did long  u-shapes to press that section down a bit more. 

 
In the colored sections of the borders, I quilted circles with a wavy line running through them. 


In the solid sections of black and gray that are not in the design I pebble quilted  because I love the texture.  The exceptions are the narrow inner border, which got a simple wavy line. And the outer border which got a variation on "ribbon candy."


I am very happy with both the piecing and the quilting on this little quilt. 
The quilt measures 34" wide by 36" long. The design is my version of a Tumbling Block quilt that has been simplified.  I love the 3D effect of the blocks shifting as I look at it. 
It is just right when I need just a little something over my lap. But it would also be a great baby quilt.

Now here is the closer look at the entire quilt that I promised earlier.


The Island Batik fabricHobbs batting, Aurifil thread, and the Accuquilt Go! cutter were given to me as an Island Batik Ambassador in consideration for promoting these brands while creating the challenge quilts. Thank you all so much. I hope I can work with you again in the future.

This will be my last post as an Island Batik Ambassador as I did not apply for the program for next year.  The simple reason is that I am choosing to spend more time with my Mom and family.  I had a wonderful time creating all of my Island Batik projects and I have purchased more Island Batik fabrics - so you will see more projects featuring these fabrics.


Until Next Time,  
Stay Creative 


Comments are welcomed. I will reply when possible. Of course if you are a "No Reply Blogger"- I can not reply. Links in comments will result in the entire comment being deleted.