Thursday, June 30, 2016

A Couple of Blocks

I started taking a new class on Craftsy a few days ago.   The class I am taking is titled Quick Strip Paper Piecing.  I originally started quilting with a local class on paper piecing.  But, I seemed to have forgotten how to do it - and honestly I thought "this takes too long."
After watching the instructor, Peggy Martin,  on an archived webcast,  I was curious to try it again. So I decided to take the class and see what happens.
The first block in the class is called "PinWheel Polka"   There are four sections that join to create one block.
The cool thing about these is that when there are four or more of them set into a quilt, the secondary pattern repeats the pattern although in different colors.

Of course,  errrrr.....  went outside the box and found a different pattern elsewhere for a Woven Star. This one looked similar to some of the blocks in the class but I wanted to do this one....so I did.
That dark color is a dark purple. This one isn't perfect because I didn't get the four sections joined exactly perfect -- but I like it just fine.

An amazing thing with this class are the nice included patterns and an e-book on paper piecing.  This is   Peggy Martin's  book on Paper Piecing that sells in paperback on Amazon for $29.95 or in Kindle format for $9.99.   This class is certainly worth the price of admission.
I know I am enjoying it.  I do love learning new ways to do things.


Comments are welcomed. I will reply when possible unless otherwise stated. Of course if you are a "No Reply Blogger"- I can not reply. Links in posts may be affiliate links for which I am compensated if you click through and purchase.

Wednesday, June 29, 2016

Fun with Designs and Electric Quilt

One of my friends asked me about using a certain die cut fabric shape in a pattern.  Since the die is  3 1/2" by 6 1/2"  it wouldn't work for her pattern that uses 2 1/2" strips.   But it got my brain clicking. So I fired up Electric Quilt and had some play time.

I discovered that I can use that die along with half square triangles to make tilted spools.  Here are some samples:
Tilted so the centers form diamonds. 

And the same in an alternate colorway

using the same fabric for some of the chisel triangles

and a quirky take with a triangle in a diamond shape. 
I am putting the spool idea here for you to use if you like. Please remember to give attribution and a link to my blog if you use it.  
I want to make one of these but I have no idea when I will be "caught up" enough to start it. So if you make it before I do, I want to see it. 
And if you use EQ7 and would like the project file, just ask nicely.
Comments are welcomed. I will reply when possible unless otherwise stated. Of course if you are a "No Reply Blogger"- I can not reply. Links in posts may be affiliate links for which I am compensated if you click through and purchase.

Saturday, June 25, 2016

Sidestep Saturday

Here is a change from my normal posting this week on quilting.  About 6 weeks ago, I took some of my woven fabric and made a boat neck top. It is always a bit daunting to cut into fabric you have woven.  This is one of a kind, can't be repeated fabric - at least it is when you weave in the manner that I weave.  But if you don't use the fabric to make things, what use is it?
So, I plunged in with two different pieces to make this beauty.
Ouch!  that "morning" sun is already too high and strong for an outdoor photo.  Let's go inside and try again.
Here is the first photo of the front.
And the second one of the front, just a slightly different angle
And the back view
Yes, whomever wears this will look good coming and going.   I love the way these two fabrics played together so nicely.

Now for you creative types who need  want supplies,  Craftsy has a supply sale running this weekend. The sale runs through Tuesday at 11:59pm Mountain Time. Just click my affiliate link to get there for up to 60% off
Comments are welcomed. I will reply when possible unless otherwise stated. Of course if you are a "No Reply Blogger"- I can not reply. Links in posts may be affiliate links for which I am compensated if you click through and purchase.

Wednesday, June 22, 2016

Hearts ROY G BIV

After deciding to turn my donation blocks for the Orlando MQG into a quilt to send instead, a new plan was necessary.  Some heart blocks were already sewn so I wanted to put them in there.
I played with some designs in Electric Quilt.
First I did a simple grid pattern
not my favorite- try again
Better, but keep trying
I like it but not sure it is just right
Hey,  I like this one and it follows the "theme" a bit better.
So I gathered fabrics and started the layout, cutting and sewing part of making a quilt. I had enough heart blocks -with one left over. Maybe that one will go on the back. 
I have it in three row sections that I will quilt in pieces and then join - a variation on quilt as you go
I put them all on the bed and tried for a good photo.  That didn't happen so here are two "not so good photos" to share the idea of what it looks like.

(no I didn't make the bed, I just sort of straightened the sheet.) 
So, now I get to layer and start quilting it. I haven't decided on the quilting yet..but it will probably be something rather simple and a larger motif so that it doesn't take me days to do it all.  The quilt will be roughly 50 by 60 inches. 

In other news,  one of my  enablers mentioned that she is taking Beyond Basic Machine Quilting on Craftsy.  I couldn't resist taking it too. Someday I may be a really good free motion quilter.  I have found that each class I take adds a bit to my mental stash of ideas.  Plus doing the exercises really kicks up the skill levels.  Hmm.  I may do some classwork on the above quilt. 
Time to get started. 
Comments are welcomed. I will reply when possible unless otherwise stated. Of course if you are a "No Reply Blogger"- I can not reply. Links in posts may be affiliate links for which I am compensated if you click through and purchase.

Sunday, June 19, 2016

Doodle Doodle

One of the comments on my last post  was from Caroline (she gets the email version.) She mentioned that the points could alternate if you do the triangle version.  That would fill in the "odd" areas that were left un-quilted.
So if you did this as an all over design, you could do it in rows and certainly use the triangle version nicely.
I grabbed my pad and pen to try it.
Wow that creates a very stylized design that reminds me of an Art Deco border design. This would actually be great for a quilt border.

I have the machine set up for sewing blocks for a project I am working on- so I haven't tried stitching it yet. It will be on the "to do" list.   I also want to doodle it some more and see if I can take it around a corner.  When you are using something as a border design, it is really nice if you can make it go around a corner.

And if you are shopping - please remember my affiliate links.  They do help support my creative efforts.
Comments are welcomed. I will reply when possible unless otherwise stated. Of course if you are a "No Reply Blogger"- I can not reply. Links in posts may be affiliate links for which I am compensated if you click through and purchase.

Saturday, June 18, 2016

Doodling - Pen then Thread

Free motion quilting is a lot like doodling.  I have taken several free motion quilting classes on Craftsy. And a theme I have heard repeated is "Doodle the design before you start quilting it."  So today, I was spending some odd minutes doodling designs.  Suddenly, I felt a firm KICK right in my creative backside.  A little voice said, Why not try doing a design that starts with a spiral and then has a rectangle or triangle around it?  The voice sounded a lot like a muse, so I played along.  First I doodled spirals in triangles.  It worked but was hard to make it go where I wanted it to go.  So then I tried it with rectangles.  The little voice said Now that looks a lot better.   And it did.  Of course the doodles are scattered over the page of my poor notepad.
I started in the middle of the page.  Perhaps that speaks to my lack of organization. Ha ha. But the part at the top was looking good. So I morphed it in triangles.  That works but there are odd unquilted spaces that won't fill an area as well.
Time to put the thread to a quilt sandwich and see how it works for real!  Yes, muse!  I hear you.
Of course, a quilt sandwich was not ready so it took a few minutes to prepare one. Then this
Two photos but the same quilting - hopefully one of them is clear to you.
 I started small then decided to see how it works larger.  I played with the triangles - but as you can see those unquilted odd spaces are not very pleasing.   I even played with a few variations like changing the direction of the spiral.   Yes,  this will work for real quilts.
Then, I giggled and did a happy dance.

Remember, Dance like you don't care who is watching.  Have a great weekend.
Comments are welcomed. I will reply when possible unless otherwise stated. Of course if you are a "No Reply Blogger"- I can not reply. Links in posts may be affiliate links for which I am compensated if you click through and purchase.

Friday, June 17, 2016

My Heart is ....

My heart is saddened by hate and violence.  My heart is touched when someone reaches out to help or show love to others.

This morning while reading blogs, one touched me.  Lisa, at In the Boon Docks, mentioned that the Orlando Modern Quilt Guild is collecting for the survivors and families of the victims of the shooting at the Pulse nightclub in Orlando.  So, following the link I found more information.  There is a list of things that would help.  I have opted to make some blocks as I have lots of fabric and can do that for them.  The request for blocks is that they have a heart or hearts on them;  bright -preferably rainbow colors; and make them 10.5 inches (finish to 10 inches.)
So, I grabbed a rainbow of colors and cut strips.  Then I made them into blocks.  But first a test block:
Okay it appears to be working.  So I made some more.
I did the one on the bottom right because I messed up the cutting-- it was too short, so I improvised.  I may like it best of all.  I may make a few more, but I will try to find a fabric in my stash that I can use for the entire heart.  Or I may make a different block and add hearts on it another way.

My heart goes out to the family and friends of those who lost loved ones - and to the survivors who surely need to be assured that the world is not a terrible place;  that they are loved;  that they are important.   I don't talk about my religious beliefs on my blog usually, but I have seen such hate spewed from people who claim to be Christians that I must say this. Jesus specifically told us to LOVE others.  We are also told that judgement is not ours but God's.

Now I ask you,  please do not post any negative comments.  It will hurt my heart, but I will heal and I will delete them.  As this is "my house" on the internet,  I do get some say in what is said here.  I appreciate those of you who understand.

Comments are welcomed. I will reply when possible unless otherwise stated. Of course if you are a "No Reply Blogger"- I can not reply. Links in posts may be affiliate links for which I am compensated if you click through and purchase.

Thursday, June 16, 2016

Four of Them

Following my own suggestion, I made four of the economy blocks by chain piecing them.  It did go much faster except for the bobbin that messed up and caused me to sew with air for several pieces.
I also used my suggestion to alternate values. Since my centers were multicolor and multi value, I was able to use the same center fabric for all the blocks. (and that is a print fabric, I did NOT piece tiny bits to make the center.)
They all have nice value changes, but it obvious that the two outer rounds affect the appearance of the center square.  The two with the dark touching the center seem to pop a bit more to me.  This tells me that the center square fabric is toward the lighter end of the value scale.
I will probably make more of these and see what I come up with as a layout.  I may add some other pieced blocks with it.
Comments are welcomed. I will reply when possible unless otherwise stated. Of course if you are a "No Reply Blogger"- I can not reply. Links in posts may be affiliate links for which I am compensated if you click through and purchase.

Wednesday, June 15, 2016

I Keep Seeing -So I tried it

One thing about social media is that you see things. New things, old things, all sorts of inspiration pop up in my feeds. One thing that I have been seeing a bit of lately is the Economy Block.  Or as I call it a "Square in a square,  in a square."
So I found a tutorial that is not paper pieced and tried it.

I used two different hand dyed fabrics for the inner section. (Hand dyed by Vicki Welsh)  I really love the brown and the shibori pieces.  Then I used a couple of charm squares for the other section.  I don't think I made good color/value choices as the inner square "bleeds" into the brown corners. But, this is why you should make test blocks - you learn from them. I should have used the brown for the outer corners.   However, it was fairly easy to make and it came out at an unfinished 5 1/2 inches - just as planned. 

The tutorial is at Red Pepper Quilts - just click on that and it will take you right to it.  These are a great block to use for fussy cutting fabric motifs for that center section.  And it you alternate "light, dark, light" or "dark, light, dark" as you do the rounds, this block will really pop.  
Here are a couple of drawings to show what I mean. 
light, dark, light

dark, light, dark
Of course, that center can be a fussy cut, just let the background be the appropriate dark or light for maximum value pop.  

Now,  I suggest doing a couple of these "the slow way" (just the one block at a time.)  Then you should be able to line up your cut pieces and chain piece away at these.  That will save you the time of jumping from  the sewing machine to the iron to the cutting board and back to the sewing machine four times for each block. 

Comments are welcomed. I will reply when possible unless otherwise stated. Of course if you are a "No Reply Blogger"- I can not reply. Links in posts may be affiliate links for which I am compensated if you click through and purchase.

Wednesday, June 08, 2016

How can I Still Use That One?

Before I retired,  I had bought shirts with a work logo on them.  I had several shirts that were really no longer appropriate to wear because of the logo.   Some of them have been transformed with my handwoven fabrics.  But today, I decided to try a bit of something different with this one.   It is a tan cotton button down, that I always referred to as my "gas station attendant" shirt.  (Only those of you of a certain age will understand that reference.)

With some hand dyed fabric that I got from Colorways By Vicki Welsh,  I made some patchwork.  Cutting the patchwork into a circle with a die cutter,  I made the patchwork into an applique.  I got the circle sewn on.  I realized that the area was a bit thick with the original embroidery on the shirt and the pieced applique.  Cutting away the backing seemed like the obvious choice.   So I started cutting. After I got it neatly cut away, I saw something: OOPS!  I had cut through the patchwork too.  (Yes I know I should get the funny looking applique scissors with the duckbill blade.)   Time for a regroup.  Hmm, okay fusible applique over the oops to cover it.   Then it needed a bit of something so I did a bit of thread painting on the applique pieces.  
Here is how it looks.
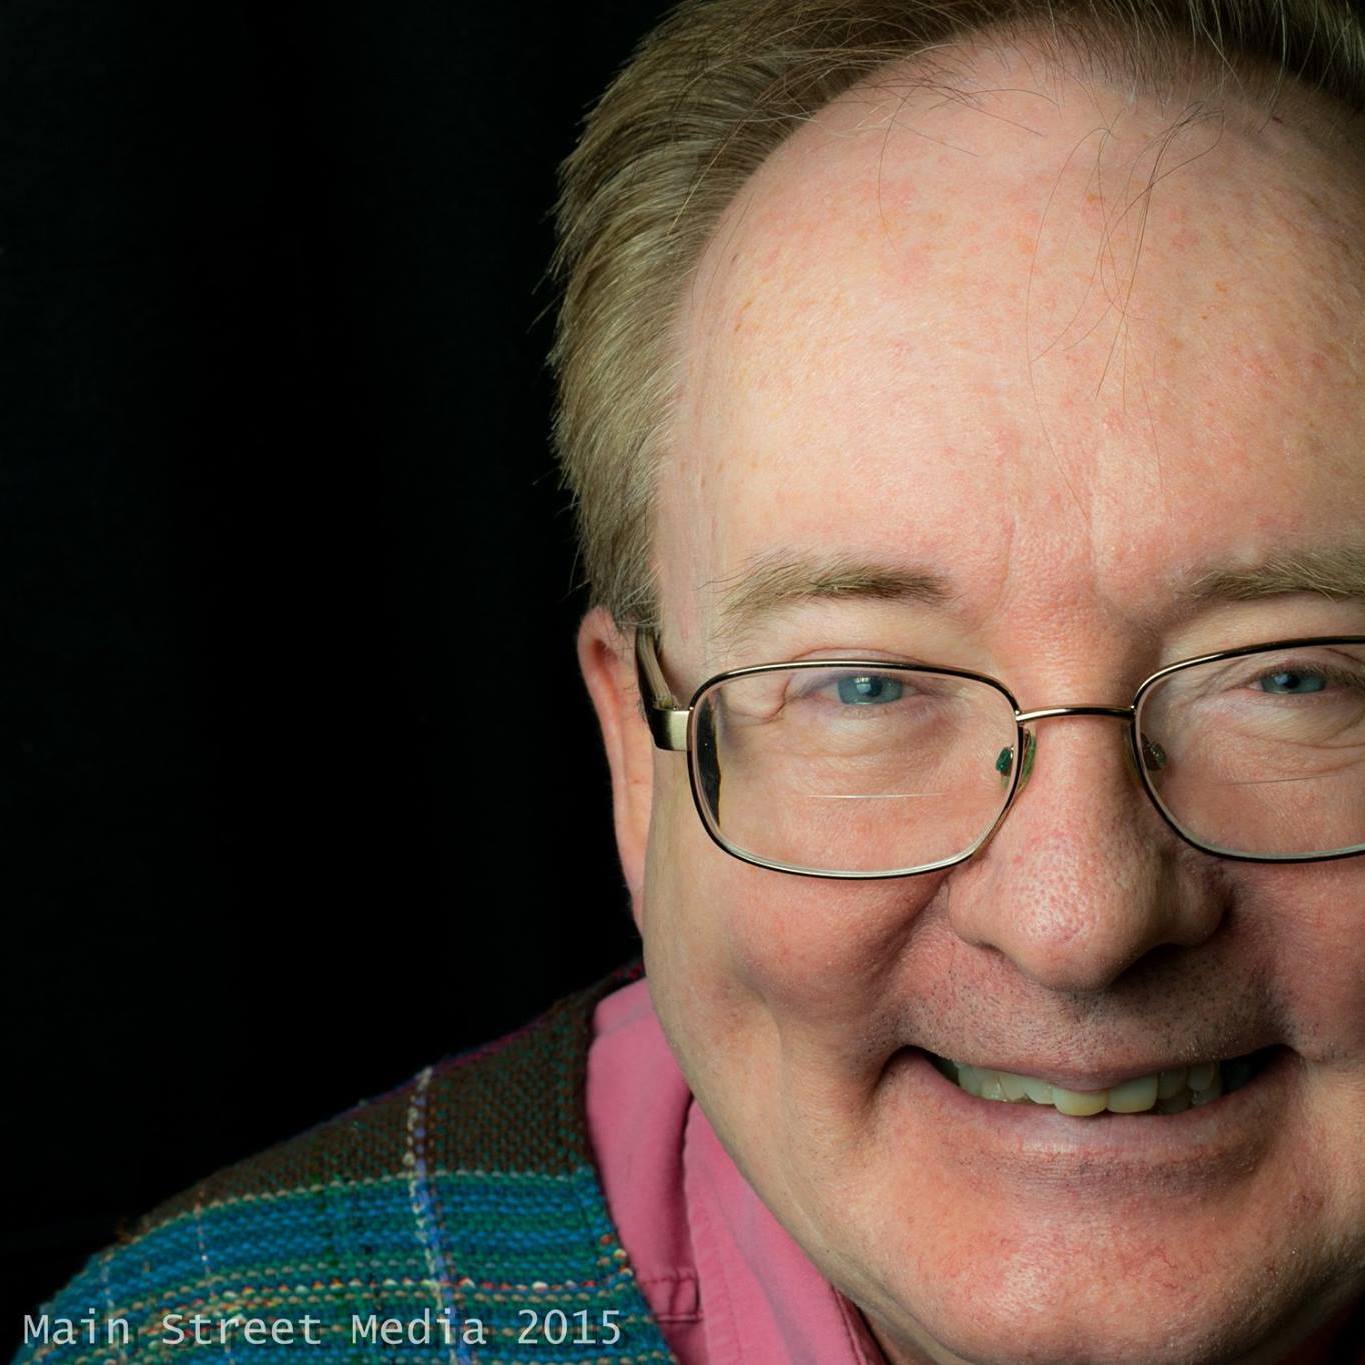
I have not mastered the "selfie" photo
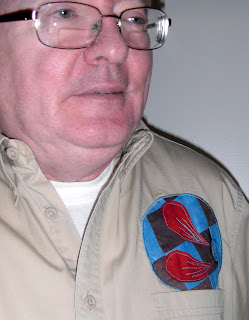
Here is a close-up...just don't look too closely.
The red shapes are done with "Crafted Applique"
I really like having the edge of the applique inside the pocket. It also helps to cover the original embroidered section that way.

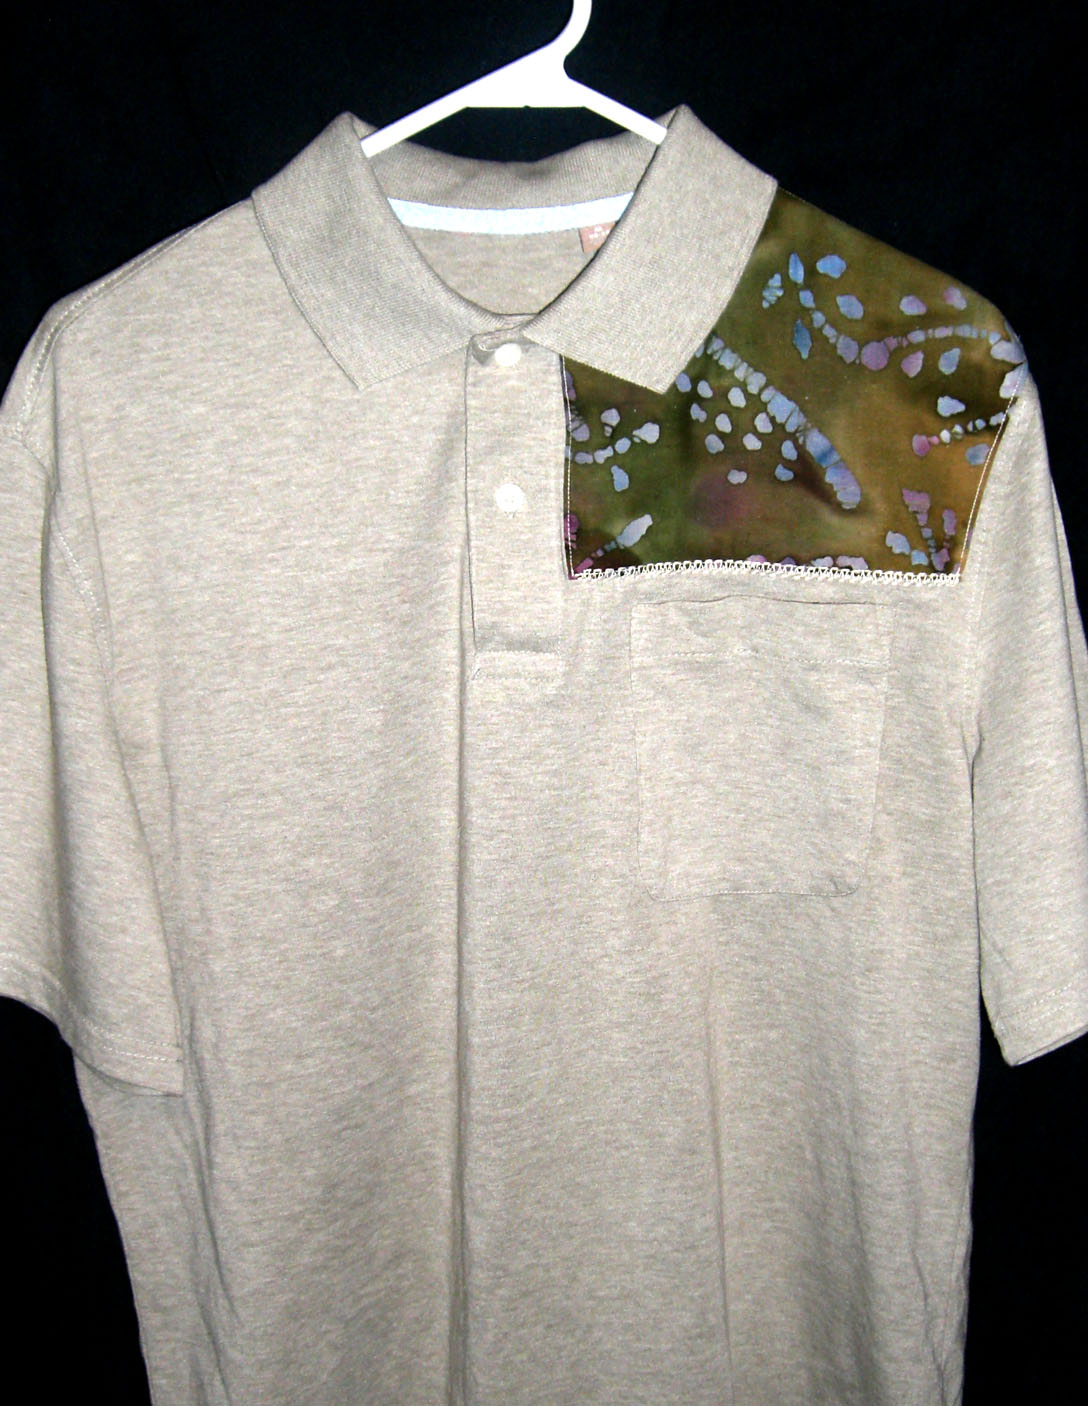
I mentioned other shirts.  Here are another I have recycled this way only with handwoven fabric.
This green one had a logo, but no pocket.  I really like a shirt pocket. Why not add one?  And for the wild muse, how about putting it at an angle?
The funny part is that the pocket is not obvious unless I have something in it. One friend said "I didn't realize it was a pocket" when I pulled a piece of paper out of it. 


My original upcycled shirt is this next one.  It did not have a logo - it was just a bit boring, and I was in a playful mood - and I had some batik fabric that I just wanted tp put on it.

Do you ever embellish your clothes to upcycle them or even to just change them?

Comments are welcomed. I will reply when possible unless otherwise stated. Of course if you are a "No Reply Blogger"- I can not reply. Links in posts may be affiliate links for which I am compensated if you click through and purchase.

Monday, June 06, 2016

Piecing Play

A crazy idea to try another convergence quilt started this.  Of course, being the way I am, I changed the directions.  The idea was to do a Divide and Conquer convergence.  But then I wanted to use a Fibonacci sequence for the cutting.  LOL... A lesson I have failed to learn and repeated "Don't try too many new variations in the same new project"
It looked pretty crappy.  So I decided "It is only fabric" (although it is hand dyed fabric!) and I cut it again and re-sewed it.
How does the title "Convergent Madness" sound?   The interesting thing will be to see where I decide to go from here.  I like it as it is now, but  I am undecided how to finish it.  Perhaps a few days for it to "rest" and it will tell me where to go next.

Shameless plug: If you are shopping for supplies or classes, be sure to check my "Affiliate Links" tab. By going through these links you help me to fuel my supply of creative resources.  And that makes me smile.


Comments are welcomed. I will reply when possible unless otherwise stated. Of course if you are a "No Reply Blogger"- I can not reply. Links in posts may be affiliate links for which I am compensated if you click through and purchase.

Saturday, June 04, 2016

I Can't Stop!

Okay,  Yes, I can stop if I wanted to stop. But I don't want to stop. Creative playtime is too much fun.

 I had this mini-quilt in my stack from a while back.
BEFORE
I had started to quilt it with black in the black areas. But I had not done a lot. The patterned fabric is quilted with a gold/yellow thread that blends in.
So today I started playing again (because creative play is a good thing and I don't want to stop!)
I used ideas and designs from several sources including a couple I sketched out.
AFTER
This has a bit more OOOMPH than using the black.  The parts quilted in black really disappeared.  The creative way to fix that?  I took some acrylic interference paint in "gold" and dry brushed it over the tops of the quilted bits (the parts that puff up.) So now you see gold polka dots and a few tiny gold triangles.

I had experimented on some scraps of the black before I took paint to quilt.  I tried some  water soluble artist color crayons (heat setting will make them permanent.)   But for this it didn't seem to be the right answer.   I will certainly use them on other projects though - perhaps paired with the acrylic paint I used on this.

In case you are wondering, I do realize that this piece is a wild mishmash of designs.  It was a learning and practice experience. And the most important part?  I had fun and learned by doing it.
Comments are welcomed. I will reply when possible unless otherwise stated. Of course if you are a "No Reply Blogger"- I can not reply. Links in posts may be affiliate links for which I am compensated if you click through and purchase.

Friday, June 03, 2016

Wonky Willy Nilly Bright Quilt Top

The Wonky Willy Nilly Bright quilt top is completed.   I got a semi-decent shot outside yesterday.  I really need some clothes line rope instead of the yarn I used to improvise.  Ha ha.
Hopefully you can see from this photo that I allowed the "wildness" to escape the edges of the borders.  There are five places where the piecing extends through the borders. None of the borders are the same width, but rather I allowed the bits of wild piecing to dictate the width that I cut the borders.  At this point there are a couple of places where I may add a bit of applique - or not.  I suppose time will tell.

I also finished quilting a small sampler piece that was inspired by the Divide and Conquer class I took on Craftsy. The first picture is reasonably close in color to the actual piece.
But, as that doesn't show off the quilting lines very well so,  I played in the photo editor and got this:
It is the same photo but with changes to the "levels" of light and dark.  I used the auto setting for it.  At first I said "Oh no." but then I realized that it does show the quilting lines nicely.  I hope you see the "square flowers" in the upper right and lower left corners.  Quilting that motif was quite fun.  I am sure I will use it again.  I also want to do another piece with a centered motif that is surrounded by the grid design.    I also want to experiment with different thread types, weights and colors.

Yes, I see more playtime in the future.

Comments are welcomed. I will reply when possible unless otherwise stated. Of course if you are a "No Reply Blogger"- I can not reply. Links in posts may be affiliate links for which I am compensated if you click through and purchase.