Thursday, July 30, 2020

Curtains and more Plinks

The curtain fabric has been hanging out and waiting for a few days.  I finally got a photo to share with you.  I plan to make it into curtains in the next week or so.

This fabric is very loosely woven so that it doesn't block all of the light. I can always add a layer of thin white fabric behind (or a blind or a shade) if needed. I am considering using it on a kitchen window instead.   I will sew the simple hems and audition it in both places before deciding.

More Plinks

And I mentioned that there were more "plinks!" sounding in my kitchen.  I did all these jars of preserves on Thursday morning before lunch time. 

I used up almost all of my canning jars.  I need to buy an extra flat or two of half pints.  I think a few of them have not made it back when the preserves were given with the request "I would like the jar and the ring back when you are done."   But I know people forget.  (The fig tree is still loaded.)

There was actually another small batch of four half pints made at the same time. They are low sugar preserves for Mom.  Due to the lack of sugar (which is a preservative) they have to be stored in the freezer until used. So, I make small batches as neither of us has a lot of freezer space.


Until Next Time,  
Stay Creative 


Comments are welcomed. I will reply when possible. Of course if you are a "No Reply Blogger"- I can not reply. Links in comments will result in the entire comment being deleted.

Wednesday, July 29, 2020

Plink!

There is a sound that I love.  Plink! a few times a year, when the fig bush at Mom's is producing abundantly, I gather figs and make preserves.
Plink!
That is the lovely sound that the jars make when they seal after the water-bath canning process.  I have it down to a science now and all the supplies are ready to go.

For several days, I picked the first figs that were ripe.  They were cut up and put in containers.  The first few went into the freezer for storage. Then I got a rather nice bag full so I knew it was time to just suffer the heat and get into production mode.

Using some of the frozen and the 1.3 liter container that I had from that last bag full,  I started early in the morning.  (Before it gets so hot!) It has been in the 90s all week here in Alabama.  I started the fig mixture cooking and filled the big canning container and started it getting hot - It has to be boiling to insure that the preserves seal and stay good for at least a year.

Today I chose to make Orange Spice Fig Preserves.  So in addition to the ingredients called for in the Faux Strawberry Fig recipe I used some cinnamon and ginger along with a splash of almond flavoring.  Of course I used orange jello to replace the strawberry in the original recipe.  The magic is that you can use any flavor gelatin that you like. (Mine was a "Jell-O" clone -store brand.)

I got eight lovely half pint jars that went into the canner in two batches.

You can see the fig seeds and fibers in the preserves.  It has a nice texture and this batch tastes delicious.  These jars started sealing (Plink!) before I even finished the second batch.

There was less than one jar left in the pot, so after it cools down a bit, it will go in the fridge for immediate use.

Of course I had to scrape the remainder from the pot - and lick the "spoon." So I know it will be delicious.  Yum!

When you prepare food, you can be creative.  When this started years ago (2011) I just used the basic strawberry recipe.  But my creative brain said "You can make them any flavor that you want! Try it." So I did.  I have made orange, grape, pineapple, lime, lime and grape mixed, wild berry, cherry,  chocolate cherry (add cocoa to the mix - it is amazing!) and probably some others.   Oh yes, pickled peach (add spices to peach jello such as cinnamon, nutmeg and ginger) and Lemon Ginger.   Seriously, the possibilities are almost endless.  Can't find the flavor of gelatin?  Buy plain gelatin and add a drink mix flavor to it.  Yes, it works, I have done it.  But I find it easier to use the available gelatin flavors.  And since it uses two boxes of gelatin/jello, you can mix flavors and create new ones. (Grape and lime for example.)
Be creative with your cooking.

Until Next Time,  
Stay Creative 


Comments are welcomed. I will reply when possible. Of course if you are a "No Reply Blogger"- I can not reply. Links in comments will result in the entire comment being deleted.

Friday, July 24, 2020

End of the Line!

While doing some binge watching on Amazon Prime,  the weaving on my loom moved right along.  I was surprised when I looked at the back beam and saw that the end of the warp was pulled above it.  That inspired me to continue on with the weaving until it was finished.

Then, I removed the woven threads from the loom and tied off the ends.  The fabric went into the wash for it's beauty bath. Now it is hanging in the strong hot sun to finish drying.  I always hang the finished cloth to dry the first time.  After that with cloth made with plant fibers, it can be machine washed and dried just fine. 

Here are some photos of the cloth hanging from my car cover.


The car cover is wide enough for two vehicles. As you can see the cloth runs almost the entire width of the cover.
The warp on this particular piece is one that I created and then dyed in a class.  We used a Japanese dye product that removes some color and adds color back in.   We used resist techniques to cover and protest some of the original warp so that it gets a variegated look in the warp.  I also switched out the weft thread occasionally to make it more interesting. 

I have no idea what this fabric will "grow up" to be.  But I love it.

The reason that I finished weaving this one is to that I can put a new warp on the loom to weave some new fabric specifically for a bathroom curtain.  I have a hand woven fabric hangin there now, but I want to  create a more open work piece to let in more light. 

Now I have to decide on colors for the warp.

Until Next Time,  
Stay Creative 


Comments are welcomed. I will reply when possible. Of course if you are a "No Reply Blogger"- I can not reply. Links in comments will result in the entire comment being deleted.

Sunday, July 19, 2020

A Little Playtime with Bias Tape

Sometimes it is fun to just play with an idea.  The result doesn't have to be a finished piece. Playing allows you to add new life to your creative pool.  Recently I watched a class on Bias Tape appliqué.  In the class the teacher showed how she uses the method for improv work.  It looked like a lot of fun to me. So I decided to try it.

I chose a black background fabric - and Island Batik solid from my time as an Ambassador for them.  And I picked a pale batik with some color in it.  In hindsight,  I wish I had chosen a brighter piece for the bias tape appliqué.  The good news - I can always do this again.

I followed the directions that she gave very well.  But as she didn't finish this piece on camera, I didn't know everything.  But I learned from my mistakes and I made it work anyway. 

Here is the piece I made.

This method has a lot of possibilities.  As for this piece- I think it does too. I can go in and appliqué in the open spaces with symbols or maybe some fussy cut pieces.  Or, I could use bright colors and do embroidery in those open spaces.  I think I am only limited by my imagination.   This could even be a "medallion" for the center of a larger quilt.

Only time will tell what I decide. Right now  I am still thinking of possibilities.


Until Next Time,  
Stay Creative 


Comments are welcomed. I will reply when possible. Of course if you are a "No Reply Blogger"- I can not reply. Links in comments will result in the entire comment being deleted.

Friday, July 17, 2020

Hummingbird Finish - and a New Mask for Me

The hummingbird quilt was actually finished on Wednesday July 15th.   I have it hanging now, but it needs to be blocked so that it will hang straighter.

I am so happy with the quilting on this one.  
The center circle of tumblers are a higher relief than the rest of the quilt. 
They push out and create a dimensional frame around the image.
This is another image of some of the quilting. 
I just love these long-stemmed swirls with occasional pebbles.

Alabama just went under a mask order today. 
(Actually at 6 pm on July 16th.) 
I have been wearing a mask anytime I go into a public space.  
But I decided that I would like a new mask for me. 
I chose an old Laurel Burch fabric that I have had for a long time. 
I think it is  a fun print to use for a mask. 
I am sure that Mom won't like it because the print is of snakes.  
But I like the color and also today it matches my shirt.
And I think of the snakes like "germs" and they go on the OUTSIDE of the mask.
This mask is made using the Dhurata Davies Pattern.  Her disclaimer is that 
you can not sell masks made from this pattern.
You can use it to make masks for yourself and to donate. 

Stay Safe out there.


Until Next Time,  
Stay Creative 


Comments are welcomed. I will reply when possible. Of course if you are a "No Reply Blogger"- I can not reply. Links in comments will result in the entire comment being deleted.

Monday, July 13, 2020

3 of 4 Done

Yes!  This morning I completed the third of the four corners.  
There is only The upper right dark corner to be quilted. 

The texture made by this quilting is so delightful  I can't help but brag about it. 

When I moved to the darker corners, I changed thread to a pale lavender. 
It is not an obvious change but it keeps the thread from standing out too much
and stealing the show. 

Hope fully you can see how the value contrast between the fabrics and thread 
maintain some consistency with this change.
I am starting to get quite excited about the finish on this one. 

Until Next Time,  
Stay Creative 


Comments are welcomed. I will reply when possible. Of course if you are a "No Reply Blogger"- I can not reply. Links in comments will result in the entire comment being deleted.

Sunday, July 12, 2020

Free Motion Quilting the Corners

The Hummingbird quilt is coming along nicely.  I don't have a lot to tell you.  But I just had to show this quilting that is making me smile.
This quilting is creating a magnificent texture that is pretty in its own right.  I love running my hand over this. 

The back is lovely too.
The quilting texture along with the "mystery" batik that I got somewhere years ago is lovely and the play of the design with the quilting makes me smile. 

I have one outside corner quilted and three more to go.   
This is pretty dense quilting so I am taking lots of rest breaks. 

Until Next Time,  
Stay Creative 


Comments are welcomed. I will reply when possible. Of course if you are a "No Reply Blogger"- I can not reply. Links in comments will result in the entire comment being deleted.

Saturday, July 11, 2020

Starting to Quilt the Hummingbird

Friday was the perfect day to start quilting the hummingbird quilt.   I had decided to put an extra layer of batting behind the circle of tumblers.  That donut shaped piece of batting is 100% Wool from Hobbs Batting.  My thought was to make it a raised frame for the image of the humming bird and flower.   But how do you layer something like that???  After thinking a while, I decided to use some MistyFuse fusible web to attached the donut of batting to the top.  That way it wouldn't shift between the top and the rest of the batting.
It worked just great!  I cut small strips of MistyFuse and put a strip at each seam between tumblers.

Then I layered and spray basted the backing to the batting. Finally I laid the top with its trapunto batting attached on top and spray basted that in place.  I did some quilting stitches around the outside of the binding circle and then a line around the outside of the quilt.  That made it quite secure and I can quilt wherever I want -in any order.

I started by putting a ring of pebbles on the binding strip. (I'll show that at the end.)  Then I quilted between each tumbler and around the inside of the circle. 

Now for the fun part!  I did a lot of tight texture stitching  on the hand dyed fabric behind the bird.  I wanted that part to be pushed way back.
I was planning to add a lot of thread painting on the bird and the flower.  But, now, I see how it pops forward against that background and I am changing my plan.  I think I will do  some simple stitching on the fused appliqué for the bird and flower to secure it but try to keep that dimensional effect that I have now. I may do some thread painting on the flower as it needs a bit of definition.  I just don't want to push it back too far.

The outlined tumblers are nicely raised but I may add a bit more quilting on them as I go on.

Oh, yes, here is a photo of some of those pebbles on the binding strip.
Don't you love the hand-dyed fabric the tumblers are made of?  That is some very special "waste" fabric that I got from Vicki Welsh. I love her hand dyes.  The bird and flower are also made of other fabrics that I got from Vicki's shop.

I am excited to get this piece finished and hanging.  I may take down a painting in my bedroom and rotate this into that spot.

Until Next Time,  
Stay Creative 


Comments are welcomed. I will reply when possible. Of course if you are a "No Reply Blogger"- I can not reply. Links in comments will result in the entire comment being deleted.

Friday, July 10, 2020

Adding the Bias Tape Appliqué

This is going to be short and sweet.  After all the prep work,  sewing the bias binding onto the top was almost too easy.  I reviewed all the tips from the class and just went for it. 

The only part that gave me any problems was joining the ends of the bias tape. I used essentially the same method that I use for the binding on a quilt.  But as this was only sewn down on the inside curve, it was a little more difficult  to get it to come out just right.  (I only had to rip it out three times.)  But honestly now I would have to search to find that join.   Once it was joined. I took it to the iron and used steam to make it lay flat.  Then I sewed the outside curve.

Of course there was a lot of extra background fabric behind the center. So I took my sharp little scissors and oh so carefully cut it away. There was only one small oops in the process. 

Relax! 

The quilt top was not cut at all.  The oops was on the middle finger of my left hand.  It was slightly pierced by those very sharp tips.  (I am not responsible for the word that came out of my mouth -and I am not repeating it here.)  It bled only slightly and NOT on the quilt.  I put some liquid bandage on it and it will be fine.    

What do you think?  Should I add a border around this or simply back it and quilt it?  My thought right now is that I will do a facing rather than a binding on this one. 
Opininos?
Until Next Time,  
Stay Creative 


Comments are welcomed. I will reply when possible. Of course if you are a "No Reply Blogger"- I can not reply. Links in comments will result in the entire comment being deleted.

Thursday, July 09, 2020

Brainstorm - YES!

There is a piece I have been working on for some time.  It has sat and matured, been worked on and then sat some more.   I started it in March of 2017.   So that is only 3 years and four months, right?

At some point I ordered a set of purple fat quarters to use as background.  I was planning a pieced background.  But I was dreading the inset seams and such that would be required to make it work.
So it sat for a while longer. 

Then I saw a project photo that made me think - I would like to try that.  It is  clever use of bias strips being appliquéd onto denim fabric.  I remembered a class I purchased that I still have access to watch.  (BluPrint - sadly you can no longer purchase it.)  The teacher is Latifah Saafir and the class is Modern Quilts with Bias Tape Appliqué.    She is a great teacher she has training as an engineer.   I think that helps as she knows how to explain how things work.

I rewatched the class - not to for the project I am working on, but to try the other thing I had seen.  Ha ha.  As I watched,  the flash from the blue hit me when she showed that you can insert fabric into the blocks.  YES! I could use this technique for that project.

Four purple fat quarters were made into a giant four patch.  Then I pulled out the piece and ironed it as flat as it would go.   I centered it (more or less) on the four patch and used a glue stick to hold it in place.


Okay,  that works!  I pressed the gluestick glue so that it would stay securely.   But now,  what color to use for the bias tape?  I decided to pull out a yellow/gold fat quarter of batik fabric.  Yellow is the complement of purple so it should pop nicely - and it will match some of those tumblers.  An added plus is that it goes with the inner circle background.

Now to make the bias tape.  Several years ago, I went to a fiber festival and was given a Simplicity Bias and Piping machine.  I have played with it but never really made a project with it.  Now was the time.  It has two binding attachments - a 1" and a 3/8" attachment.  I knew that I needed the 1" attachement. So I cut the fat quarter, using my tried and true method to "Cut Bias Binding."  Then I sewed the strips together and put them on this machine.
In very little time, I had a nice roll of single fold bias tape to use for my project.

Tomorrow we will see if I can have success using this to appliqué the center onto the big four patch.  If that works then I need to decide if this will be a wall quilt.  (spoiler, I think so.)

I am looking forward to quilting this and doing some thread painting on the hummingbird and flower.  The colors in this piece really make me happy.  And working on this really got me excited to create again.

Do you have any tricks for staying in your creative mode?  I know that watching classes helps me.

Until Next Time,  
Stay Creative 
Linked up with
Comments are welcomed. I will reply when possible. Of course if you are a "No Reply Blogger"- I can not reply. Links in comments will result in the entire comment being deleted.

Tuesday, July 07, 2020

A Bit of Creativity

My creativity has been working "off and on" since the start of quarantine.  Some days I just don't feel it.  But some days, I go into gear and do things.

In the last couple of days, I have sewn more of the random piecing bits together.
Those bright and happy colors soothe my soul and help me to find peace within myself.  So it is a good thing!

I have also been doing more spinning fiber into yarn. (If only it were "straw into gold.")  My bobbin in filling up nicely.
In fact,  I wove up all of the rolags that I prepared and showed in the last post.  So I needed to make more of them.   It occurred to me that I had more silk fiber somewhere. If only I could find it!
I started to look for it and didn't get as deep into the search as I expected.  Why?  Because it was right there waiting for me.

I pulled all of it out of the plastic bags it was shipped in to show you.
It isn't all that pretty wadded up like that, but I knew it would be so nice blended with the bamboo fibers and made into more rolags.  This time I also added in some white "faux angora" - it is a super soft nylon fiber that spins nicely. 

I pulled out the blending board and started playing with fiber.  Fun fun FUN!  Before too long I had made these rolags for my next time at the spinning wheel.

I hope you can see how shiny these are. I love the wide variety of colors in this batch of rolags.  I will have lots of fun spinning them into yarn for more weaving.


Until Next Time,  
Stay Creative 


Comments are welcomed. I will reply when possible. Of course if you are a "No Reply Blogger"- I can not reply. Links in comments will result in the entire comment being deleted.

Saturday, July 04, 2020

Fiber Prep for Spinning

One of my friends who reads this blog had never heard of a spinning preparation called "rolags."   Basically rolags are fiber that is pre-drafted and the fibers are aligned making it easier to spin.
I laid out some fibers in silk and bamboo to make some rolags and show you some of the process.
There is one rolag on the left to show you what we are making. 

 It does require some equipment to make them.  I make mine on an Ashford Blending board - there are other brands out there.
The board came with the blending brush and two rods for forming the rolags.  I added the wooden skewer for my own convenience.

To start you put fiber on the board by dragging it from the top toward the bottom of the board.  You can cover the entire board or just use a section.  I am just using part of the board.  Here I have put the first layer of fiber on the board.  This is "silk waste roving."
Once that is in place the brush is used to force the fiber down into the teeth.  It is brushed from top to bottom -it usually takes me a few passes to get it beaten in.  This also aligns the fibers and starts the pre-drafting.
When it is brushed in/beaten in you can see any spaces you missed.  Those can be filled in with the same fiber or another fiber in the next layer.  I like a nice random yarn for weaving so I just moved to the next layers.  Each layer is added in the same manner.

Here you can see the white is brushed in but the magenta silk is the begining of the next layer. 
Once all the layers are added it looks like this.
Notice those tails at the bottom.  We need those to start the rolag.  To do that we layer those ends between the two wooden dowels. Pulling toward myself and up at about a 30-45 degree angle the fiber is stretched and wrapped around the dowels as it comes out of the sharp teeth on the blending board.
Once you have what you consider enough on the dowels, it is time to pull the fiber away from itself.  This is rolled lightly on the teeth of the board to seal the ends to the rolag. Then the rolag is removed from the dowels.

This is repeated until all the fiber is off the board.  The skewer comes in handy for pulling up the ends and getting them ready for the dowels.  The skewer can slide between those teeth.  You don't want to try sticking your fingers in there - OUCH!

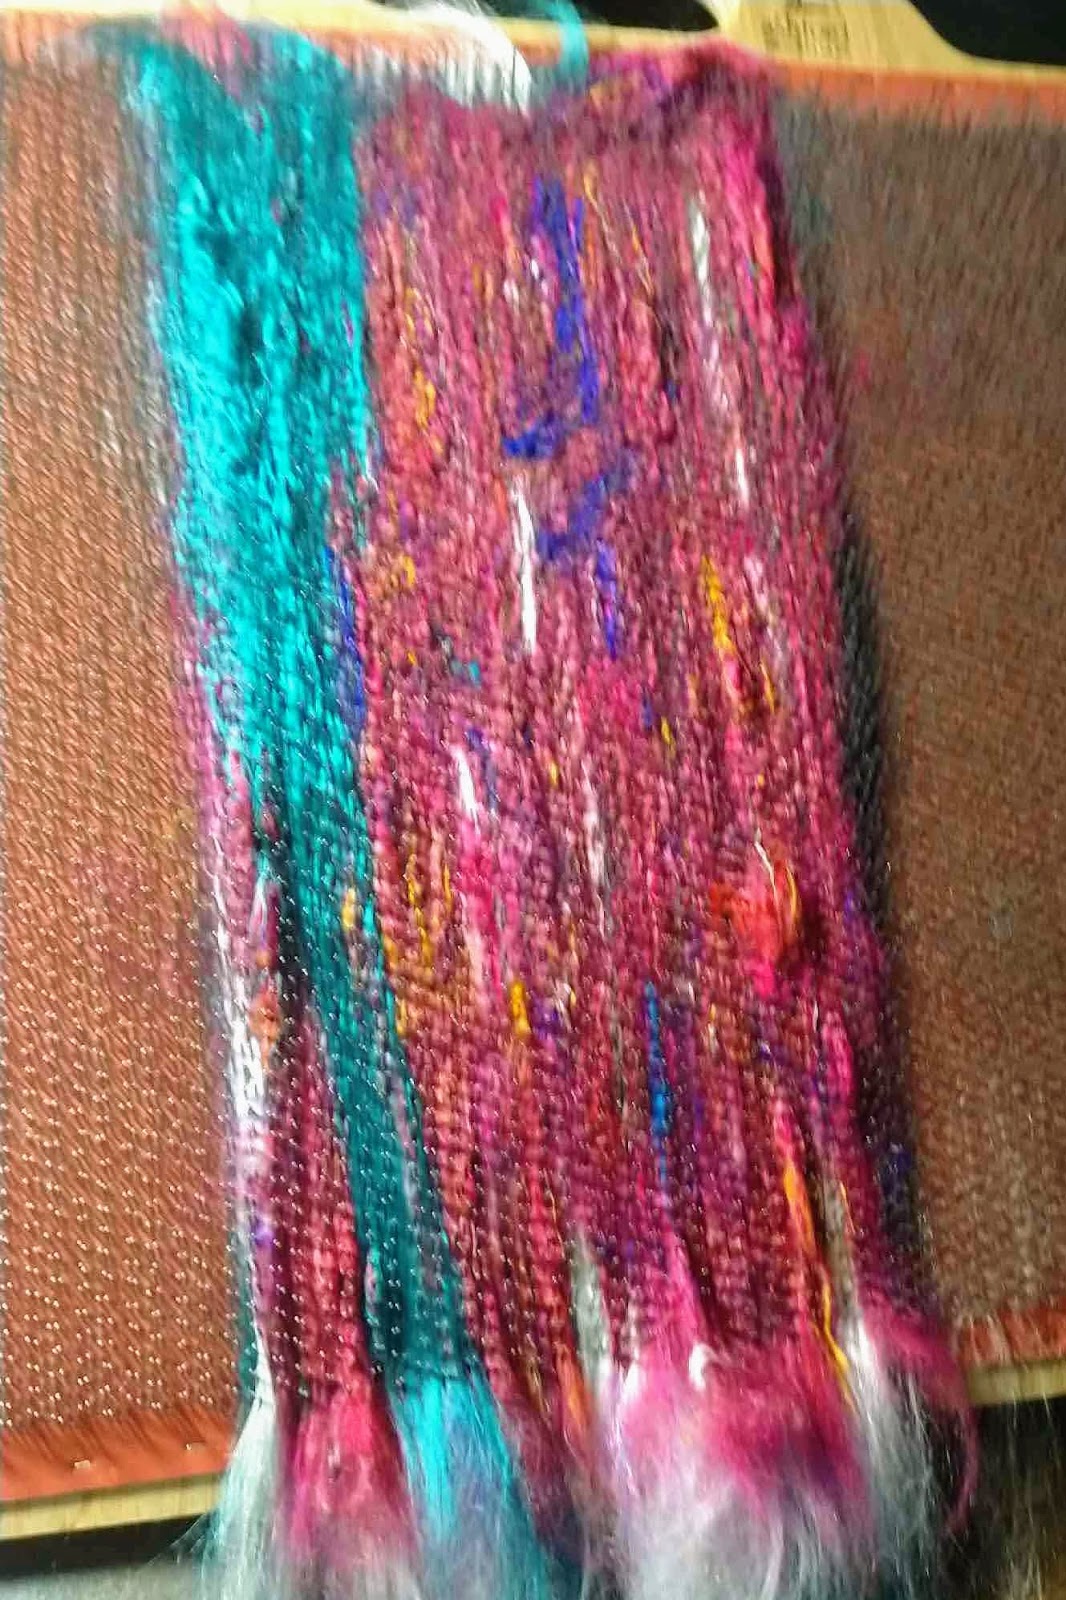
I didn't use the whole board and I did not load it fully. Here are the rolags I created from this session.
The one in front is the last one. The last one is usually a bit "messy looking."  Not to worry, it will spin up just fine.
And that pile of fiber that I started with?  About 1/3 to 1/2 of it went back into the basket for another session.
These rolags will be fun to spin and will create a multicolored yarn that I will eventually use for weaving.

I hope I didn't bore you too much.  And I hope you learned something new - at least one new word for some of you:  rolag.  I don't know if it will work in Scrabble, but it is a perfectly good word. Okay I decided to check.  The online dictionary has this:
Scrabble US/Canada (OTCWL) No
Scrabble UK (SOWPODS) Yes (6 Points)
Words With Friends No
I know that another tool used for fiber prep - diz - doesn't work in UpWords or any of those three either.   I don't think I have tried rolag in UpWords but I wouldn't expect that it would work.


Until Next Time,  
Stay Creative 


Comments are welcomed. I will reply when possible. Of course if you are a "No Reply Blogger"- I can not reply. Links in comments will result in the entire comment being deleted.

Friday, July 03, 2020

Tour de Fleece

Yes, I am late arriving at the "party."  The Tour de Fleece is a yearly event for people who spin yarn.  This started fifteen years ago.  The current year's event started on June 27th.   As for me, I started spinning for this year's event yesterday. 

The Tour de Fleece runs essentially as the same days of the Tour de France bicycle ride/tour.  If you have ever seen someone spin on a spinning wheel, you may have noticed the pedaling action with the feet.   So the bike riders pedal the bikes while we pedal our spinning wheels. 
 (more than you wanted to know?)  

Anyway, I have been spending some of my time spinning yarn.  While it is called the Tour de Fleece,  I am not spinning wool from a fleece.  Rather, I am spinning yarn from silk waste roving and bamboo because I prefer to weave with those fibers or cotton (and I am not good at spinning cotton yarn.)  

Here is my current bobbin with mostly silk but some bamboo yarn. 
 The white that you see is the bamboo that I have used thus far.  But I also have bamboo fiber in other colors and some of it will be added eventually.  Or it may be spun separately and then plied with the silk.  Time will tell.
This pretty ball of stuff is silk waste roving.  While the main color is a magenta hue, there is also orange, purple, blue and yellow in this fiber.  I really love the uneven nubby yarn that I get from this  fiber. 

Until Next Time,  Stay Creative 


Comments are welcomed. I will reply when possible. Of course if you are a "No Reply Blogger"- I can not reply. Links in comments will result in the entire comment being deleted.