Monday, December 31, 2018

Happy New Year - and a recap

The end of the year is upon us. I have an annoying cold but it certainly doesn't have me down. 
I have finished the Flamingo Road baby quilt top. It is layered and basted with some ditch quilting done.  It will not be finished in 2018 but early in 2019.
Yes it is a terrible photo. 
My surprise for the year is that I had more finishes than I realized.

The first was in January. It lives in my recliner and makes me smile when I see it.

 Another finish was the "years in the making" quilt that is on my bed now.

I made a faux stained glass window for a play I was in. The theater has saved it (actually two of them) for possible use in future productions.

I completed the Crumb top - but it is still in the pile to finish "someday." 


The denim squares quilt was finished and gifted to my brother and his wife as a thank you for all they do.

I dyed the fabric and made some pillowcases for my bed. I love them! 

I finished the wonky stars quilt top - and sent it off where it was quilted and finished to become a quilty hug for a chemo patient.

I made a couple of quilted notebook covers.

 I made a LOT of fig preserves/jam that are flavored with Jello and taste delicious.
I also made bread, cakes, pies and did a lot of piecing on projects that are now just PIPs (projects in piles.)  But, those give me a start for 2019. 

Happy New Year my friends.


Comments are welcomed. I will reply when possible. Of course if you are a "No Reply Blogger"- I can not reply. Links in comments will result in the entire comment being deleted.

Sunday, December 30, 2018

Another String Block Layout

I have (ahem) forty-nine string blocks made at this point.  So I tried this layout.
Exploding Diamonds (sounds like a James Bond type book, doesn't it?
There is probably a name for it already, but I am calling it "exploding diamonds." I hope you can see the design. 


Comments are welcomed. I will reply when possible. Of course if you are a "No Reply Blogger"- I can not reply. Links in comments will result in the entire comment being deleted.

Saturday, December 29, 2018

More Stringing

I made a few blocks and laid them out in the layout that makes the large rectangles on point.

Can you see the rectangles? 

#modastringalong 

Comments are welcomed. I will reply when possible. Of course if you are a "No Reply Blogger"- I can not reply. Links in comments will result in the entire comment being deleted.

Friday, December 28, 2018

The String Along Starts

Today is the official start of the Moda String-Along.  I have been prepping for it for a few days.  Strips have been gathered - and some more strips cut from larger scraps.  Paper foundations have been cut. 
I started using the glue stick to put some of the first strips on the papers in readiness for a fast start in sewing.
You may notice that I trimmed the "ears" off.  That is just a bit of OCD on my part.
It isn't necessary, but it makes it easier for me to use a slightly shorter strip for the next strip. 
Of course, I may have jumped the gun and started sewing some blocks.
This one is a little more than half finished. If you haven't made string blocks on a foundation before the edges may look "odd" to you.  But all of that will be trimmed off later for a nice square block. From the back this one looks like this:
The important thing is that the strip runs fully across the paper.  The top corner where you start your seam can be right at the edge. When it is folded back and pressed the other edge will hang off the paper.  You are going to cut those little pieces off when you trim.

So here is a finished block that is a bit different.  I found a rail fence block in my stash and used it to cover the corner. 
There is also another pre-sewn strip section in there.  I like to think outside the box and use up some of the odd pieces. 
Another tip, if you cut off ends that are too short (an inch or two) you can keep those and sew them end to end into a pieced strip to use in another block.  This is a great way to add variety - and add some of those "precious scrap pieces" back into your quilt.

Here are four more blocks that are trimmed.

Okay folks, if you are stringing along it is time to warm up those sewing machines and sling some strings.  --and if you are using paper foundations:  Don't forget to shorten the stitch length so that the papers pull off easily. You can thank me for that tip later.

(disclaimer - I wrote this post the night before. ;-)
Comments are welcomed. I will reply when possible. Of course if you are a "No Reply Blogger"- I can not reply. Links in comments will result in the entire comment being deleted.

Thursday, December 27, 2018

Getting Ready -string-along

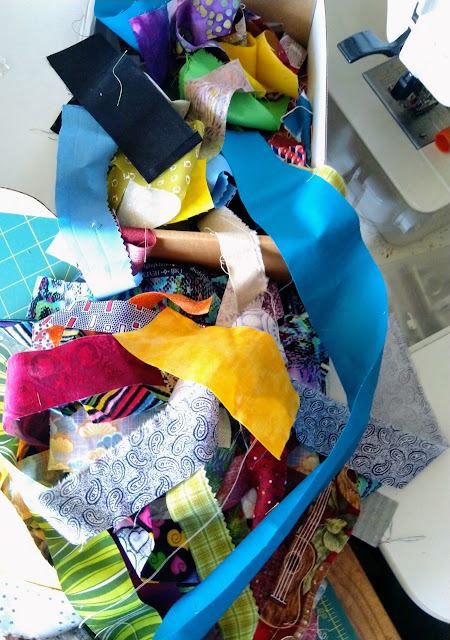
I started pulling things to use for the StringAlong mentioned in the last post.  I have a lot of strips and strings already.  But I took a few pieces of fat quarters and cut them into strips with my die cutter.
Now I have a nice overflowing box of strips/strings to use for my blocks.
Then I also cut the paper foundations for my blocks from some newsprint that I had in my art supplies. I believe it was purchased for a portrait class that I took some years ago.
I will also be using that Lapel Stick glue stick and my snips as I work along on these.

Then just for fun, I did camera filters on one of the pictures of the strips.

Even though the black/white photo isn't a true grayscale, it serves as a reminder that converting a photo to grayscale will allow you to judge value more accurately.


Comments are welcomed. I will reply when possible. Of course if you are a "No Reply Blogger"- I can not reply. Links in comments will result in the entire comment being deleted.

Wednesday, December 26, 2018

Stringing Along

A couple of weeks ago on The Cutting Table blog my Moda, they announced a "String-Along."  If you follow that link it will take you to the information. 

I have loved making string quilts since soon after I started quilting. Back in 2009 I made a quilt using a number of string blocks with some various other blocks.
That quilt was gifted to a close friend who lets me sleep under it when I visit.  It is well loved and well used.  I have had to repair a few seams that popped because I was a baby quilter when I made the blocks.  But it is a fun quilt and it always makes me smile.

So I will be doing the string along with Moda - although my fabrics will be a wide variety of scraps from many manufacturers.    I have chosen to make blocks that finish at 6 inches- so I will need to eventually make LOTS of them to make a good sized quilt.  Of course I have the option of making a medallion from the small blocks and adding larger blocks around it.  Ha ha.  Only time will tell.

I played in Electric Quilt to consider possible layouts. Here is one that is strangely fun.

Because I will be using lots of various scraps mine will not be this consistent in color. The thing that stands out to me in this design is that there are wonky rectangles on point.  I am seriously considering using this layout for my blocks.

Do you make string quilts?  Have you ever made a string quilt? 
I would love it if you decided to string along.

Comments are welcomed. I will reply when possible. Of course if you are a "No Reply Blogger"- I can not reply. Links in comments will result in the entire comment being deleted.

Tuesday, December 25, 2018

Merry Christmas To You


I hope you all have a joyous holiday season.


Comments are welcomed. I will reply when possible. However at this time Blogger is not notifying me of comments. Of course if you are a "No Reply Blogger"- I can not reply. Links in comments will result in the entire comment being deleted.

Sunday, December 23, 2018

Layout Variations - just for fun

Just for fun, I thought I would show a few alternate layouts for the quilt I am making.  I removed the embroidery blocks and put in pieced blocks.
First I did it in the colorway I am using for this quilt.
Then I thought,  Red and White quilts are very popular. So I changed the colors

And of course Blue and Yellow is a classic too.
I could not decide on the border color- so I went with the yellow (a light)
since the others are dark.
I am wondering if I should do a write up later for this quilt pattern- or maybe do a quick "quilt along" of it. Is anyone interested in making this? With borders it is roughly 42 by 57 inches. You could make the borders wider or narrower - or leave them off entirely.
I also have some other design options that  I will share later.  The block units are 8" and finish at 7.5"

Comments are welcomed. I will reply when possible. However at this time Blogger is not notifying me of comments. Of course if you are a "No Reply Blogger"- I can not reply. Links in comments will result in the entire comment being deleted.

Friday, December 21, 2018

A new Start - Flamingo Road

While on a Christmas visit, I received a commission to make a baby quilt.  I was handed a fabric swatch and told which colors on it to use.  I went shopping today, and matched them as best I could.  Of course prior to shopping I played in Electric Quilt and made a plan for the quilt.  I am using the photo of the flamingo as place holders for the embroidered blocks I will add to the quilt. The background will be the same dark blue as is used in the rest of the quilt.
After cutting a lot of fabric and sewing for a few minutes hours, I have this section completed 
.....along with a lot of cut pieces and pre-sewn parts:
There are actually the other two corner sections that need to be assembled from the "parts" that are in those stacks. I have also pre-cut several of the other pieces.  
 Now, if I don't get too distracted by the holiday activities, I may get the top assembled completely before the end of the year.  If I get really into it, I could even have it layered and the quilting started. But, perhaps I will wait and have it for a nice project to finish in January. 
Only time will tell. 


Comments are welcomed. I will reply when possible. However at this time Blogger is not notifying me of comments. Of course if you are a "No Reply Blogger"- I can not reply. Links in comments will result in the entire comment being deleted.

Wednesday, December 12, 2018

Chandelier Bead

My friend, Debbie, over at Stitchin' Therapy, posted a block that she is calling Chandelier Bead.    She mentioned wondering what lighter colored beads would look like on a dark background.  I had to go to EQ and play a bit.  This is what I came up with.


Mine may be brighter than she meant, but I do love this design.
I see that I have one (maybe more) oops in the coloring.
Comments are welcomed. I will reply when possible. However at this time Blogger is not notifying me of comments. Of course if you are a "No Reply Blogger"- I can not reply. Links in comments will result in the entire comment being deleted.

Tuesday, December 11, 2018

HST Surprise - Finished Top!

Hooray, the top is finished and the sun is finally shining for a good photo of the HST Surprise quilt top.

I love the play of colors on this top. I also love the variety of fabrics I got from those two small packs.

How do you like it?

Comments are welcomed. I will reply when possible. However at this time Blogger is not notifying me of comments. Of course if you are a "No Reply Blogger"- I can not reply. Links in comments will result in the entire comment being deleted.

Tuesday, December 04, 2018

HST Surprise Quilt

The new quilt has a name.  I am calling it the HST Surprise Quilt.  Because, surprise!  I am changing the layout  - but then you probably are not surprised at all if you read my blog regularly. 

Here are the six blocks that have the small half square triangles (HSTs) in the sashing.
You will notice that the HST centers are all the same color combo.  I am hoping that when I join the blocks those will still be facing the same directions as in this photo. But, no promises - and I won't  rip seams if it isn't "perfect."   (Because finished is always better than perfect!)

Here is a sample layout with some of the blocks with the large HSTs.
This is NOT how it will be laid out for the final quilt.  This just shows how the blocks look together. I think this quilt will be quite colorful and happy - as well as scrappy.  And that is my favorite way to quilt.  I used many of my favorite colors in here. There is a nice amount of purple and blue with some yellow and green too. The red batik with white in the sashing adds a nice little surprise pop.

All of the blocks are sewn now (but not all shown.)  There are still setting triangles and corners to be cut  before I can start joining it.  I am certainly enjoying making this quilt top.


Comments are welcomed. I will reply when possible. However at this time Blogger is not notifying me of comments. Of course if you are a "No Reply Blogger"- I can not reply. Links in comments will result in the entire comment being deleted.

Sunday, December 02, 2018

New Quilt Top Started - Calling Lefties!

Those squirrels keep running by.  One of them was a stack (or more) of five in precut squares.   I decided to make some simple half-square triangle blocks.
And I have a Left-Eze Rule tool which is designed to make life easier for Left Handed Quilters. The tool and the instructions are written in "left-ish" - so those of us who are right handed need to adapt to use it.  Seriously though, I find it to be a useful tool in my arsenal.

Since I had precut squares, I just stacked a background square on top of a colored square.
I had already drawn the line before I took the photo.
As you may know  many tutorials tell you to draw a line from corner to corner - there is even a specialized tool for doing it.  But you CAN use the Left-Eze Rule to do it.
Just line it up along the top edge and the diagonal will run corner to corner.  Then draw along the line.
I use a permanent pen for this since it will be in the seam allowance (sh! don't tell those quilt police folks!)

Then stack them up and take them to the sewing machine.
I chain piece them to speed up the process. Because,  for the top I am planning I will need 48 of them.
Next you sew a quarter inch seam on both sides of the line. Cut the apart and press them open and you are ready to square them up.  I am squaring mine to 4 1/2 inches.
Here is another use for the Left-Eze Rule.
You can use it as a squaring ruler for half-square triangle blocks!  Let me show you a close up of it.
I use that diagonal line at 4 1/2 on the tool right on my diagonal seam. Then I trim those outside edges.  I flip it 180 degrees and do the other two sides.  It comes out perfectly square. I love it.

Of course I didn't do all of the blocks because I needed to run to the computer and work on the layout. So I drew it up in Electric Quilt.
This is the layout that I used for the Crumb Block quilt. I love the visual impact that it has. At this point those colors are just to make it pretty.  How it turns out will depend on the fabrics in my stash. I am sure it will be "Happy Scrappy."

If you are interested in the Left-Eze Rule, you can find it for sale here.  There are also tutorials on the website.   This is an unpaid endorsement.  I get nothing if you buy it - except perhaps your gratitude for sending you to find it.  If you have a left-handed quilter friend -OR- a left-handed wanna-be quilter, this will be a great present for them.


Comments are welcomed. I will reply when possible. However at this time Blogger is not notifying me of comments. Of course if you are a "No Reply Blogger"- I can not reply. Links in comments will result in the entire comment being deleted.