Showing posts with label dyeing. Show all posts

Saturday, May 20, 2023

Painted Shibori

I recently saw some lovely hand dyed shibori fabrics and was immediately in "lust" with them.  It reminded me that I my "someday" list had "try making shibori fabric with fabric paint rather than dye." Needless to say,  it had been on the list for some time, and I said "Okay, today is the day." Of course that extended to two or three days of experimentation.   
You should know that shibori takes a bit of preparation before you dye (or paint) it.  In one class I took the teacher suggested using rubber bands for the method I was using to help with the fabric compression. Other teachers suggest using twine.  So, I did some of both.  I started with the rubber bands because I couldn't remember where I had put my twine. Ha ha. Later I found the twine and used it for one of these.  I honestly can't tell which was which. 
 
Here are my resulting fabrics.  First is this green pieces, that was compressed a bit too tightly at one end. That resulted in some white spaces remaining. 
 
Next up is a piece that was pre-dyed with some purple and blue. However, most of the fabric was still white and I was planning to over-dye it, so it was perfect for this experiment. For this one the cloth was dampened prior to painting. 
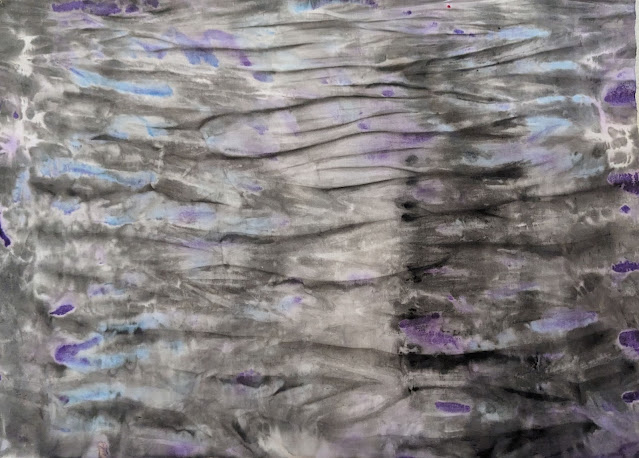
I really love the colors peeking through. 

Next up is a piece on which I decided to use two color of paint.  Seeing all of the white, I can assure you that this was on dry cloth that was tightly compressed.  The paint doesn't bleed into the compressed fabric when it is dry and nicely compressed. 
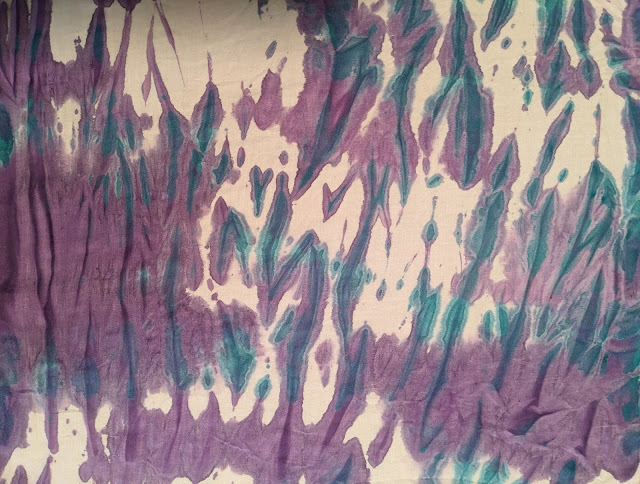
I love the effect of the two colors both applied while the cloth was compressed.


The next piece looks a bit disappointing compared to the previous one.  The lighting wasn't good for this photo.  The fabric is actually while with just the blue paint on it.  This will work well for water or maybe a distant forest if it is turned ninety degrees. 

Overall, I would say that my experiment was a success for the most part.  I will certainly try doing more of this type of painted shibori.  I think any of them would work well as a "filler block" or part of a pieced block.  The should also work well in art quilting if I find the right place for them.


Until Next Time,  
Stay Creative 


Comments are welcomed. I will reply when possible. Of course if you are a "No Reply Blogger"- I can not reply. Links in comments will result in the entire comment being deleted.

Thursday, July 13, 2017

A Proper Pineapple Block - and some Dyeing

After the paper piecing debacle yesterday, I was determined to make a proper pineapple block.  This time I did it by a more traditional piecing method.  This was cut/sew/trim and repeat.  The good part is that I got a pineapple block that I am happy with.
The best part is that I can now repeat it if I want to make more of them. And now, I can change sizes and alternate colors if I desire - because I know how it works.  Yaay!

I also have been playing with fabric dyeing again.  My goal was to mix a couple of specific colors.  That was a semi-failure.  I was going for Mint Green and Lilac Purple.   I think the Lilac is pretty close - close enough that I am happy with it and I have the formula written down.  The mint green - ha ha!  It isn't even green.  I had found a formula online for a color that looked close on the chart they showed.  Mine is blue not green.  Sigh!  I did a "re-do" that is still soaking.  I think it may be close but it isn't what I consider "mint green."
When I was dyeing these I also played with the concept of dyeing shades of the same color. In person you can see that the purple is three shades, but it didn't translate so well in my photo.
The other has a less defined shade variation.  I suspect that I should have made a wider variation in the amount of dye to water in these.
Still, here is the "not mint green" blue batch.
The one on the left is obviously lighter but the middle and right one are very close in value.

The fact is, I don't consider any of this a "failure" - it was a great learning experience for me. The fabrics are certainly useable for quilting so nothing was wasted.  I declare it a "win."

In case you are wondering, I watched both of the pineapple quilt block classes on Creativebug.  I used the traditional version to make this block.  Since the improv version uses the same technique with only a few variations, I feel sure I can do some improv ones if I want to.

Comments are welcomed. I will reply when possible unless otherwise stated. Of course if you are a "No Reply Blogger"- I can not reply. Links in posts may be affiliate links for which I am compensated if you click through and purchase.

Thursday, June 15, 2017

Dyeing Results

Confession - I was disappointed when washing out the dye from my last batch.  Going in, I was aware that my dye solution was "older" and may have lost strength. But once it was on the fabrics, it appeared bright and lovely. It showed great promise.
The fact is that powdered dye that is premixed with water loses some effectiveness the longer it sits.  To help counter that fact I decided to let the batch set for a full 24 hours - in vain it appears.
This bright piece
became this:
The red and fuschia faded to barely pink and the violet is entirely missing.

Here are the others


They are all useable as they are.  However, none are what I expected or hoped for.
For my next dye batch, I will be mixing up fresh dye concentrate that I will use up in one batch!

The "ugly" fabric that I was over-dyeing needs more pigment. So the next batch will hopefully make it useable.
Comments are welcomed. I will reply when possible unless otherwise stated. Of course if you are a "No Reply Blogger"- I can not reply. Links in posts may be affiliate links for which I am compensated if you click through and purchase.

Tuesday, June 13, 2017

This 'n' That

I have been doing a little bit of this and that today.  Earlier in the day I decided to use some pre-mixed fabric dye.  I soaked some fabrics in soda ash solution in prep for dyeing.   Here is that fabric in the various containers soaking up the dye.
The idea is for this to fade from blue to purple to fuchsia to red. 
I did layered color and drizzled dye on these.  Who knows what will happen!
Left: Three blues with some green mixture squirted on various areas.
Right:  Some "ugly" fabric that I am overdyeing with all of the colors I used above. 
I hope that some of these turn out amazing and that the others are at least useable.

Later in the day, I realized that I needed to actually use some of my hand-dyed fabric.  I cut pieces to make "four at a time flying geese."  I made two sets and then put them into these two blocks.
Once finished, I realized that the contrast on these is very weak.  Oh well!  I will use them with others that have great contrast and they will hopefully look okay in the final quilt.

I think my muse has gone to Tahiti without me.  If you see her, please send her home.
Comments are welcomed. I will reply when possible unless otherwise stated. Of course if you are a "No Reply Blogger"- I can not reply. Links in posts may be affiliate links for which I am compensated if you click through and purchase.

Thursday, February 21, 2013

Altering Fabric

As some of you kind readers know, I like to play at dyeing fabric.   So when I was shopping and discovered a product called deColourant, I had to try it.    I have been wanting to do some discharging of color, but I can be so sloppy that I was afraid to try it with household bleach.

(note: discharging is simply removing color from the fabric)

After I ordered the deColourant, I did some research on using it. Yes, I know I should have done that first, but I was impetuous this time.  I found that it is supposed to work nicely with rubber stamps.  Cool, I could use some of my hand carved stamps to print designs on the fabrics.  It can also be brushed on.  And it is designed for natural fiber such as cotton.

So I got a piece of dark purple fabric to play with.  I think it is cotton, but I would not swear to that.  I put down some wax paper under the fabric and stamped and painted on the fabric with the deColourant.  Then comes the hard part.  You have to wait for it to dry.  I played it smart and left the house.

When I got back it was dry. The patterns were stark white and felt like --uh- toothpaste dried on the front of you shirt that you find after you get to work. It was kind of stiff and grainy. The next step is to iron over it until the color is lifted to your liking.  It mentions on the label that you can use steam for extra lift. So I started ironing. The white started to disappear and the effect looked weak.  I started steaming - with the iron of course.  I wasn't sure if it was where I wanted it or not.  Still, I took it to the sink and washed it out. Then I decided to iron it mostly dry.  The designs did show.

I hung it to dry - and promptly forgot it.  This evening I took a picture.  Due to the flash you can see the shiny white board it is hanging on thru the cloth.  But you can see how the designs came out also
 The brick lay pattern and dots were just painted on with a stiff bristle brush.  I love the pale warm purple tones and interesting edges that show in this.
 The leaves were added with a stamp that I carved. So was that little flower on the right.

The last picture is probably a little more true in color, although it is not quite that light.
This was fun. I will definitely try it again.  Next time I will likely use a lighter color of fabric just to see what happens.

I guess I am still a little boy when it comes to playing in this type of thing. Being childlike in creativity is a good thing.  Let your inner child loose and tell me what happens.

Wednesday, September 28, 2011

Two More

I finally got back to working on the scarves just a bit. These take a bit more time than I had realized.  The first two were total play time so I didn't pay much attention.  The good part is that I need to be mildly distracted when I do it, so I put a comedy show on the television because laughter is good for the soul and in my case, the muse too. Thus the time is not all "work" and I don't feel bad about spending extra time on them. 


What I found is that if I am not distracted, I obsess on details/perfection and it just doesn't work for me. These are supposed to be loose casual designs. They should be soft and playful designs on the elegant silk. Or at least that is what *I* want to make out of them.  So, without further ado---here are the latest two scarves. 
The previous two that I did are in this post.  All of the scarves are 8" by 54". 

I tried to do one in just purple and green but it didn't work. The purple and green I have ended up blending into a tragic mess.  Adding some teal and a touch of yellow solved the problem. 


Oh yes, since I photographed these on a black background, I had to overlap the one on the right to show that the ends of the scarf are black also. 
Which one do you like best and why?  Your thoughts may help to inspire me on the next ones I do. 

Monday, September 12, 2011

A different kind of dyeing

Since I needed some extra items for the sale in November, I ordered some silk scarves.  These come in a cream or an off-white color.  But of course when I get through with them they are bright and colorful. 
Check out these - they are my first try with this technique. 


Mmmmm... I like it. What do you think about them? Oh yes, what would be a reasonable price for them?


Saturday, September 10, 2011

Adventures in Dyeing


Today I did some more fabric dyeing.   But I had bought a few polos on clearance (aka really cheap!) and one of them was white. It isn't white anymore.  
Funny thing though, the thread it was sewn with is still stark white. It didn't take the dye at all. 
The next pieces looked very interesting before they were washed. 
But afterward, they lost a lot of intensity. 
 You are seeing the back of the blue fabric that was overdyed because the front just looks "dirty." However, the back will make a nice neutral to put against a bright color to really make it pop. 

The one below was also wonderful and vivid before it was washed...but now is kind of pastel. I am sure I will find a use for it.
 The this one is another piece of the blue fabric that was overdyed. Again, this is the back.  I think the front was printed with something that resisted retaining the dye.  The back is lovely, I think. 

Finally, this one looks almost as good after washing as it did wet. 

The shibori lines show nicely and the color is good. 

I can tell that I need to invest in some fiber reactive/procion dyes if I want to get intense colors.   Or better yet, I have a birthday at the end of this month if anyone wants to send me some procion dyes. (ha ha) I already have the soda ash that is used as a fixative; I use it for making laundry detergent. 

Saturday, September 03, 2011

Dyeing For Fun

Today I had a friend do some prep for a form of shibori fabric dyeing for me.  This particular method can be extremely planned or you could have your helper do it randomly. Or you could do it yourself if you have to. 
  
Marbles were individually placed under the fabric and then secured with rubber bands over the top. The rubber bands need to be pretty tight. 


After all the marbles are rubber banded it is time to dye the fabric.  I use Rit dye and a low water immersion method. I used two colors of dye in separate containers that were side by side. I did drizzle some from the burgundy side into the purple side.  After the fabric was rinsed (several times) the marbles and rubber bands were removed. 


Then,  I took it outside and hung it on my chain link fence.  Some textile medium, acrylic paint (golden liquid artist acrylics)  and water were blended together and flung/spattered on the still wet fabric.  Then I left it to dry. 


After drying, I brought it in and ironed it to heat set the paints. 
Here it is:


This shows both sides so that you can see the difference in the areas where the marbles were.  On the side touching the marbles, it resisted the  dye.  On the side away from the marbles it died the centers.  The random edges of those shapes are caused by the bunched fabric held tightly by the rubber bands. 


I am still surprised that I haven't made a mess with the dye.  I think I will buy a few  more colors to play with since I have been so careful with it. 


Sunday, August 28, 2011

660 - Quilting, Binding and Dyeing

Let me start off by saying that this is my 660th post.  I truly cannot believe that I have written that many blog posts.  But that is what Blogger tells me.  
I have had hits from all over the USA, Canada, Italy, Poland, Germany, Australia, the United Kingdom (England , Ireland and Wales that I know of), American Samoa, South Africa, India, the Netherlands, France and Spain.   If your country wasn't listed PLEASE leave a comment and let me know. **edit** Thanks to Maree for reminding me that  I get visitors (like Maree) from New Zealand. 


 I finally got my little art quilt quilted and bound. 
This is shown draped over a chair back so it looks wonkier than it really is.  I still need to add a hanging sleeve.  (P.S. I love it! but it will go up for sale.) 


I have resisted attempting to dye fabric because I thought it would be too messy and I just don't have a place to do it. But I had bought some "super muslin" which is thicker than regular muslin.  I washed it with a small amount of detergent to remove any sizing.  I was planning to use acrylic inks to dye it and thinned paint to stamp designs on it.  
Enter the muse!
I saw some liquid Rit dye on the shelf when I was shopping.  So I picked two bottles- purple and wine colors.  I knew they would blend well and not make "muddy brown/gray." 
I also got some cheap plastic containers to put the dye in when I immerse the fabric. 
I did some wrapping and tying of the fabrics and these are my resulting fabrics.
I will be doing this some more. I will be buying more colors of dye also.  Just what I needed (sigh) another hobby. 
I also kept the Color Catcher sheets as I saw on someone's blog that she uses them in art quilts.  The two I used in this are a lovely dark lavender   I should have taken a picture!