I am sharing a quilt pattern I designed in Electric Quilt 7 on my computer. I call this quilt "Long May She Wave"

There are two layouts. Just adjust based on the size of your blocks. Smaller block sizes require more blocks to make it the desired size. You can also add borders to achieve the proper size.
I tried designing a traditionally pieced five pointed start for this quilt. I came up with one. It just looked sad.
So I went back to the drawing board and did a paper pieced version.Here is an image that a dear friend, Tonya, tested for me.

She said that it works well. So if you want to paper piece stars; the file can be downloaded here . I discovered that although I started out quilting with paper piecing, I don’t love it. So I went back to the drawing board again!
This time I spent a lot of time thinking about the techniques I have used that I like and don’t like. I really don’t like the tedious act of cutting out pieces using templates.
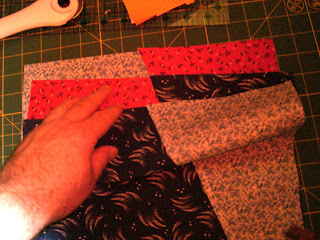
While I was thinking about this, I noticed part of the quilt n my bed. I saw a nice sharp point. Hmmm….. I did this by layering fabric and cutting thru it and rearranging the layers. So I tried it with three little sheets of paper and some tape. Hey that looks like it will work. So I took the pieces of paper to the sewing area to follow along with. (I drew a diagram as I went so I could follow it since it worked on paper!)
What do you think? The stars are not perfect but they are five pointed stars AND they are easy to make. (These are untrimmed in the picture)
So here is how you make them:
First cut three squares (I did mine 12 1/2" square) one each of red, white and blue. Stack them with all right sides up and edges even.
Now we make one cut at an angle from Top center to ?? 1/5 from the right edge on the bottom. (I just eyeballed it. See next image for approx location)
Shuffle the piece on the top right stack to the bottom Then sew the two pieces that are now on top together. Repeat with the second and third pieces. Press your seams then restack the pile being sure that all the pieces are facing the same way like in the next picture. (sorry the color on it is horrible!)
You should have a pile similar to this - but make all the edges match again.
Now you are ready to cut your neat stack again:
I made cut two about a third of the way from the top. Again shuffle the top piece of one of the piles to the bottom.
Like this:
You are going to sew the three sets again-try to line up those seams. The edges might not match exactly but we are going to trim the square later.
Again we press the seams, restack and make the next cut like this:
Shuffle, sew, press and restack - I think you should have the idea now.
The next cut is like this:
Again: Shuffle, sew, press and restack
Make the final cut like this:
Shuffle and sew. Then press your three blocks and trim them to size.
You can do with with up to 6 blocks- more than that and the cutting becomes difficult - your blocks will slip. You could also do these in three shades of blue. or use a dark and a medium blue with a white or a red. Changing the order of the cuts will change the layout of the block.
Here is the cutting diagram with the cuts marked. The color of the line matches the color of the number.
And one more thing! Here is the video showing how to make the Wavy Bar blocks. If the wavy bars aren't your thing, you can make straight stripes. I just think the wavy bars add a nice movement to the design.
 Comments are welcomed. I will reply when possible unless otherwise stated.


3 comments:
I so love this block and so glad you brought it back. I think I'll do a 4th of July post showing my QOV block. This reminds me to make a label for a QOV quilt that I have ready.
Great quilt!
Wow, thanks for sharing. Surely I can follow your instructions and at least make one block....cross your fingers.
Post a Comment