Showing posts with label quilting. Show all posts

Monday, August 02, 2021

Table Scraps - A Table Topper

My "liberated quilting"  table topper is complete.  Because the top and the backing would need different thread colors for the binding,  I chose to hand sew the binding to the back. 

I have to say that the binding looks a lot better than if I machine stitched it in place. This little quilted topper makes me really happy.  It ticks all the boxes.   
Scrappy/using up scraps ✅ 
Fun and random piecing ✅
Colorful  ✅
Random quilting designs  ✅
Finished!  ✅

Here is the finished piece, although it has not been in the wash yet.  That is my final step before I consider it "really finished."  


In the borders, I used two different styles of triangular design.    Both were inspired by the quilting I saw in a photo from the Liberated Quiltmaking II  book by Gwen Marston.   Here are some closeups. 


In the skinny insertions in the borders,  I did pebbles. In the one wider blue insertion, I quilted swirls.  All of that shows up well in the above three photos.  

My next project????? I haven't decided.   I suppose I should spend more time learning my lines for the play I will be in in September - unless we have another quarantine lockdown. 


Until Next Time,  
Stay Creative 


Comments are welcomed. I will reply when possible. Of course if you are a "No Reply Blogger"- I can not reply. Links in comments will result in the entire comment being deleted.

Wednesday, July 28, 2021

Quilting Again

Finally I have stopped working on the website issues long enough to get the little quilt top layered and basted.   Then I did some ditch quilting on it.  I stayed mostly in the ditch but as you can see next to the presser foot in this photo - there were momentary bobbles out of the ditch.  
Oops!

However,  my rule for that is  - if the stitches are good and it won't be noticeable from across the room, leave it in and keep going.   Once the ditch quilting was done (enough for my purposes)  I started quilting. Here is the beginning. 

I am quilting with the same gray thread that showed slightly on the blue where it bobbled out of the ditch.  Once I quilt that blue inner border, that will be well hidden. Right now I am thinking maybe pebbles in that skinny border.  Most of the quilting is whatever I think of as I am doing it.  For me, that is just more fun - and this piece is nothing if not fun. From the fabrics to the random piecing and now to the quilting, this piece has a joy and freedom.  

If you want to check out the new website, it should be at https://www.geneblack.com/ (or maybe I messed up again and you get an error. ARRRRGH!)

Right now the link " blog.geneblack.com "  doesn't seem to be working for me.  But the original blog URL https://artbygene.blogspot.com/ is still working just fine.  


Until Next Time,  
Stay Creative 


Comments are welcomed. I will reply when possible. Of course if you are a "No Reply Blogger"- I can not reply. Links in comments will result in the entire comment being deleted.

Tuesday, October 22, 2019

The Promised new video

As promised I have recorded and posted the video on how I did the  coloring on fabric for my Island Batik table topper. 


I completely forgot to discuss heat setting.  To heat set your piece after it has dried for 24 hours, use the hottest iron you can use without damaging your fabric. Cover your work with a press cloth (simple muslin or cotton fabric works fine.) Press for at least 20 seconds, moving the iron to avoid scorching.

Here are my notes for your convenience:
Adding color to embellish fabric with Derwent Inktense Pencils
Supplies
·         Inktense pencils
·         Fabric - white or light colors work best - color will affect the final product. Must be organic fabric not synthetic for permanence.
·         Paint Brushes - reasonable quality - not expensive
·         Activator -textile medium or Aloe Vera Gel  (Brands not terribly important)
·         Imagination and a sense of fun

Drawing or Design options
·         Machine embroidery
·         Permanent pen - I like Micron fine point pens
·         Direct drawing with Inktense pencils

Testing colors - until you know what results you get testing is a good idea.  Also test new ideas on a practice piece.
Coloring in the design
        Shading  - more pencil
        Blending - more than one color
Wetting agent
        required for permanency
        types: Water (highly likely to bleed),  Aloe Vera Gel, Textile medium
        Differences  I have noticed: look, brush care,
        Application - using appropriate brush, getting in smaller spaces.
        Option of adding more color while wet
Drying - allow to dry at least 24 hours - it should not be damp at all

Heat setting - After drying, heat set with a hot dry iron using a press cloth to protect your fabric. 


Until Next Time,  
Stay Creative 


Comments are welcomed. I will reply when possible. Of course if you are a "No Reply Blogger"- I can not reply. Links in comments will result in the entire comment being deleted.

Monday, September 09, 2019

UFO - Moving Forward


Most quilters have UFOs (UnFinished Objects.)  This quilter is no different.  For a weekend at a friend's house, I grabbed a bag with what I thought was one particular unfinished project. When I arrived and opened the bag, it was a different project.  But I am happy that I grabbed the "wrong" bag.  This one is a quilt that was in five sections that needed joining together.  All the necessary fabrics were also in the bag (yaaay!)

You can read some of the backstory on this quilt here
One of the five sections
The reason that I did this in sections is that it makes quilting much easier on a domestic machine.  I have to say that I think this may be some of the best quilting I have ever done. I join these using the method in Maguerita McManus' book "Quilt As You Go -reimagined"   It is my favorite 'quilt as you go' technique.


I have a lot of quilting designs in this one quilt.   
When I got it all joined together, I realized why it had become a UFO.  You see it is an odd size - long and narrow.
So I said to myself,  "Okay fellow, you know you can come up with a solution to this. Think!"  Adding side borders seemed pretty obvious at this point. So I took leftover pieces of the blue, red, yellow and lavender and made 3" borders for each side.  "Hmmm..." I said,   "Fellow, those are going to be a royal pain in the patootie to quilt at that size. Back to the drawing board."  I looked at the leftover fabric, and did some calculating and decided the blue would look nice added to it.
So I sewed 2 1/2" strips of blue to the sides of the piano key borders. Here is what it will look like eventually.

I will probably bind it in red or yellow - depending on what I have enough of in my stash.  I think this quilt looks like it belongs in a circus - because of the bright red, blue and yellow colors.  But that is okay, I like it that way.

If you missed my September Post "The Absurd Bird" please go to see it.

Linking up with The Inquiring Quilter.
Until Next Time,  
Stay Creative 


Comments are welcomed. I will reply when possible. Of course if you are a "No Reply Blogger"- I can not reply. Links in comments will result in the entire comment being deleted.

Tuesday, August 13, 2019

Under my needle

Today I have another project under my needle.  You may remember that a week or so ago, I basted this quilt.  Today I started quilting it.  I decided to start with the focal point - i.e. the lime colored diamond "square."  For that I did some special quilting to make it stand out more.
 For the rest of the quilt, I am planning to do a simple meandering/stipple somewhat loosely. (loosely for me, that is.)  As there are lots of bias in this type of block, the quilt doesn't lay very flat. So I am "quilting out" the excess as I go.

I have to say that the meandering is going pretty fast -or at least it seems so. I have about a sixth of it quilted.  If you don't remember this is how it looked basted.

Don't forget that this month the Island Batik Beat the Heat blog hop is going on.  There is lots of inspiration and a few prizes so try to read the posts from all of the Ambassadors in this hop. Tomorrow, August 14th, is my day on the hop. I hope you like my quilt as much as I do.

Until Next Time,  
Stay Creative 


Comments are welcomed. I will reply when possible. Of course if you are a "No Reply Blogger"- I can not reply. Links in comments will result in the entire comment being deleted.

Saturday, February 23, 2019

Shhh....A "Secret" Project

After diligently working on my Island Batik March project, I am nearing a completion.  Of course I can't show it until March - and I hope I finish it by then.
I am doing something I have never done.  Yes, this is a true confession.  I am hand sewing the binding to the back of the quilt. I honestly have never done this before. But, as it is the traditional method, I decided I needed to do it at least once.  I sewed more than one side without using a thimble -mostly because I couldn't find one here.  Yes, I do own thimbles but as a rule I dislike using them.

Since I can't show you the front of the quilt, let me tease you a bit with the back of it.  The backing fabric is a delightful Island Batik Neutral called "Whip Cream."  It is off white/cream with a spattering of pale blue and a darker cream swirl pattern.

I have adjusted the photos to show off the quilting better so the colors are not true in the photos.


I had lots of fun quilting this quilt and deciding which quilting designs and motifs to use.  There are a number of "Square Flower" motifs which I learned from Lori Kennedy.  I also pulled out a book or two to look at other ideas. One of those was 180 Quilting Doodle Designs compiled by Karen Burns.
Another was Step-by-Step Free-Motion Quilting by Christina Cameli.   Christina has been one of my favorite FMQ teachers. Her teaching and "you can do it" attitude have really helped me to be better at Free Motion Quilting.  Even though we have never met, I consider her a true friend.

Thanks for stopping by.  I hope you will return in March for the reveal of this quilt. But don't wait until then.  I am sure I will be posting more here before the end of February.

Comments are welcomed. I will reply when possible. Of course if you are a "No Reply Blogger"- I can not reply. Links in comments will result in the entire comment being deleted.

Friday, January 04, 2019

Ruling The Quilt

A friend intrigued me with the Ruler Foot for the domestic sewing machine.  This led me to watch a couple of classes on BluPrint (aka Craftsy) since I got a year of unlimited for Christmas.  I watched Angela Walters' class on "Point to Point" quilting and one by Amy Johnson.

This pretty much convinced me that "Yes, I do do that!"  so I found a good deal on a foot that came with an arc ruler.
It arrived today and I just had to play with it.  There was an interesting design on the package that I wanted to try.
I had a quilt sandwich ready to practice on - a large orphan block would work just fine. Maybe I can make something with the quilted fabric later.
I'm not sure how well you can see those curves, but the are better than I could do with free motion quilting.
Here is the back.
 That fabric is a bit too busy.... but  you can probably see the quilting lines better.


And the ruler foot and ruler are here.
I am thinking I will have a lot of fun with these new toys.
 It is a new year, and there are lots of surprises so stay tuned!


Comments are welcomed. I will reply when possible. Of course if you are a "No Reply Blogger"- I can not reply. Links in comments will result in the entire comment being deleted.

Saturday, April 20, 2013

Picture it - Gee's Bend Class

I think I will let the pictures speak for themselves.  The classroom was full of creativity. All of the people in the class were friendly and willing to share both supplies and knowledge. Enjoy the art from our class.

1

2

3

4

5

6

7

8

9

10

11
 Okay, I just had to say - Yes I did do some hand quilting! There I am with Cherrye (classmate-right side of the photo) and China Pettway of Gee's Bend (on the left.)
12
She may kill me if she sees this - look at the blocks behind her....she was in a serious discussion. 
Hopefully tomorrow I will show you some of the things I made yesterday after getting back from the class.
If you are interested in the class, it is listed at  Alabama Folk School  I don't know when the classes for next year will be listed. 

Saturday, September 24, 2011

TATW Quilted

The TRIP AROUND THE WORLD quilt is quilted. It just needs binding. But today I have worked enough. It is time to play and relax. A cup of tea sounds good.
Sunday, August 21, 2011

Start Me Up


The play with the fusible applique cat has sparked an idea.  A while back, I read a book Simply Stunning Woven Quilts by Anna Faustino. I kept thinking that I would try the techniques in the book -but I never did. 
Since the play sparked my "why not just try it" mode, I took some batik fabric and tried it my way.  I did not reference the book at all since, although I own it, it wasn't close at hand. 
I put fusible on two pieces of fabric, then did the cutting and weaving. Then I fused it all to a piece of cotton batting. 
Wanna see?  Of course you do. 

Woven Batik Background

This will be the start of a fun applique piece. I plan to redo the Silly Play Saturday cat design.  However, I will make it a bit more fun and whimsical.  Several people thought the yellow cloud was blonde hair - those comments inspired me. Thank you! Your comments mean more than you know at times.  And you never know, I might do a giveaway based on comments made in the past!
Did you do anything fun this weekend?  Oh, and what do you think of the woven background?


If you don't hear from me for a couple of days - fear not - something fun is going to be going on.  (((grin))) I will tell you later!

Monday, March 07, 2011

Scrap Busting

It is amazing how scraps build up when you are a quilter.  Some, rare quilters, are able to throw them away. I am not that type of quilter. Some quilters have bags of scraps hidden away for the "someday" when they will use them to make a scrap quilt. 
Of course they keep buying fabric and collecting yet more scraps. I have been that type of quilter lately.  Early in my quilting I used scraps. People gave me scraps.  Now I have bags of scraps. 


Don't get me wrong, scraps are good.Keep your scraps, but don't SAVE them, bust them!  When I realized that I had to cut extra pieces for the quilt along blocks that I made too short, I made a decision.  I decided to cut some scraps while I had my AccuQuilt GO! set up and the value die was working anyway. 


So, I ironed a couple of scraps and cut some 2.5" squares while I was cutting the half square triangles.  Then, while sewing the pieces for the quilt along block, I used the square to sew on, sew off.  I normally have been using little scraps as "Thread Rats" to keep the points from clogging up when I start a triangle.  


I finished the extra parts of the quilt along block. The iron was still set up, ready to go. The bag of scraps was right beside it.  I decided to iron the entire bag of scraps then cut them up. 


I was surprised at some of the sizes of the "scrap" pieces as I was ironing.  I got my GO! cutter and some dies and put them out. I set up a scrap busting shop.


I started cutting. I cut 2.5" squares and half square triangles.  I cut more half square triangles in 3.5", 4.5" and 6.5".   I cut some quarter square triangles that will make a 4" finished block.  I even cut a few 4.5" squares. 


Here are the finished stacks:

I sat watching a movie and sorted them by lights and darks. There are a LOT of pieces there.  I still have more bags of scraps that need busting.  I will sew the half and quarter square triangles into square blocks.  I will sew the squares into four patches or nine patches.  Eventually I will have a truly scrappy quilt made as "extras" that were sewed in between pieces of other projects.  I won't have to cut the thread, or use a thread rat when I need to take pieces to be ironed, I will just sew a couple of these together and leave it under the presser foot while I go iron.  Then when each one comes out it goes into a stack for that scrappy quilt.  
As an added bonus, those scrap bags will start to diminish. 

How fun is that?


Wednesday, March 02, 2011

Finally Feeling Better - So I made some Quilt Blocks

After a couple of days feeling blah and wishing I felt better, I have finally rounded a corner.  I am doing the AccuQuilt GO! Quilt Along hosted by Ebony at Quilt Possible. The first block was posted back of February 17th.  Yikes!  I am late. At least block two hasn't been posted yet. 
For block one we were to make eight of the Whirlwind blocks.  Here are four of my completed blocks laid together so I could see this secondary design. I love it, I could make an entire quilt of this block. 

Since I cut the pieces for this block with the AccuQuilt Go! cutter, all the pieces fit together wonderfully and the cutting was fast. My points are near perfect and I am happy. (Disclaimer: I don't stress over perfect points; but I do like them.)  
For this quilt along, we were to pick two neutrals and six other fabrics. The other fabrics are 3 sets of two in light and dark, as are the neutrals. My light neutral is a natural muslin, the dark is a tan. 
The fabrics in the dark triangles are a bit confusing as they did not photograph well. The triangles that form the center pinwheel are a hand dyed fabric that is burgundy with a bit of green in it. The light that goes with that is the mottled light burgundy/pink.  
The dark outer triangles are a mottled purple that goes with the light purple/white floral. 
There are two colors that are NOT shown, as they didn't come into play this round.  I have a solid light green and this green with purple and yellow in the foreground:
I think the purple in this will play nicely with the other fabrics. 

If you are on FaceBook you may want to "like" AccuQuilt.  It will let you see what other people are making with the GO! cutter and occasionally they give away some great prizes. Tell them "Gene Black sent me over here" if you want to.  And you might mention that I should be on their "Blog Friends" wall, too. (Yes that is shameless self-promotion) 

I just spotted this: If you sign up for email updates at the AccuQuilt website they have a $100 monthly gift certificate giveaway.  I am glad I am signed up. I would love to win one of those! 

Thanks for all the 'get well' wished over the past couple of days. You have really made me feel loved. 

Tuesday, March 01, 2011

Sick Day - On Point Blocks

I am almost never sick.  But a couple of weeks ago, I had a nasty cold.  Ugh.  That was no fun. 


((You can skip this section in purple if you are sensitive it may be "too much information"))


Today I woke up with a strange feeling - I was nauseous! I got up and headed to the bathroom,  I knelt down and did my impersonation of Linda Blair in "The Exorcist."   I thought that since we had a storm last night and the weather had changed again, that it was just sinus issues. So I got dressed and went to work.  I got to my desk and put my lunch in the cabinet. I did not have time to sit at my desk.  I had to run to the men's room and --well I had a different symptom - you figure it out.
So I went home for the day.  


I didn't accomplish a lot since I didn't want to stress myself. But I did do a little research on how to set a block on point.  You see I have this little piece that I worked on Sunday night and Monday night. (Sorry no picture yet.)  I want to enlarge it and then maybe add some borders to bring it to lap quilt size.  
What I found was that a whole lot of the math has been done for me (and for you if you need it) at Bonnie Hunter's Quiltville site.  There was one thing I didn't understand. She has "Corner Triangles" and "Side Triangles" listed. 


Okay, so maybe I am a bit dense. I did  a bit more research and found that what I need is Corner Triangles since I am only doing one block.   The Side Triangles are for when you are setting an entire quilt with on point blocks  and you need to fill in the edges to make it square.


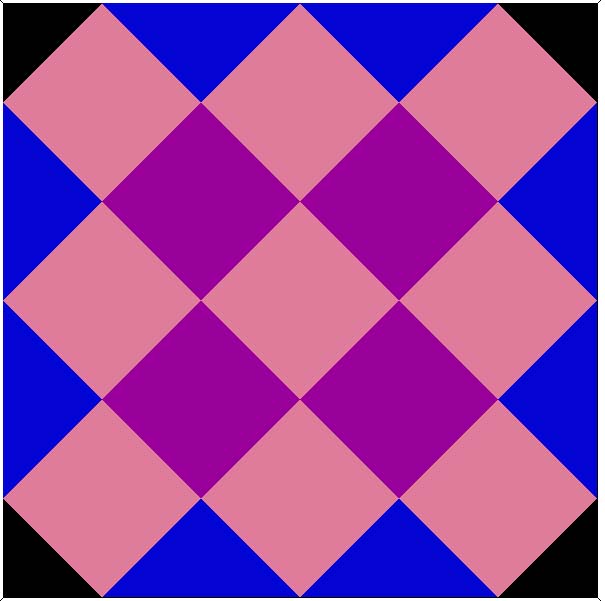
Here is a picture of a quilt on point layout for those of you who are visual thinkers. 


The Corner Triangles are black
The Side Triangles are blue. 


However, all I was doing was taking one big block to set on point. 
Like this:
Except the big block in mine is pieced. But those corner triangles were what I needed. 


My block is about 15 1/2 inches square, so looking at Bonnie's chart, I will cut two 11 7/8" squares and cut them diagonally for my triangles. 
That chart has sizes from 3" square up to 16" square.  I am really glad I found it.  I am sure I would have wasted a lot of fabric if I had winged it.  I thought that the 11 7/8" was wrong. Surely it would take more than that. So I checked it using a right triangle calculator on the web. I got the same answer. 
Now if you enjoy doing the math for yourself, here is the formula.
Size of finished block divided by 1.414 then add 7/8 inch to that total. or  X/1.414 + 0.875 (where X is the length of one edge of the block you are setting on point) 


Yeah, I will stick with Bonnie's chart.